3dMax Object Creation TutorialWritten by Schwaa
I will not go into great detail on how to run 3D Studio Max or Photoshop. You should be
familiar with the basics of these programs before you start. I will however explain a few
parts of the programs that I use to model. These aren't nescessarily the best ways to model,
just how I prefer to do it.
|
||
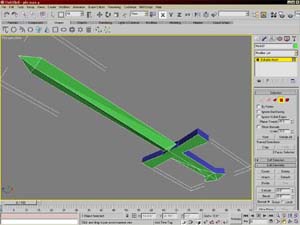
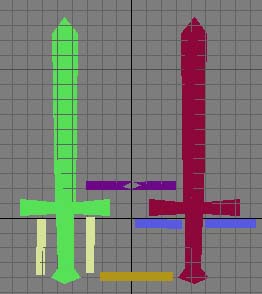
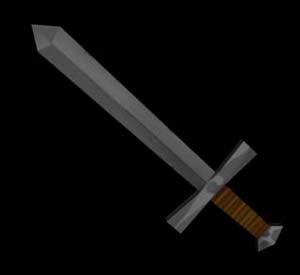
Part Three: Complex Texturing (Planar mapping)In Step Part Two we made a Goblet, you can use it or create a new object like the sword I used for this tut.Now that your sword is created it's time to map it. This is the most important part as this is where all the details are added and will ultimately determine how good your object looks in game. I choose to planar map most of my objects as it can give the most precise results and you can map an entire object made of different materials using only one texture map. This can also be the most time consuming depending on how skilled you are with your paint program. To complete this part of the tutorial you will need to have Texporter. This is an excellent freeware plugin for Max. Get the version that is compatible with the version of Max you are using. They also have a tut explaining the ins and outs of the program on their site. Here is the Sword.3ds file for the sword in the pics. You can use it to follow this tut. Just unzip and import into MAX. ==============================================
Step 1:After installing Texporter in your Max Plugin folder, open Max and your sword file.
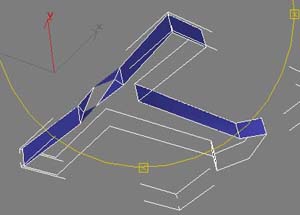
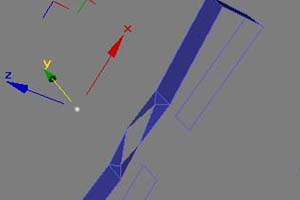
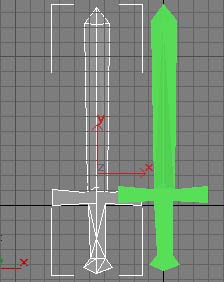
Step 2:Your sword should be an Editable Mesh, so choose Edit Mesh the Modifiers Menu and select Polygons. Select every polygon on the front side of your sword, go down the menu until you find Detach. Hitting this button will seperate all of the chosen polygons from your mesh, a dialog will come up asking if you want to name it object 1 (or mesh 1). Click OK.{Fig.1}When you detach pieces from the mesh they will be renamed, usually MAX is consistant in numbering the pieces in order (i.e. mesh1, mesh2, mesh3,...). Its important to keep track of this, you'll have to reattach them twice later in the same order you Detach them in. Now do the same with the backside, I try to get the biggest, flattest faces together. The fewer seperations you make the easier it will be. After detaching faces you can hide them, this makes it easier to see what you are working with. After you've selected and detached the front and back of your sword work on the hilt. You'll probably want to seperate it into multiple sections (i.e. sides of handle,base of handle, top of hilt, bottom of hilt).{Fig.2}
Step 3:You want to make sure as you go along that you have selected all the faces you meant to select and not any that you didn't want selected. You can always go back a few steps so use it to your advantage. Carefully check after each Detachment. When you are satisfied with how your polys are detached, and all of them have been detached, click the screen so that no polys are chosen.I have six meshes and one line. You can choose hide all from the Display menu, then Unhide by name. Select Line one, hit OK, and you should have a white dot {Fig.3} on your screen called "line one". This is the residue left over from your sword mesh, its very important to delete this before moving on to the next step.
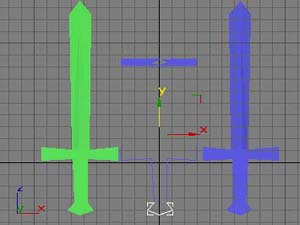
Step 4:After deleting "line one" unhide all. You should see your entire sword on screen, most likely it's different colors where all the pieces have been seperated.Choose Select All from the Edit menu. Then choose Clone from the same menu, a dialog comes up, select COPY. The first thing you want to do after cloning your pieces is choose Group from the drop down Group menu. A dialog says "group one", OK. Now hide this group. All you are left with onscreen are the pieces of your sword.
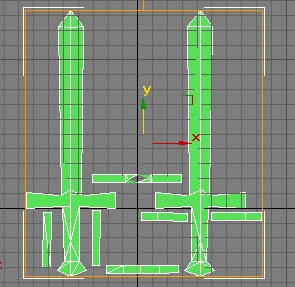
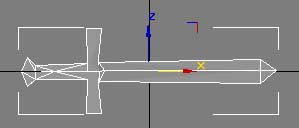
Step 5:Now we are going to rearrange all of the pieces next to each other, flat, so they can be seen from one side.{Fig.4} Each piece is now its own editable mesh so you can choose seperate vertices and move them around if you need to. I usually try to keep the pieces in a nice square or even rectangle shape, this will help when trying to achieved low distortion.{Fig.5}
Step 6:Once you have all the pieces aligned{Fig.6} with each other you'll want to reattach them. This part is very important. If you attach them in the wrong order this won't work and you'll get a jumbled mess of polys when you are done.Always SAVE to a new file before this step. Save as a new name so you have a backup in case something goes wrong. Select Mesh 1 (when you detached them they should have detached in order/ mesh one, mesh two, mesh three, ...), go down the Modifier menu until you find Attach. Click the button and then choose the Attach List, select Mesh 2, Mesh 3 then repeat until all of your meshes are attached in the same order they were detached in. Now you have a flattened sword, (all pieces are one color, one mesh). Deselect Attach and in the window select your mesh.
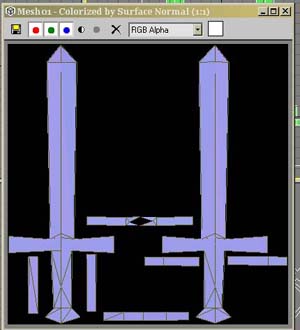
Step 7:In the Modifiers list choose UV Map/ Planar/ Fit and an orange square will appear around your sword.{Fig.6} Now open the Utilities Menu (a little hammer marks this one)/ More/ Texporter.In the dialog box pick the size you want your map to be, if your mesh fits into a square pick 400x400 pixels. Click on Pick Object and you should see a window like this. {Fig.8}. If it is blank all your polys are facing the wrong way, correct this by selecting all the vertices, then the rotate tool and rotating them 180 degrees, choose texporter and try again, if you still see nothing, rotate the vertices at 90 or 270 degrees and try texporter.
Step 8:Save this as a .JPG and you are ready to paint. The name must be an eight letters or less (i.e. "tutsword.jpg").
Step 9:Before you paint you can reassemble your sword, the mapping is all done.This is the most critical part, if you didn't attach your mesh pieces in the same order as you detached them this won't work. Select "Mesh One" and rename it "Sword" to avoid confusion. Choose Unhide All and Group One will appear in the window. In the Group Menu choose Ungroup. You'll have to reattach all of these pieces in the same order as you did the flattened mesh. The difference being that they are named Mesh 7 through 12 instead of 1 through 6. Attach them as you did before but be sure you don't accidentally attach "sword". Now you'll have two things in your window, "sword"- a flat splayed out mesh, and "mesh 7" a complete sword. Save as a new fileSometimes Max will let you undo this step, sometimes it won't so go ahead and save to be safe.
Select the flat sword and from the Compounds Menu choose Morph {Fig.9} (a very powerful and dangerous tool!). Delete "Mesh 7" and you're left with your original sword, back in its original shape. The one thing that isn't the same is that detaching all of the segments actually "splits the vertices" and your sword is now a Morph. In the Modifiers Menu choose Edit Mesh, and now select all of your vertices, weld them together and pull up the Rendering Menu.
Step 10:Choose a material out of the rendering menu and pick a map for the Diffuse value. Navigate through BitMaps and select the texporter file that you saved in Step 8. Apply this material to the sword and render, its should be pretty ugly right now but its all lined up and ready to be painted.{Fig.11} Save your file!
Step 11:The rest is up to you, paint it however you like in whatever paint program you have.{Fig.12} Save your skin as a .GIF file, reload MAX, reload your new skin and render it.{Fig.13}
Step 12: Finalizing
You are now ready for the .3DS to .BIN file conversion tutorial |
| |