3dMax Object Creation TutorialWritten by Schwaa
I will not go into great detail on how to run 3D Studio Max or Photoshop. You should be
familiar with the basics of these programs before you start. I will however explain a few
parts of the programs that I use to model. These aren't nescessarily the best ways to model,
just how I prefer to do it.
|
||
Part Two: Modeling an object (Goblet)First open 3D Max. Choose shapes from the top tool bar {Fig.1} and select a circle, drag in the window to create your circle, doesn't matter how big, we'll deal with that later (I actually used a "donut" as you'll see in the picture but choose a "circle" instead). Also left click on the name of the view you're working on (yellow arrow in Fig.1) and from the pull-down menu choose shaded and edged faces. You don't have to do this, it just makes it easier to see what you're working with. Now go to the side tool bar and select modifiers{Fig.2}. Now click on More... which will bring up a list, from this list choose Bevel Now you'll bevel out the bottom of the cup and the stem {Fig.3}, Max only allows 3 part bevels so we'll have to make it an Editable Mesh through the Modifiers menu. Then you can select the bottom polygon {Fig.4} of the stem and extrude and bevel {Fig.5} it. The numbers in the counters only show as you are extruding and beveling (that's way they say 0.00 in the diagram), and each time you release the button you will start a new segment, try to do it only once as you can pull the vertices around seperately if you need too. If you get it wrong just ALT-Z and go back a step.
Having just created the base of the goblet, we must now move to the inside of the goblet. There are probably many ways to do this, I'll just explain how I did it. With this vertice in place we can start adding more faces {Fig.8} to the mesh. In {Fig.9} you'll notice that I used a couple polygons instead of faces, either way works there are just a smaller number of clicks with the latter method. In {Fig.10} I streched the vertice I created up away from the goblet to give myself more room for the next step which is... Slicing. Choose edge and click Slice Plane {Fig.11}. You'll notice a yeelow square in the viewport, move it to where you want the slice to occour, you can move it in all three dimensions and rotate it. This will create new vertices {Fig.12} on all edges in this plane to infinity (on this object). The first cut will become the inside rim of the goblet, the second cut will define the lower, inside portion of the cup as seen in wireframe {Fig.13}. {Fig.14} shows the almost completed goblet. There are alot of polygons however, this is fine if you want a very detailed and clean model (like a Holy Grail), but if you want to make "Bafford's House Cup" and use alot of them in game it would be better to Optimize and cut down on polys drastically. Keep in mind that while something can look very rough in Max, when you're playing a game and not noticing the level of detail you notice in Max, low poly models can look fine. You have more importatn things to think about in game than "that little tiny cup isn't perfectly round", and as a level designer its best to keep framerate high than kill it with a bunch of hardly noticable details. Optimize is in the Modifier stack where you found Bevel and Edit Mesh {Fig.2}. Select it and setting that best suits your needs, I choose something like 6.5 for the Face Threshold. That gave me a much lower polycount (it will say at the bottom of the Modifier Menu) as you can tell in {Fig.15}. One thing it also left me with is a bunch of "flat edges", especially noticable are two the base of the cup. So I choose Edges/Divide {Fig.15} and clicked in the middle of the flat edge, then pulled it out to a better lookin position. One more thing I want to fix is the excessive amount of polygons in the goblet stem. I found the easiest way to do this was to delete the entire stem {Fig.16}, but not any of the vertices. Choose polygons, select all stem faces, delete. Of course this leaves us with a gap, so I welded some of the vertices to cut down on polys even more and created faces/polygons {Fig.17} to recreate the stem. Now we have an almost complete goblet ready to be resized, centered, and exported to Thief. One major detail lacking is a texture, I made a quick one in Photoshop and used it as a cylindrical map {Fig.18}. Like I said, it looks pretty rough in Max but it'll look better in game.
|
|
|
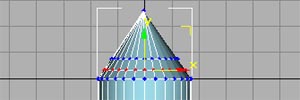
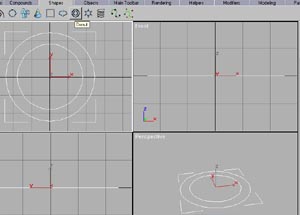
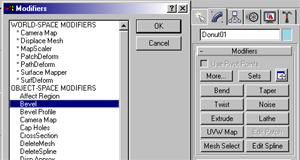
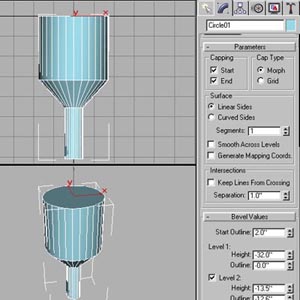
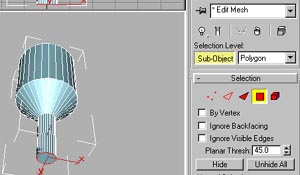
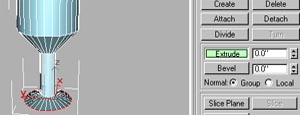
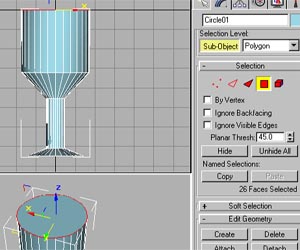
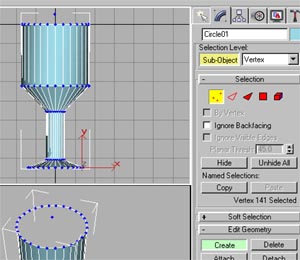
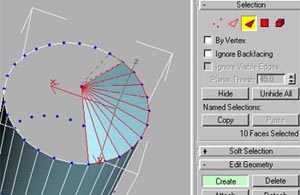 Fig.8 |
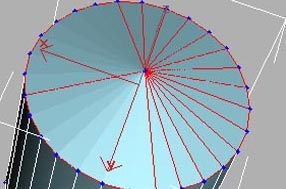 Fig.9 |
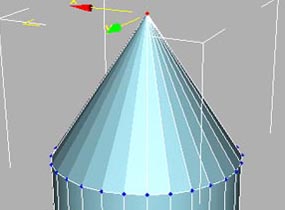 Fig.10 |
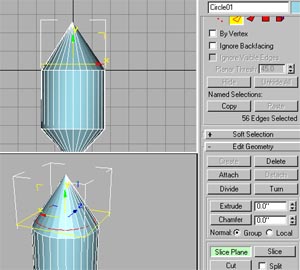 Fig.11 |
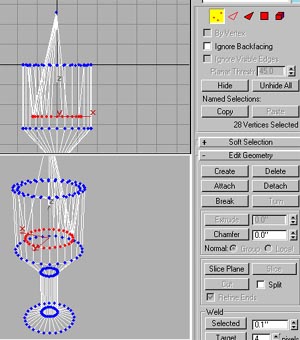 Fig.13 |
 Fig.14 |
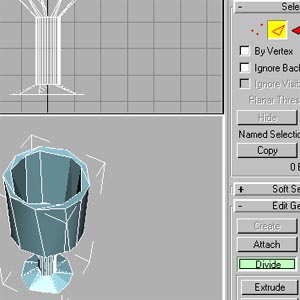 Fig.15 |
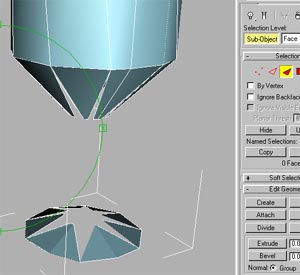 Fig.16 |
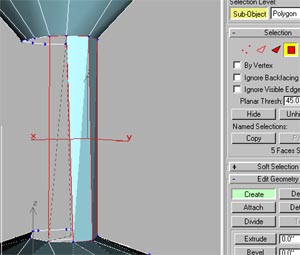 Fig.17 |
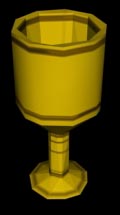 Fig.18 |