|
Ruins of Originia Walkthrough
The
Mines of Margroth |
 |
 |
| "I was informed of an interesting opportunity..."
TABLE OF CONTENTS (click a topic to jump to that section)
- In Sheep's Clothing
- Into the Mines
- Clearing the Path
- The Throne Room
Starting Objectives:
- Find some maps in the Hammerite Headquarters.
- Find the Soulstone called Gem of Oldorf.
- Find the trigger to open the Mines of Margroth.
- Find Bantar's Book of Darkness.
- Find Bantar, kill him and retrieve his amulet.
- Discover another exit from the mines.
- Find the Whistling Stone to prove the legend of the Ancient ones.
- Escape with at least 6000 gold.
- Don't kill anyone human other than Bantar (if indeed he is human).
Ending Objectives:
- The gem is hidden in the Vault! Grab it.
- The Book must be in his lab! Find the lab on the Eastern Half of these Ruins.
- Cross the Pit and find the Mirror Room. It is the only way to the Eastern half of Margroth.
Loot Information:
- Requirements: 6000
- Available: 12862
- Accounted For: 12862
In Sheep's Clothing
Window Shopping
You start at the entrance to the market.
Go down the path. Don't worry about the guards, you're dressed as a
miner. Don't douse any torches though, as torches don't go out on their
own, and the guards know this. Visit the miners town and enter the
merchant's shop. Make sure no-one sees you when you blackjack them (yes,
it's necessary). Take the loot from the shop (533 - Total 533). There
are also 2 flash bombs, three mines, three gas mines, some water arrows
and a few fire arrows. Tavern Brawl
Go
into the tavern, down the stairs
and into the cellar. In a small side room are three moss arrows and a
bottle of fine wine (50 total 583). If you like, go fishing. Margrothian
fish secrete a drug similar to the one found in healing fruit. While
addictive in large quantities (don't worry, you'll never catch that many
fish), in small amounts it will heal you quite nicely. Return to the bar
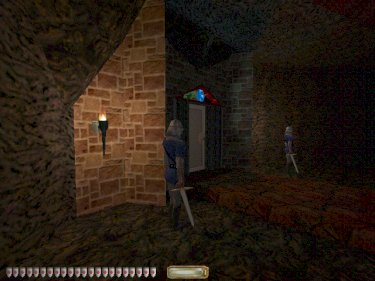
and go up the stairs to the mezzanine level. Take a peek into the room
(figure 1). |
|
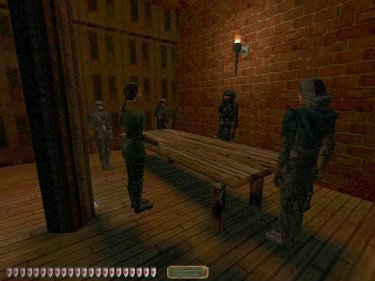
Figure 1
|
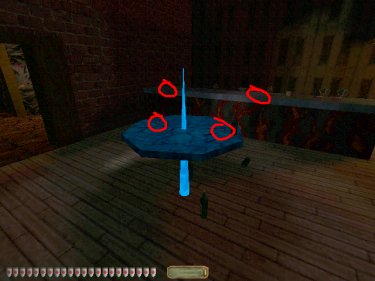
Figure 2
|
Goodbye
Frying Pan, Hello Fire
Now all hell has broken loose, it's time to
clear up the things you couldn't get before. Since the assassins came in
the same way you did, naturally, you're suspect. The assassins carry 5
purses (350 - Total 933), and one had 5 fire arrows. There are some
coins (40 - Total 973) and bottles of fine wine (150 - Total 1123) on
and under the bar. There are also some more coins (figure 2) on the table (40 -
Total 1163). The Party's Over
In a guard station at the western end
of the town, there are 2 guards with 2 purses (150 - Total 1313). At the
eastern end of the town is s storage room. Push the big rock out of the
way with the little rock and take the things from the niche. Two boards block access to the
waterway. Break them and jump in. Swim left and pick up the big blue
geode you find in the water. Swim back to where you jumped in. You can't
climb out, so keep swimming. You'll come to the bottom of a well. Drop your
geode, put a rope arrow into one of the beams and climb up. You are now
inside the Hammerite headquarters. First we have some unfinished business
though. Crystal Lattice
Shoot a fire arrow at your big blue geode. Jump down and pick up the
(newly created) energized coal crystal. A little bit of background
information on the coal crystal. When coal, and a blue, ice-like
substance (Margrothian Crystal) mix through seepage, the form what
is known as a blue geode. When this is heated to extreme temperatures,
the concentrated ice forms a lattice with the coal. This new form is
know as an energized coal crystal. When burnt, the lattice holds the energized
crystal together until the internal forces shatter it, sending red hot
shards of coal and decaying concentrated ice into the surrounding area.
This is similar to the inferno caused by a Hammerite explosive charge
(although not as powerful). Looting
So, you can use the coal crystal like
a small explosive
charge. Speaking of explosive charges, there's one just around the
corner. Cross the corridor and enter the dining room. Take a look at the
painting (figure 3), and then loot the area (290 - Total 1603)(figure
4). In the kitchen next
door, there's a bottle of fine wine (50 - Total 1653) on the rack in the
corner. Cross the corridor again and loot the guard's quarters. You
should find a couple of purses (300 - Total 1953) as wall as some
broadheads and some Hammerite maps of the region. |
|
Figure 3
|
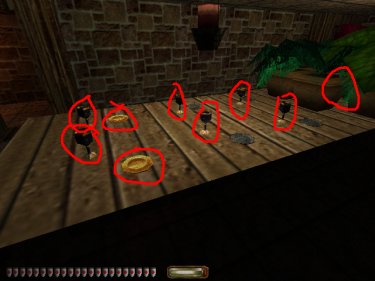
Figure 4
|
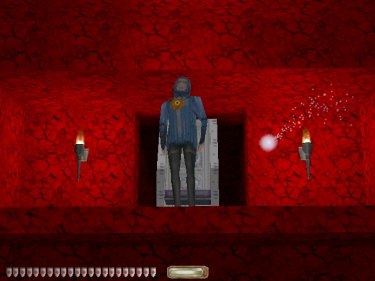
Jack in the Pulpit
Go out of the front door and take the gem above it (50 - Total
2003).
Nearby is a market cart. Blow it up with a fire arrow (figure 5) and
take the 4 gems and the coin (805 - Total 2808). Go back inside the
barracks and go to the temple. You will find 2 gold hammers (150 - Total
2958) and a blue gem (50 - Total 3008). Stand in the pulpit and read the
plaque. Hmm. Shoot a rope arrow into one of the attic's wooden supports
and climb up. You will find a chest with some coins in it (100 - Total
3108) and 2 images of the sun (figure 6). Shoot a fire arrow at each and
then return to the pulpit. |

Figure 5 |

Figure 6 |
Research
A
secret passage has now opened, so go down it. Be warned, there are
several fire elementals down there, as well as 10 gems (1000 - Total
4108) and 40 fire arrows. When you take the fire arrows, 2 more
elementals appear, so watch out. Return to the outer temple, go along
the corridor and up the stairs. Each room has some loot in it, as all
together you get quite a bit (700 - Total 4808). Press the button and
flip the switch at the end of the corridor. In one of the rooms is a
note about the gem of Oldorf, so read that, then go back to the outer
temple.Last Thoughts
Be warned, it has escaped. The gem of Oldorf is now flying and
shooting, but a couple of flash bombs should banish the dark magiks from
it. It was not "dropped" by Bantar, it was left behind
deliberately to cover his escape. Anyway, loot the treasury (637 - Total
5445). Now it's time to enter the mines. go to the southern side of the
market place. You will come across Bantar's lady, so be careful. If you
wish, you can get some weapons from the nearby rooms, and the nearby
rock can be blown up for a coal crystal.
Into the Mines
Opening Moves
Enter the mines. As you near the spider, beware the active mine on
the ground. Past the spider are some burricks. The darker ones are
Shadow Burricks. They can see in the dark, so don't bother hiding. Go
north, up the incline. You should come to a room with a corridor blocked
with rocks. Turn around and pick up the stores resting on the lintel.
Then use fire arrows (or mines) to clear your way. There is also another
blue geode. You know what to do with it. go
Fiends
In the next section you hear something a bit like a burrick.
It's feet sound a bit mechanical though. This is the fiend. So Bantar has
called forth demons. They are immune to fire, and their scratches really
hurt, but luckily broadheads are surprisingly effective. One hit to an
unalerted fiend will kill it. There are a number of fiends in this area.
Go south along the passage, and then east. You will find a side passage
blocked with a rock. Blow it up with a fire arrow. You know what to do
with the geode. You will also find a chest with some rope arrows in it. Tomb
Raider
Return to the place where you first met the Shadow Burricks. To
the south of that is a hall, with stairs leading down into the ground. A
statue of death watches the entrance. Go down the stairs, unlock the
lockbox and enter the embalming area. Ignore the warning about traps. In
the northern room you will find three hammer zombies and a purse (100 -
Total 5545). In the southern room you will find a flash bomb and a healing
potion. On the side of one of the tables are two buttons (figure
7). Use these to open the storage closet and retrieve the explosive
charge, the two flash bombs, and the holy water. |
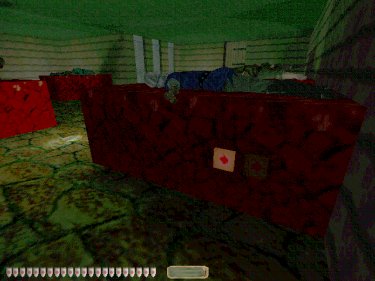
Figure 7 |
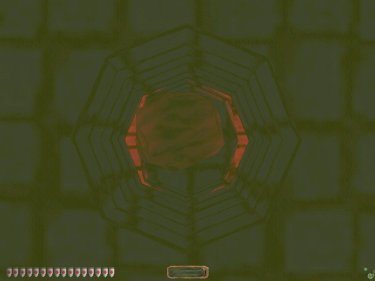
Figure 8 |
The Well of Lost Souls
Go back to the northern embalming room and out the other door. At the
first intersection is a rock. Pick it up and go south. You'll come to a
well. Get as close as you can, look straight ahead (don't lean forward
though) and drop the rock. Keep going sough until you come to a room
with a few stone sarcophagi. Behind one of them is a chest with a tiara
in it (125 - Total 5670). Go back to the well. The whistling stone
should have appeared (350 - Total 6020). If it hasn't we'll deal with
that later. For now, shoot a rope arrow into the roof of the well and
then jump in. In the well are three breath potions, 2 holy water vials,
one slowfall potion and 1 invisibility potion. In the centre of the
bottom of the well is a depression. The rock should sit in it (figure
8). If it doesn't, put it in. Now return to the surface and climb out
of the well. If you haven't already, grab the whistling stone.Merchants
Go back to the south embalming room out the other door, through the
commoners tombs, and into the merchant's tombs. Be warned the ghouls
haunt this area. At the western end are three rooms. The first one
(working from south to north) contains an electric generator and a switch. Do not, repeat, do not
flip the switch. The second one has 2 active mines just inside the
doorway. After you have disarmed them, grab the golden skulls (200 -
Total 6220). The third room involves following a catwalk around a
spider-infested pit before crawling through a tunnel to your
destination. In the coloured light there is an invisible mine, but
luckily the gem of Oldorf will reveal it's exact location. This feature
is extremely useful in finding secret doors and invisible
enemies. Grab the valuables (700 - Total 6920) and leave.
Lost and Found
Visit
the Halls of the Lost Heroes. Be warned that every time you raid a
tomb, a dwarven haunt appears somewhere nearby. You should collect a
number of golden skulls (600 - Total 7520). Some of the tombs won't
open, and we'll come back to that later. Now, visit the Halls of
Sorrow. Near the centre of the area as a pit with 4 canopic jars in it
(300 - Total 7820). Remember to watch out for the zombies and the air
elemental. Go up the long stairway, past the tricks section, right to
the top. Be careful about stepping out into the open at the end though,
as there are a few falling rocks.
|
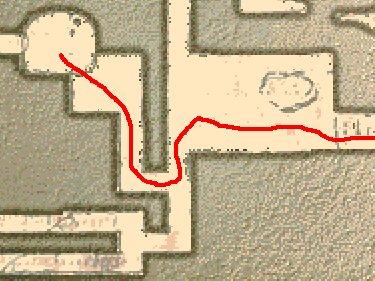
Figure 9
|
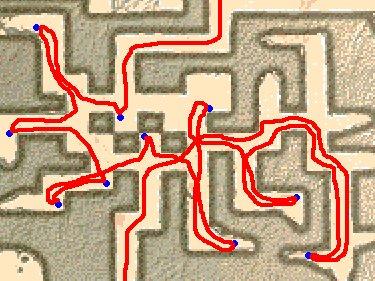
Figure 10
|
Close Your Eyes
Go up the slope the rocks came rolling down, and then go left, into a
large cavern. The middle half has been blocked up, so work your way past
it. There are two passages, on leading north, and one leading south.
Take the southern one, and then go west at the first turn (figure 9).
You should come to a massive shaft leading into the depths of Margroth.
Shoot rope arrows into the walls, and climb down. You have entered the
realm of the Shadow Burricks.The Shadow
There are several shadow burricks down here. You should find a number
of black silver nuggets (400 - Total 8220). When you're ready to leave,
travel north and through the passages back into the mines. Nearby is a
wooden stair. Go up it. As you travel up, there should be a short
passage branching off to the north. In there is a chest (25 - Total 8245) and
a nugget of black silver (75 - Total 8320) behind the chest. Once you reach
the top of the stair, go south. Oh, and watch out for fiends. The
included map (figure 10) will guide you to the loot (750 - Total 9070). You should
end up back in the open cavern. Go down the slope and return to the
tricks section.
Clearing the Path
Monkey Business
As you may have noticed, a glass pane stands in
your way. Break it with your sword and step through. To the north is a
chain of rooms. Enter these and continue until you reach a room with a
blue hexagon of light on the floor (figure 11). Stand in the light and
look up. See the button? Good. Throw something at the button to press
it. I suggest using the gem of Oldorf (you could of course, just jump up
and press it). Go back through he rooms till you
come to a place where there are two pillars. Grab the crystal shard
(figure 12) from the niche (111 - Total 9181).
|
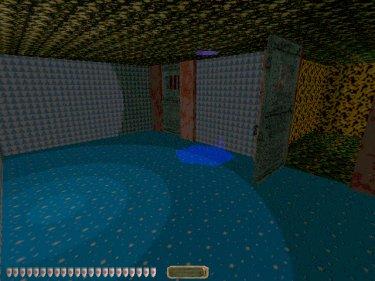
Figure 11
|
Figure 12
|
| White Light
Follow the corridor east, and then
north, then east again until you find an image of a dead guy on the wall
to the south. Bash it in with your sword. The inner chamber has four
doors, with the one on the west being unfrobbable. Bash it in and take
the loot from the chest (350 - Total 9531) Watch out though, as an ape
beast and a will-o-the-wisp are coming. The will-o-the-wisp can be
killed with holy water and flashbombs, and even your sword. They shoot
bolts of light at you, which cause you to become confused, illuminated
and disoriented. Planting the Seed
Return to the corridor and go
east, then through a metal door. You are presented with a zigzagging
hallway, so follow it round the centre pillar, albeit and enormous
pillar. On the wall is an unlit torch. Flip it, and then crawl into the ventilation
shaft. Grab the manaseed, and then return to the corridor outside the
metal door. Go south to the hall. In here are two apebeasts and two
will-o-the-wisps, as well as a holy water fountain. On the southern side
of the room is a window into a small terrarium. Place the manaseed in
the middle of
the seam between the window frame and the floor, go back to the holy
water fountain, bless your arrows, and hit the manaseed with a holy
water arrow. A climbable tree will grow, but don't climb it yet. Stand
under the holes in the ceiling, and fire rope arrows into the centre of
the gas clouds. When you have rope dangling from all four, ascend the
tree and jump off to the sides. You should find two chests (600 - Total
10131). Gate
Return to the entrance of the tricks section (do not
go out though). To the north is the passage that leads to the chain of
rooms where you found the crystal shard. To the south is an unexplored
passage. So, explore it. You come to a room with a water channel
running through centre of it. behind the door is a lever. Flip it. Oh,
and watch out for the spider-zombie. Go out the newly opened exit. When
you come to a junction, go south. There should be a passage branching
off shortly after the intersection. in this is a box containing some
rope arrows. Grab them, ant then keep going south. Eventually you'll
come to a metal gate. Read the inscription on it. So, Bantar has sealed
the way, and it will only open if he is dead or he commands it. Ah well,
We'll have to do this bit later. Right now, we'll deal with the
un-looted heroes' tombs. Go back to the
intersection, and take the northern passage. Exit the tricks section and
return to the first room of the merchant's tombs (the one with the
switch you shouldn't flip). Viper
Prepare a speed potion and flip
the switch I told you not to flip. Take the speed potion and run to the
tomb of Viper VI (figure 13). Once inside, flip the switch to make sure
the door stays open. The door to another tomb has also opened. Take the
skulls and assorted accessories (1050 - Total 11181) from all the tombs.
Once you're done, flip the switch in the tomb opposite Viper VI's. A
secret passage to the tank level should open. Go down. Pick up the
maps, watching out for the shadow burrick in the side tunnel. There is
also a secret door and a hidden button in this area. Scan for them with the gem of Oldorf
(figure 14).
|
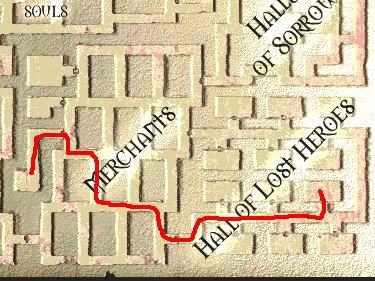
Figure 13
|
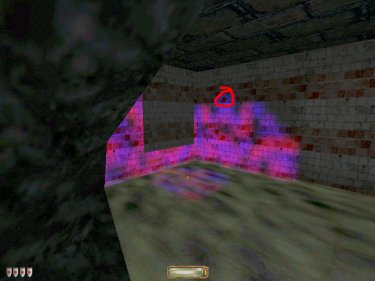
Figure 14
|
Mushrooms
Enter the secret area and loot the place. You should find 9 gold
mushrooms in the rooms (81 - Total 11262). Be warned that one room has 2
and one room doesn't have any at all. There is also a gem in the
southeast corner of the corridor (10 - Total 11272). After you have
that, swim through the filter system and get the change from the filters
(50 - Total 11322). Then go up the steps to the east, and open the other
secret door (figure 15). Be warned that several cyclopses, 2 craymen and
a bugbeast occupy this area.
|

Figure 15
|
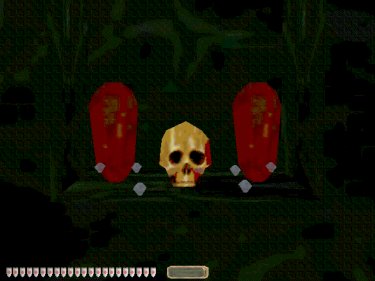
Figure 16
|
Fish Food
In the distance are some stairs. Go up them (watch out for patrolling
critters) and look into the tank. You're going to swim in there. And the
puffer fish and crayman will not be happy. But first, move round the
catwalk to the feeding balcony. Grab the loot from the chest (50 - Total
11372), flip the lever and dive into the tank. Your destination is a small
drainpipe in the northwest corner of the tank (under the ramp the
crayman walks up). Swim in, grab the gem (300 - Total 11672), and swim back
to the feeding balcony.Secret Treasure
Look down the shaft. You'll see a red light. Your goal is to jump
down the shaft and land on that light. To do this you must jump in so
that the ice slope points directly at the light, id est opposite or adjacent
to it. When you land on the light, look across the shaft to the place
where the treasure is hidden (figure 16)(470 - Total 12142). That's not all though.
In one of the earthquakes three gems flee. You already have one of them.
The other two sit on a lintel holding up the roof of the corridor below
(20 - Total 12162).
The Throne Room
Escape Route
There is a tunnel. It's an
ancient escape route, leading from the
throne room, down to the lower levels. It was intended to allow the
rulers to escape in the event of the throne room being seized. Our
situation is very similar, only we're trying to break into the throne
room, not break out of it. Fortunately it can be opened from the
outside, but it involves a long and complicated process.
|
|
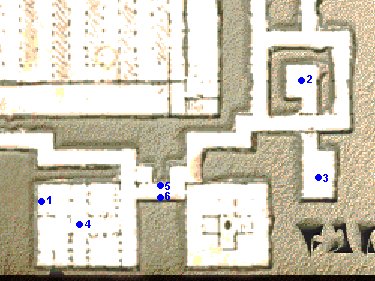
Figure 17
|
Open for Me
Cast your eye over the map (figure 17). The blue dots mark the
location of buttons. Button one is easy, it's just on the wall. On, and
while you're there, pick up the loot from one of the chests (300 - Total
12462). Buttons 2, 3 and 4 are recessed into the ceiling. These can be
pressed by looking up and throwing the gem of Oldorf while jumping.
Button 5 should be pressed with an arrow. Do not press button 6.
As you may have notice, the way is now open. Climb up the wooden
platforms, stand straight under the metal grating, and frob it. The air
currents will suck you up into the antechamber of the throne room.
Personal Guard
Grab the slowfall potion in the corner. You'll need it later on. Now
go up the stairs. In the distance is a man in blue. He's standing on a
platform. It's Bantar. Move forward to the intersection. This is guarded
by two ratmen and a tricksterling in a side corridor. There is also an
invisibility potion. If you feel killing the tricksterling is necessary,
try holy water and flash bombs. Move on to the throne room itself. Eavesdrop
the conversation, and when they attack, stand forth and try to draw
Bantar's fire. You can dodge better than they can. Eventually however,
the thieves will die, and you'll be left on your own.
Stab in the Back
Underneath
the ledge Bantar is standing on is a tunnel constructed of Margrothian
Crystal. swim through this, picking up the water and gas arrows on the
way. Eventually you come out in the rooms behind the platform on which
Bantar resides. There is a healing fruit and a healing potion here, as
well as some loot (250 - Total 12712) and some maps of the guild. It
turns out the Bantar does not have the book of darkness here with him.
It doesn't matter, we can get it afterwards.
|
|
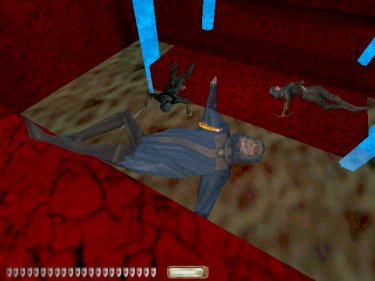
Figure 18
|
Bantar
Kill Bantar and take his
amulet (figure 18).
Leaving the Mines
Return to the escape shaft. Save before you do this, as it's risky.
Jump in, and take a slowfall potion as you fall. As soon as you are in
sight of the bottom of the shaft, take another one. Once you're down, use
an arrow to press button 6 (figure 17). Go back to the tricks section,
back to the hall where the wisps were. Shoot a rope arrow into a tree
and climb down into the terrarium. In the southeast corner is a tunnel.
Crawl through it, picking up the two nuggets of black silver as you go
(150 - Total 12862). You should come to a place overlooking a pit.
Across from you is a target. Shoot a rope arrow at it, and make sure
you hit wood, or you'll have to come back and do it again.
Tricks with Rope
Now go to the place where the gate was. It is now gone, as
Bantar is dead. In a wall niche are a couple of
potions. Shoot a rope arrow into the target visible from here, then go
round to the hole opposite and shot rope arrows into the two targets
visible from there. Save, then jump onto a rope and climb down into the
red water. After a bit of falling, you grab hold of another rope. Climb
down and jump into the passage (don't bother about retrieving your rope
arrows). Now, it's a simple matter of going along the corridor and
entering the hall of mirrors...
|