Thief II FM -- Calendra's Legacy: A Winter's Eve
Okay, time to carry on with the third part of this Fan Mission. Also carry on with Garrett difficulty. We're also trying to Ghost. But know up front that Perfect Thief is not attainable in this mission. A broken window is required to access some loot. Let's see also if all pockets can be picked.
Act III: A Winter's Eve
Objectives
Keep Mercedes alive
Meet Mercedes at the bridge then rob the Dayport bank
Kill Gaston the Red
Get at least 5,500 loot
Loadout
Everything except the Lotus Nectar. Especially the Skeleton Key even though it costs two thousand. There are a few locks it works on that are problematic if alternate methods are required. Actually I'm not sure which locks but I'll try to firm this up. I'm curious to see how the mission plays without it.
Opening Scene
In a small building in deep shadow. A six-man Hammer patrol comes buy and is ambushed by five or six Thieves. They're probably from the local Deepshine Thieves Guild. When we bring up the Skeleton Key in our inventory, or maybe it was Garrett's Tip that triggered it, a new objective to steal the Night Jewel from the Keepers gets added to our to do list. Garrett's Tip is about the Night Jewel and that it requires two hands to use. A Note From Mercedes about the Amulet, which we still have from Act II. She's used up the three charges for today testing it. Correct me if I'm wrong but if the Amulet won't fire how can I be sure she hasn't given me a fake and stolen the real one from me? She mentions meeting her on the bridge.
I've played this opening over fifteen or twenty times in an attempt to get all five pockets picked for the final statistics. Two of the Hammers have Healing potion vials and three Thieves have pockets to pick as well. One with three Broadheads, one with a purse with fifteen gold, and a third with a purse with five gold. Well, I've been able to get all three Thief pockets! Plus the two Healing potion vials off the Hammer corpses. There may be time even to get all five pockets. Once I've done the Thieves' pockets all I need is a scenario where the two Hammers with Healing potion vials survive. Almost! It happens that their pockets can be picked while they're fighting. I guess AI's only prevent pocket picking by whomever they alert to. And also I can position myself so as not to be observed. Alas, one of the Hammers used his Healing potion so I didn't get that but it's only a matter of time now. Yes, almost there. I got all five pockets picked but while reaching into the melee my hand got wacked by a wayward sword or hammer. Not the smartest thing Garrett ever did. Dang, this was a good one because the wandering Hammer Mage from above came down and one of the Thieves got him. This would have made it a lot easier later. Oh well. Keep trying.
Did it! This time even better luck. Not only did I get all five pockets picked but the Thieves won. And the two survivors went out toward the ramp up from the Pawnshop and killed another Hammer. The final surviving Thief settled back into his original hiding spot. Then just after I pickpocketed the Speed potion and grabbed the golden wine bottle from the two Thieves by the campfire, another Hammer came out of a warehouse and the Thieves dispatched him too. This is my lucky day. I may play a money golf game today after this.
Here's the drill. First thing get Kharras Drahg out. I'm not sure it's necessary, but the little bit of extra stealth it provides may be critical. Also know that I kept the sword out during most of my travels throughout this mission. Crouch-walking with the sword out has no footsteps and this seemed safest in a lot of situations. It is slower though. Start running out toward the ambush spot with a slight pause just outside the shed door. A Thief archer comes running out from the alley between the shed and the next building. If you're lucky you can grab his Broadheads while he runs past you. If not, don't worry, you'll have another chance. Keep running along the left wall toward the box. Remember to stay in full shadow while doing this. You won't be able to pick any pockets off anyone who spots you and the Hammers are looking right in your direction as they approach. Stop just before you get to the box. Turn to your left and lean in and grab the first purse off the right hand Thief. 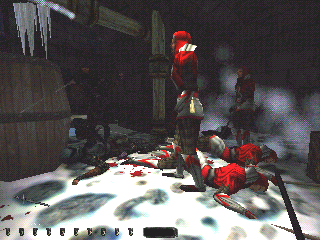
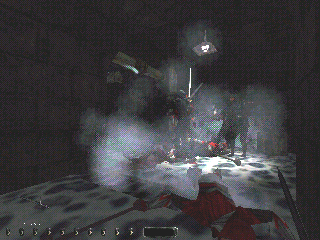 Take care you don't get too far in toward them. There's a grate and if you walk on it the Thieves will alert to the noise. Quickly across to the other side. Now's your chance to grab the Broadheads on your way by the archer if you didn't already. Once over to the other side, double back toward the barrel. Look left again and lean in to grab the second purse off the right hand Thief. Then reverse direction and crouch and park it between the double pipes and the wall across from the box. Turn to look toward the fighting. With luck none of the stray swords or hammers will hit you as you lean and reach into the melee to grab the two Healing potions. When I had these two Healing potions, I scurried into the spot the Thieves had been hiding in to get as far from the fighting as possible. Fifty-seven seconds elapsed time to this point. Then just wait until it's over. If the Thieves win, the survivor will eventually return to his original hiding spot so don't be here when he does. Be on the lookout for the Hammer Mage, with the hammer on his belt, coming down and mixing it up with the survivors. You'll want to snatch his hammer if he does.
According to the map I've started in the middle of the north end of the warehouse district. The Deepshine Thieves Guild doesn't show on the map. Neither does the Keeper Darkwatch Sanctuary. There is a single box here so perhaps I'm supposed to be able to go up. I don't readily see anyplace to proceed upward. Except maybe from the roof of the shed I started in but I'm not having much luck with this box. In fact there is a wooden beam sticking out of a building above the shed that I can Rope arrow into. But there's also a Hammer up there that'll spot me if I try. The bridge where I'm supposed to meet Mercedes does show on the map.
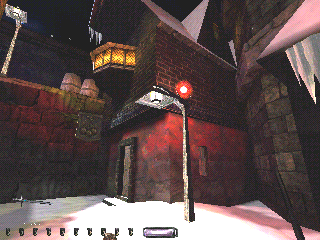 First stop, the Pawnshop. Beware any surviving Hammers patrolling by here. Just work around them. The Skeleton Key opens the Pawnshop door. If you don't have the Skeleton Key you'll get another chance to get here from the Keeper Sanctuary. Or, if you're skilled at Rope climbing, you can get the Pawnshop key from the attic now. It doesn't matter when you do the Pawnshop. There's nothing in here that you need to proceed now. A jewelled sword on the wall worth twenty-five gold, twenty-five gems, and twenty-five goods. The Basketball. An empty barrel. Two platters worth ten goods each. Four goblets worth fifteen goods each. A golden candelstick worth fifty gold. A silver coloured nugget worth fifty gold. A necklace worth twenty-five gold and twenty-five gems. A ring worth fifty gold. A large hammer worth five gold and five goods. A small hammer worth five goods. A Water arrow, a Speed potion, a Flare, a Gas Mine, and a Flash Bomb. A cashbox behind the counter. Just behind a curtain three alcoves. The first of which has a warrior statue, a lock on the wall, and what looks like elevator flooring behind the warrior. Part way up the stairs a golden urn worth fifty gold. Run and jump over the top step to avoid a spitball trap. A note from Keeper Orland to Keeper Loren regarding his returning with the Amulet and Mercedes having left the Keepers and probably Gaston the Red's Deepshine Thieves Guild in this area. A golden candelstick worth fifty gold. Keeper Loren's journal admiting he's in deep trouble with Orland for not having the Amulet. He talks a bit about the South Cavern Doors and Orland's opening them at midwinter. Sounds like the Amulet may be some help with opening these doors. He talks also of the North Sanctuary Doors. A bed, a desk, a fern, and a lit fireplace. A vase on the mantle worth fifty goods. A pair of Lucky Coins on an endtable worth twenty gold. Also on the endtable a small statuette worth fifteen goods and the Fire Talisman but it's nailed or glued down to the table. And finally another door. I could see from the stairs there is another level, the attic. Here's hoping there's another stairway or ladder behind this door. Yes, a ladder. Upstairs is a catwalk attic with an empty unlocked chest, another golden candelstick worth fifty gold and a Pawnshop Key.
There's a stash of goodies under the bed too. This thanks to Nightwalker of the TTLG FM forum. The switch to move the bed is on top of the doorframe of the closet door. The closet with the ladder to the attic. The switch is on the closet side of the door. You can see the switch by jumping or going a little ways up the ladder and looking back. In the secret compartment are: a Scouting Orb; a purse with sixty-six gold; a Healing potion vial, an Invisibility potion vial, and two Gas arrows.
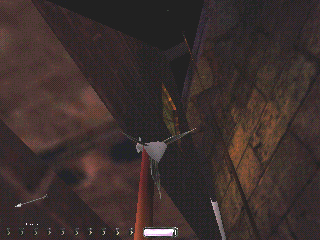
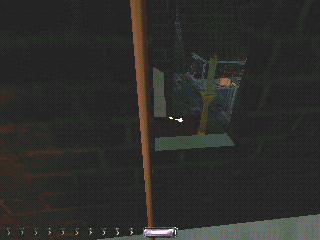 The window behind the candlestick opens from the outside to get the Pawnshop key if the Skeleton Key is not available. In the screenshot are the two Rope arrows required to scale the side of the Pawnshop to get to the attic window. One in the eave and the other in the roof beam that extends out over the attic window. Stand as far away from the Pawnshop to shoot this one. The arrow needs to extend out as far as possible to facilitate passage between the wedge created by the two buildings. I was able to retrieve both Rope arrows. The highest by retrieving the arrow while hanging from the Rope and falling onto the second story ledge of the building next door. Then jump over to the lower Rope and down. Place another Rope arrow close to the lamp post. Up this one to retrieve the arrow in the eave, swivel and retrieve this one falling onto the lamp post. Then slide down onto the ground.
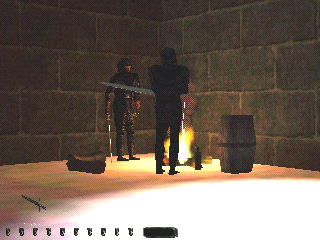 Leaving the Pawnshop straight ahead up a ramp and sharply right back along the roof by some barrels near the Pawnshop. A couple of Thieves standing around a fire, a couple of bedrolls, a barrel, and a golden wine bottle on the ground. One Thief has a Speed potion. The golden wine bottle worth fifty goods. One or two Hammers will pass you and spot these Thieves and they'll fight it out. Just a little further on a wooden door that a Hammer Mage goes into and then comes out again. Generally he'll go back further away still but sometimes he goes on toward the Thieves. There's another Hammer Mage facing more or less toward this door. The door is locked but it can be picked. There are a couple of different paths to proceed from the Thieves. If you have the Skeleton Key you can work your way over to this door. There's a shadow running diagonally to the door from the building opposite. Go all the way to the top of the stairs, unlock the door with the Skeleton Key and out onto the roof. Then over to the edge, slide off onto a light fixture and slide again off onto the catwalk. Alternately, I've just noticed that most sloped roofing in the mission accepts a Rope arrow. There's a small peaked roofed building between the Thieves and the wooden doored warehouse. A Rope arrow there gains access onto the sloped roof and on up onto the ladders and catwalks.
From this highest catwalk there's a broken window to enter the warehouse. Coming out on a beam, slide down onto one of the large crates, sliding off this onto the floor. There's an unlocked wooden chest with a copper coin stack worth five gold. And a Hammer sentry with a Warehouseman Key. That would make him the Warehouseman, I guess. This unlocks the door just behind him. Out onto the stairway and up to the top. The wooden beams here can be Rope arrowed up to where there's a Moss arrow and a couple of Lucky Coins worth twenty gold. If you don't have the Skeleton Key, you'll have to exit the warehouse at the wooden door on the ground floor. Just use the diagonal shadow to get away from there and then the Rope arrow to get up onto the sloped roof. One of these fire escape ladders can be repositioned down. Climb down it and jump off. That's the bridge we're to meet Mercedes at right ahead. Not just yet, though, there's still some things to take care of on this side first.
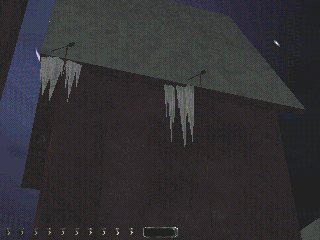
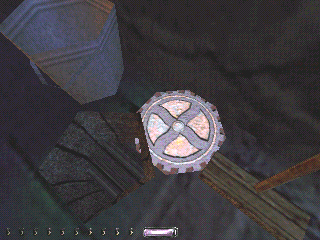
 I'll lay this Easter Egg out now. If you're Ghosting this cannot be part of it since a window must be broken. Firstly get on top of the warehouse with the wooden door. There's a peaked roof over the stairway that we're going to shoot a couple of Rope arrows into. Approach this edge. The screenshot shows this roof with the arrows but from the perspective of the third floor ledge of the warehouse opposite. That's where we want to end up. And you'll have to play around with the best height on the second Rope to jump to the ledge from. It can be done with no injury. Then around the corner to a window. Break the window with the blackjack and enter.
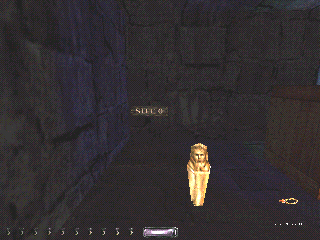
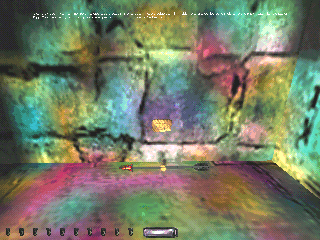 There are a few things in here. The golden urn or statue worth seventy-five goods is the reason this mission cannot be Perfect Thiefed. The "Site 0" sign can be "unlocked" with the Amulet, you'll hear the unlocking sound. That puts a gear on the floor by the pails and broom that isn't there at first. Poke the gear and the Broken Arts Easter Egg plaque is brought to life in the colourful corner along with one hundred Fire arrows. The screenshot can't be read so I'll cite it here: "Calendra's Legacy 2002. Any resemblance of Mercedes to Broken Arts is purely coincidental. :) This mission is dedicated to Nicole. Have fun w/ this 'Ultimate Easter Egg'. This may be my last offering so: ave atque val. And try not to cross the beams."
 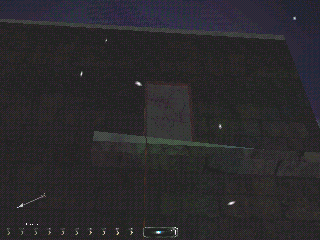 That's about it for here. There's another Fire arrow on the floor beside a fountain. Also the fountain is odd. If you try the lockpick on the fountain you'll hear the unpickable sound. Or maybe it's the already unlocked sound. And although the keys and the Amulet behave as if they're unlocking something there is no sound associated. Beyond this I've not discovered any purpose behind the fountain. Reload back to the bridge area just over the peaked roof and catwalks. The last screen shot is a method to get to the window and is a whole lot more simple. Just place a Rope arrow in the sliver of snow on the ledge.
Back to the bridge side of the peaked roof. There's a Thief lurking between Grindel & Boggs and the Hammer Seminary. So we'll go from just off the adjustable ladder to the alley between these two buildings and flush him out. When we corner into that alley the Thief takes off toward the seminary front doors. He pauses and picks the sentry's pocket. This counts as a pocket picked for Garrett! He doesn't pause for long here so rush right up behind him and grab the Hammer's hammer he just stole. This counts as another pocket picked for Garrett! He then takes off down toward the wooden door and beyond. I suppose there are various outcomes to his running by the other Hammers. But we're not finished here. If the Hammer sentry took off after the Thief nip into the seminary doorway and grab two more hammers. If he did not follow the Thief we can still sneak behind the sentry and get the hammers. I had better luck from the other side of the door though. So, all the way around the seminary and up close to these doors from the other side. There's not much time so be ready when the sentry turns away to nip behind him and up to the front door. Grab the two hammers. When the sentry looks away again nip back out to the shadow beside the entranceway.
Finally, there's the Hammer Mage watching the wooden door. He has yet another hammer on his belt. Depending on which and how many of the Hammers are still alive there are a couple of ways to proceed. If the Hammer behind this mage is gone, the best method may be to work your way back over the peaked roof and down to the beginning of the mission and Rope arrow up onto the wooden beam behind the mage. Alternately you can work your way over to the building across from the seminary. I found the shadow by the seminary entrance but furthest away from the sentry the best bet for this. Once over against the far building work your way up close to the mage. When no-one's looking sneak out and grab the hammer. You may also wish to get out onto the wooden beam and then onto the catwalk behind the mage. From there up the ladder, jump off the ladder onto a metal hopper and on the inside of the piping down to and around the corner of the building. Further along is a concrete projection with a Gas arrow on top. You can slide off the piping onto the second floor ledge of the wooden doored warehouse. Once on this ledge around to the peaked roof and down the ladder by the bridge again.
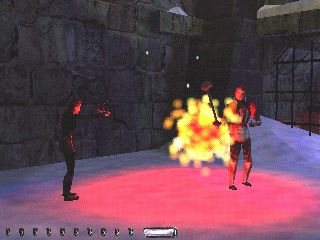 Now's the time to get Mercedes into the mission. Go over to the centre of the bridge. Mercedes will come from the other side and cross the bridge. She'll eventually work her way down the stairs beside the bridge and over to a metal barrel with a fire in it. There's also a paganesque guy down by the fire. When Mercedes approaches he takes off. I'm not sure exactly where he goes. Once he went between Grindle & Boggs and the Hammer Seminary to a pile of snow and collapsed. Go down and stand near the fire. Have a little chat with Mercedes. I suspect this chat doesn't start up until the paganesque fellow reaches his destination. When you're finished she'll take off toward Grindle & Boggs. She'll dispose of the Hammer sentry there. Then she'll just stand there and wait for you to open the Grindle & Boggs gate so she can go in. But before we deal with Mercedes and Grindle & Boggs I'd like to take care of the Deepshine Thieves Guild. That will clean up this entire surface area of the mission so we don't need to come back up here and can finish off in the sanctuary. Although I am hoping to figure a way to Supreme Ghost an area of the sanctuary that includes the Pawnshop and will probably involve coming back to the surface for a short while.
Past the area Mercedes first appeared is where the Deepshine Thieves Guild is. Before we go there are some things you should know. There are four archer Thieves that have quivers with Broadheads we can pick. We want them all picked before we kill Gaston the Red. By the way, killing Gaston is an objective and is therefore exempt from Ghost rules against killing. Furthermore all the loot and other items that can be found in the guild should be gathered up before killing Gaston. This will include two boxes I want to take with me into the Keeper Darkwatch Sanctuary. There's a small area in the sanctuary that requires nudging to get by unless the boxes can allow backtracking. I intend to take a third box from the Pawnshop and a fourth from the ambush area as well. Okay, there are two accesses to the guild. One under the large statue you can see from the bridge. The other is the obvious door with an archer sentry. The statue is moved aside by moving a stick in a pile of rubble close to the doorway entrance. An archer and a swordsman Thief spawn as you make eye contact with the door sentry. They then patrol between the doorway entrance of the guild and the Builder's Chapel. We should pick the archer's pocket before descending into the guild. There's a Gas arrow trap on the stairway down from the door entrance so I suggest using the statue entrance.
Except for the newly spawned archer, the other three archers accept Garrett as a Deepshiner. At least until Gaston is killed. Remember this. Afterward, the archer watching the statue entrance and the patrolling archer do not accept Garrett. This means we're going to leave by the front door. The sentry watching the main entrance down in the guild will not accept Garrett either after killing Gaston but seems to either not see Garrett leaving or accepts him after he settles down after the killing. Okay, move the stick and when the statue slides out of the way into the hole and down the ladder. Don't let any of the patrolling Thieves down here see you. We want to start in the main room which is furthest from the statue entrance. There are three patrolling Thieves. One is Gaston and goes back and forth between his room off the barracks and the main room. He can be identified by his red hair and red wrist bands. The other two patrolling work from the main room to the barracks to the statue entrance. When you've got a handle on the location of the three patrolling, go ahead and proceed down the hallway from the statue ladder stopping by a safe. This safe is lock pickable and there's a gold nugget worth two hundred gold in it. Beside the safe is an armoury. If you don't have the Skeleton Key the armoury is inaccessible. Otherwise, unlock the armoury gate with the Skeleton Key and grab the weaponry inside. In the armory: two Moss, two Fire, and ten Broadhead arrows in two five-arrow clips; a Holy Water vial; a Mine; two Flash Bombs; and two Water arrows in an unlocked chest. It can all be gotten from shadow. You should have spotted Gaston by now. His room is opposite the safe. We need also to get down to the far end of the barracks but I'd like to have to do this only once. I also want to kill Gaston in his room. So, let's do the barracks and Gaston's room at the same time. When the coast is clear move on into the next, main room. Continue all the way and stop behind the archer sentry. He's probably spotted you and even though he's not making a fuss about it he won't let you pick his Broadheads until he settles back down. So, wait behind him for a couple of minutes and then snatch his Broadheads. We'll be making several jaunts out into the main room. I want to move the two boxes out into the main entrance stairway.
When the three patrolling Thieves aren't likely to return to the main room right away go ahead and scurry out from behind the sentry. First off on the left is a red handled lever on the wall that opens the main entrance gate. Pull the lever. While the gate is moving aside loot the chests. There's a rolled up rug on top of one of the crates too. By this time the patrols should be heading back so grab a box and out to the stairway entrance. The trip wire for the Gas arrow trap is at the top of the first set of three or four steps so stay well back of this. However, there's also full shadow on either side on the next step down and you'll want to be there when the patrols move through the main room. Drop the box well away from the trip wire. This trip wire is visible. While you wait here you may be able to see another chest at the base of a statue just inside the main room. Start with this chest when the coast is clear again. Carry on and get the second box and back out to the stairway. Place this box also well away from the trip wire. When the coast is clear again turn left as you enter the main room and all the way around to the far left corner on the other side of the table. There are a couple of more chests that can be looted from this corner. All that's left now is what's on the table. This can be taken in two or three sessions between the patrols. When this is all done we'll be moving on to the barracks.
For those keeping track, here's a detail list of the loot in the main room. On the table: two deer legs; six apples; two cheese wedges; and, four loaves of bread. Also, a large golden vase worth one hundred gold; one jewelled dagger worth twenty-five gold; two golden wine bottles worth fifty goods each; three golden goblets worth twenty-five gold each; a pair of dice worth fifty gold; a sack worth forty goods; two copper coins stacks worth five gold each; two silver coin stacks worth twelve gold each; a single gold coin stack worth twenty-five gold; a statuette worth fifteen goods; and, three pairs of lucky coins worth twenty gold each. Starting from the entrance and working around the room clockwise: a wooden chest with a silver coin stack worth twelve gold; a jewelled chest with a gold coin stack worth twenty-five gold; a rolled up green rug on top of a large box worth one hundred fifty goods; a jewelled crown worth seventy-five gold and fifty gems in a pirate chest; a gem worth one hundred gems in a cedar chest; and, a ring worth one hundred gold in a second jewelled chest.
You're on your own as far as getting to the far end of the barracks from the main room. There are probably plenty of routes. Plus it's all about timing with the patrols. Don't forget the archer won't spook if he sees you. If the archer sentry does see you you'll have to wait for him to settle down before grabbing his Broadheads. There are four chests in the barracks area. A chest with eight gold coin stacks worth 25 gold each; and, another chest with another three Broadhead arrows. The other chests are empty. When the time is right go over and open Gaston's door and enter. Go right over into the corner shadow. The Misplaced Key from the main room table or the Skeleton Key will open the chest which has Gaston's diary including the combination of his safe. You'll want to get a sense of how long Gaston is away from the room and take as many forays out into his room to loot it as you need. There's a golden candlestick on the night table worth fifty gold and a purse worth two hundred gold behind a grate by the floor behind the headboard of the bed. That's all the obvious loot here. It would be nice if we could kill Gaston while he's viewing his treasure in the safe. But this seems somewhat sketchy. He sometimes doesn't even stop but pivots and exits immediately once he enters. We can't count on him. If you can kill him while he's stopped looking into his open safe do so. Otherwise, wait in shadow by the armoire and the wall until he closes the door and wack him before he opens it again. I had to raise my sword when the door opened so I'd be fully ready when he turned his back on me. Once he's down pick him up and back across the room to the corner by the chest. Just wait it our here. The other Thieves in the guild were alerted when Gaston croaked and you'll have to wait for them to settle down and return to their assignments. I dropped Gaston in the corner by the chest and went back over by the armoire and opened the door to monitor the other Thieves. At any point you can grab the jewelled vase worth three hundred gold, eight hundred gems, and two hundred goods from the safe. When the patrols are patrolling again and the archers are at their posts again start thinking about getting out.
Once again you're on your own. The patrols can be at any point along their routes so you'll just have to time it yourself. Don't forget we're heading for the main entrance stairway. I could never get the sentry by the statue entrance to accept my leaving that way. I headed straight from Gaston's room out to the right, around the powderkeg, and on into the main room and sharp right to the corner I'd staged my table looting from. When the coast is clear back out to the shadows in the entrance stairway. If you've left it long enough the archer by the main entrance is okay with your passing.
Now to deal with the trap. The boxes come in handy for this. Standing just down from the trip wire reach and grab one of the boxes. Look straight down and crouch. Drop the box and jump. You should now be on top of this box. Reach out and grab the second box. Repeat the crouched drop-jump. You should now be on top of the two-box stack. If you've placed them close to the trip wire you should be able to just walk off the box over the wire to the landing with the grate. Otherwise jump over. Bear in mind the Deepshiners will alert if they hear you land. Once on the other side of the trip wire run up the stairs to the door. This door is lockpickable. Open the door and you should be able to grab the sentry's Broadheads. Walk past him to the end of this entranceway. There's another good shadow out and around the corner against the wall past the statue. And finally, when the coast is clear on to the Grindle & Boggs gate.
Before we proceed I've decided to bring the basketball with me beyond this point. So, take the time now to go back over the peaked roof and on down to the Pawnshop and grab the basketball. When I got back to the peaked roof I placed another Rope arrow just above the eave. This Rope, and the similar one on the other side of the roof near the adjustable ladder, will facilitate trips back and forth from the locked grate entrance to the Keeper Deepwatch Sanctuary and the Pawnshop. So, let's just leave them here for now. 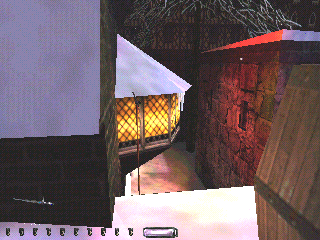 There's another Rope arrow we'll need to get into and out of the Pawnshop. There's an overhanging feature above the Pawnshop door that includes a small roof. We want to place a Rope arrow in this as close to the wall and ledge below as possible so we can get onto it by the barrels and down and back up. There's a Hammer that spawns over by the lamp post outside the Pawnshop door that complicates access via the front door. This Rope arrow is just enough to avoid notice by him. Okay, similary for the basketball and the box down by the ambush area. This box is a little more rickety than the others so I carried it over the peaked roof fearing it may break if I tossed it around much. The basketball can be tossed up onto the peaked roof behind the Pawnshop box we tossed up there earlier. That way we need only climb the Rope once to get all three items over the peaked roof. Go ahead and tote all this stuff down by the Grindle & Boggs gate.
Okay, let's get into Grindle & Boggs. I suspect there is more than one method but I'll detail the obvious one. High up over the gate is a wooden beam with a light on it. We can place a Rope arrow in this beam, climb up, and jump off onto the slope on the left down to the ledge of a broken window we can fit through. Go ahead and shoot the Rope arrow into the beam. We're also going to want the basketball with us so throw it through the broken window now. Getting onto the Rope requires dodging the two patrolling Deepshiners and getting onto the ledge above the gate. Go ahead and sneak past the patrolling Deepshiners and around the far side of the Builder's Chapel. There's a shadow near the front of the far side of the chapel. Stop there. Lean out and look around the corner toward the front. There's a sentry here. Also a red handled lever that turns the lights out. Pull the lever. After a short pause the sentry comes over and puts the lights back on. While he's doing this grab the prayer from his belt. Then when he returns to his post turn the lights off again. Before he gets back over here and lights the place up again, run past him over toward Grindle & Boggs. As you approach the railing, jump up onto and over it onto the ledge. Then around and jump onto the Rope. Scurry up and jump onto the slope and slide down to the window ledge. Go through the window inside. We're in. We could probably have used one or more boxes to get up to the Rope. Plus the seminary roof accepts Rope arrows and we may have been able to get from the seminary roof over onto the roof above this room we've just entered and down onto the ledge that way. I don't know, I didn't try that but it looks like it may work.
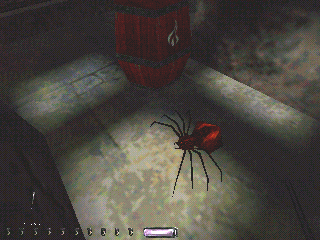
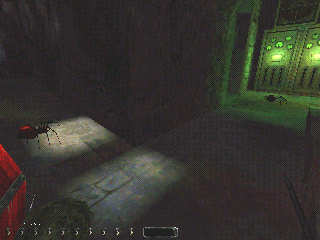 Before we open the gate for Mercedes we've got to negotiate the spiders. Just out of this room is a corridor leading off to our right. A spider is down near a powderkeg at the end of this corridor. There's plenty of shadow to work your way down. Before going any further let's lay out the mechanics of spiders. The swivelling spider has a neutral position. This is the orientation he has usually for the longest periods. In this case slightly away and to our left. There's more. The spider's sensitive or red areas are at his neutral position rear. This red zone does not swivel with the spider! So, ignore his movements. The spider's dead or green zone is from his direct right, all the way around his front to about three quarters of the way down his left side. You can do pretty much whatever you like in the green zone and he won't see you. In fact, you can butt heads with a spider from the front and he won't notice you. Peek out around the corner by the powderkeg and look left. The other spider is down there and faced away from us. That's a problem. We're in his red zone. So, we'll have to remain in complete shadow. By the way, the spider's red zone seems to extend to extreme distances. We're well within their range here. What we want to do is follow the shadow out to the corridor we can see to our right. The powderkeg is in our way. And the corridor ceiling is too low for us to jump up onto the powderkeg to get by it. We'll have to move the powderkeg to make room. Before going any further there's a Water arrow in a pool opposite the room we entered. The further problem here is a Supreme Ghost buster. Saddens the heart. I tried several times but was unable to move the powderkeg without alerting the spider. The corridor is actually a ramp also and when the powderkeg passes the transition between the ramp and the flat flooring beyond, it falls just a little bit and makes a slight noise. Too much for the spiders though. So, what I did was shoot a Moss arrow at the base of the powderkeg. I was then able to push the powderkeg aside enough to sneak out of sight of the spiders in complete shadow.
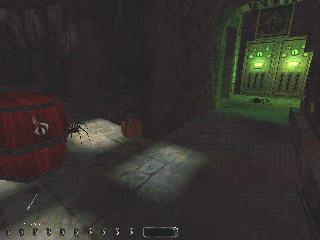 Well, well, well! I did it! I'm playing along while I write this up. And I sat here stewing about having to use a Moss arrow to get by these spiders. This busts the Supreme Ghost. If only I could move the powderkeg further up the ramp. Leaning? Nope. Throwing stuff? Nope. Too much noise. Then, wham! Aha! Back to the Pawnshop. Let's play some basketball No Moss! If you compare the two screenshots showing the powderkeg you should be able to spot how far back up the ramp corridor it's been moved. I was a little worried I'd have to move it so far that it would hit the spider and alert him but not quite. But there's more still. I had noticed that the spider issued forth with a shrill chirping when I first tossed the ball. From then on he accepted all the bouncing. I decided this was a level one alert and therefore a Supreme Ghost bust. Let's see if we can move this powderkeg without alerting this spider at all. First off the powderkeg has spawned as if it were sitting on and level with the next hallway rather than the corridor ramp. We want to get it back up the ramp. I'm guessing the alert off the first bounce was due to the powderkeg tilting to be flat with the ramp. So, inch over in the shadow and just barely touch the powderkeg. It should tilt. Now get set to do the basketball bouncing. This work would go a lot more quickly if we threw the ball against the far wall so that it bounced off that wall directly to the powderkeg. This alerts the spider again.
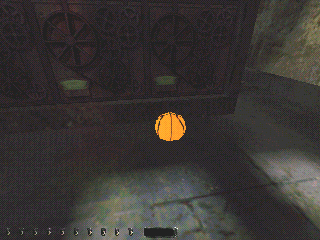
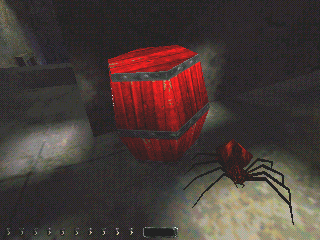 So I want to make the basketball-powderkeg contact a little less violent. To do this I first bounced the ball off the floor and into the far wall and back to the powderkeg. This seemed acceptable to the spider. Alas, the force against the powderkeg is less this way and it required many more shots. No matter, the goal is Supreme Ghost so it's worth the extra time. If you're lucky, you'll find an orientation like the one in the screenshot with the basketball coming to rest within reach and sight without having to move from the position you were in or even move your eyes from the direction you were looking when you threw it. If you don't have to move your eyes then it's simple to just retrieve the ball and throw it again in exactly the same spot. This meant I could repeatedly retrieve and rethrow the ball without changing my orientation. Also without worrying about saving between throws in case the ball ended up out of reach. Finally, when the powderkeg gets lit up near the right of the spider we're almost there. A few more tosses and we can inch over to the powderkeg and slide around it to it's left and across the hall and on toward the stairway. Remember to bring the basketball with you. I want to try something with it in the sanctuary.
Okay, find the stairway and descend to the gate level. Then pull the gate lever and "give Mercedes the signal." I had to move out in front of the wooden flatbed tram so Mercedes could actually see me after the gate was open. She then comes in and goes over and unlocks the locked grate the wacko in the basement is yakking about. The grate Mercedes unlocked is the entrance to the Keeper Darkwatch Sanctuary. But remember to tote the basketball along. First, though, the Rope arrow above the Grindle & Boggs gate can be retrieved. Here's how I did it. Get back up onto the ledge by the Rope. Place another Rope arrow in the underside of the same beam that the first Rope arrow is in. The wacko in the basement we'll deal with next alerts on the sound of this Rope arrow hitting the beam so do this before opening the basement door. The placement of this Rope arrow should facilitate two things. First, it should allow retrieval of the first Rope arrow. Second, it should itself be retrievable, while Garrett is hanging from the Rope, in such a way that falling after retrieving it should land you on the ledge so you don't hurt yourself.
One more little task before moving on the the Keeper Darkwatch Sanctuary. There's a steel door here that accesses a stairway down to a flooded basement. The Skeleton Key unlocks this steel door. There's a wacko down there with some loot. You should be able to hear his ramblings. Sneak down the stairs and into the water. With no footsteps over to the corner and get the Water arrow. Then over near the wacko and get his jewelled dagger worth two gold and his Boggs Factory Key. Back upstairs. Don't close or relock the steel door! The wacko hears this and goes searching. I suspect the basement can be accessed by the hole in the basement ceiling above the Water arrow. There's a red button at the top of the stairs between the spider and gate levels. This moves a vat of molten metal down a track and opens this hole through to the basement. There is time for Garrett to precede the vat through the gate and the hole in the floor. I was injured falling into the basement. This may be avoidable by sliding off the edge of the hole but I didn't try that.
Just a bit of cleanup first. Something has happened while we were getting the Grindle & Boggs gate and the locked grate opened. Four more Hammers have spawned on the surface. Two patrolling the same route as the two Thieves on the chapel side of the bridge. It may be wise to get close enough so these Thieves and Hammers over by the guild mix it up. Although I can't think of a reason to have to go back there. Or does their being there indicate there is a reason? Has anything else changed when these Hammers spawned? A third Hammer has spawned down between the Pawnshop and the building next door. Right by the lamp post. This guy may be a problem. I had hoped to work the parlor or sitting room in the sanctuary in such a way as to not have to turn the lights out. This may have required exiting the sanctuary the way I'd entered and re-entering through the Pawnshop. I think I'll tote the basketball along into the sanctuary too. There are a couple of loot items that I had to shoot Water or Moss arrows at to get them close enough to grab. Maybe the basketball will do for this too.
I thought I'd take a look around and see what else may have changed since I was there before. There's a fourth Hammer spawned in the warehouse with the wooden door. He goes up and down the stairs and out and about a bit. And I've figured a way to get into and out of the Pawnshop without being noticed by the Hammer sentry just outside. That looks about it for the surface changes.
Let's carry on into the Keeper Darkwatch Sanctuary. I'm going to give names to the rooms for reference. First there's the Elevator room you enter through. Then there's the Bell Tower room. This is the first main room you'll come out into. It has a large bell up high in the centre of the room. The next room is the Pool room. There's a large rectangular pool with three large statues on a pedestal in the centre of the water and tiled floor all around the pool. Then there's the Dining room and off of it the Kitchen. The Library is a very tall room filled with tables and desks and ladders up the sides of immense stacks of books and the Interpreter's Tower in the middle. The Study is a smaller room with several desks and a globe. The Parlor or Sitting room is the kicker in the Sanctuary. Very difficult to Ghost. The South Cavern with the prophecy. The Courtyard with a practice dummy and target on the wall. A couple of smallish rooms one of which I'll refer to as the Talisman room with the other three elemental talismans up on a wall. So, that's Elevator, Bell Tower, Pool, Dining, Kitchen, Library, Interpreter's Tower, Study, South Cavern, and Courtyard rooms.
Okay, let's go ahead and get into the sanctuary. Over and slide down onto the ladder in the grate. There are two ladders actually. And you'll need to jump from the upper ladder to the lower one in order to get all the way down. Stay to the shadows. I actually swivelled around to the other side of the lower ladder when I came out into the room below before I climbed down to the floor. There's a Keeper sentry here looking right at the ladder. The shadows are obvious so stay to them and work your way over beside the sentry and the teleportation doorway. Grab his dagger and through the doorway.
This is the Elevator room. You can see the elevator right in front of you. Let's take the stairs down instead. There are shadows in the corners at each landing. When you get to the bottom, stay in the far left corner in shadow. There are four Keepers patrolling thoughout the sanctuary and by this spot on their way up and down the elevator stairs. They all have daggers. Also the Interpreter. That's the childlike Keeper. The Interpreter has a South Grotto Key that we'll need to get into the South Cavern area. All the candles on the pillars in the Bell Tower room can be snuffed out by hand. I'm not sure if it's really necessary but every little bit helps. I've never found anything up on the wooden structure that supports the bell. Just for future reference, the South Grotto is just off the lower level of the Bell Tower room. I don't suppose it really matters in which sequence we go to the various rooms except the South Cavern should be last since that will be the final objective and complete the mission.
Dining room and Kitchen
When you exit the Elevator room stay to your right through the Bell Tower room and then a small room with a lamp on a coffee table. Through the next doorway into a darkened hallway. Carry on and right and you'll come out at one end of the Dining room. From this perspective the Kitchen is through the doorway along the right hand wall of the Dining room. The only loot in the Dining room is three golden plates on the fireplace mantle at the far end of the room. They're a bit tricky to get. There's a wooden structure at this end of the Dining room we can use to get up onto the stone beams running the length of the room. All of the candles in the room can be put out. The only one that needs to be put out is the one on the wall between the Kitchen and the Dining room fireplace. If you're going to use a Water arrow to put this candle out go ahead. There are some Water arrows in the sinks in the Kitchen. I elected to not use the Water arrow but to snuff the candle manually. This is tricky. That candle cannot be put out until others are. So, I used a Speed potion vial stack to get up high enough to jump and snuff the four candles on the walls. The three on the table can be snuffed by sneaking in between the chairs and reaching.
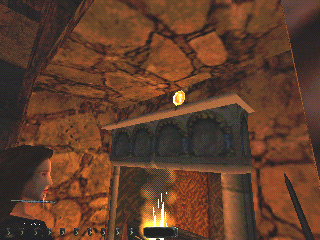 Now put a Rope arrow into the wooden beam overhead and get up onto the stone beam. Work your way down to the fireplace end of the room and place another Rope arrow in the wooden beam there so you can drop onto it and lower yourself down to the shadows beside the fireplace. I don't suppose it matters which side of the fireplace we do first. I got two of the plates from behind the Keeper side and the other from beside the woman, but on her right side, not her left. Then reclimb the Rope and retrieve the Rope arrow and across to the other side of the fireplace and repeat. You'll have to remain out of the light from the fire in the fireplace to lean and reach around the corner to get the righthandmost plate. The Keeper is angled slightly to that side of the room and will see you if you get into the light from the fire. Also, the patrols routinely come through the Dining room so keep an eye out for them. There's one last thing to take care of while we're here. The rightmost window can be opened. This opens a secret door across the sanctuary that we need opened. I placed a Rope arrow in the wooden pillar at windowledge height, climb the Rope, open the window, climb down the Rope as far as you can and still retrieve the Rope arrow, and, finally, retrieve the Rope arrow falling to the floor.
Study
With all the candles out, the light in the Dining room is low enough that you can creep out the other door. Across a balcony to the Talisman room. Down the stairs and past the secret doorway just before the tile flooring around the pool starts. Carry on onto the tile flooring keeping left around to the Study. There's a switch on the wall of the left hand door that turns the lights off in the Study. Then go down into the study and grab all the loot and parchments, etc. I missed the two large blue vases on either side of the entrance balcony posts. You may notice while you're here that there are some balcony windows around the room. There's a corridor that goes from the secret doorway we've just passed by all the way around the Study and exits outside in the Courtyard off the Dining Room. Once you're finished with the Study, double back to the secret doorway and enter. A short ways down the corridor is a Keeper sentry. Take his dagger. To his left just around the corner is a candle on an endtable. Creep around behind him and snuff the candle. What you just did may very well have been what we call a 'Nudge.' Stationary AI can be moved by touching them. They fidget and are programmed to move away from obstacles. If you noticed any sort of pause before you could reach out and snuff the candle that was a 'Nudge.' We want to continue on past him. If you look high up on the wall across from the sentry you'll see a tilted candleholder. This is a switch to close the secret doorway. Just leave it the way it is. Continue on past this sentry and along the corridor. You'll come to another sentry. Take his dagger. This guy can be passed without dousing the torch on the wall around a corner to the left. Get as near to the sentry as you can in shadow along the left hand wall. Then scurry through behind him. I mean run! Be quick. Most of the times I did this I was good but a few times he spooked. On past him is another room with a chest with a Gas arrow. Back to the sentry.
 Courtyard
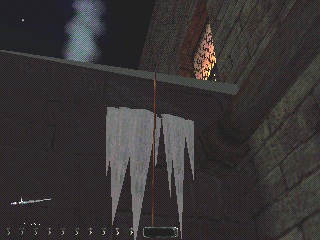
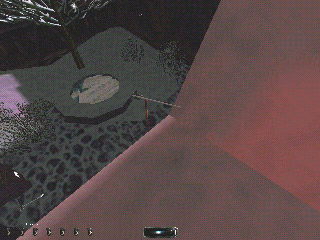
Down the corridor with the torch behind this sentry is a locked steel door. Pick the lock and outside to the Courtyard. There's a partially frozen over well with some Water arrows. That's it for the ground level here. To the right as you come out of the door is a flat roof. There's a sliver of snow on the roof. Shoot a Rope arrow into this snow and climb the Rope up and mantle onto the roof. Looking ahead you should see the window we'd opened in the Dining room. Before we go there though slide down off of the flat roof onto the pipe. then along the pipe, mantle up onto a windowsill, run and jump to another windowsill and onward to a fire escape balcony and ladder. Up the ladder to the top. Jump over onto the ledge on the building next door. Along the ledge is Baron De Zabrus' will. We're now incredibly rich! He left everything he had to whoever finds the will. By all accounts we're now the richest people around. This should probably end the mission since there really isn't much point in continuing but let's do it anyhow just for kicks. We cannot return the way we came so back over to the Dining room window. Enter into the Dining room and back over to the Talisman room.
 Interpreter's Tower
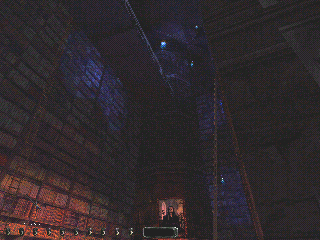
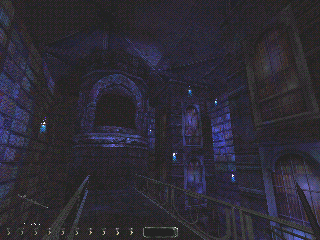
Ealier we'd passed by a stairway going up on our way to the Study. Now we want to take these stairs up. Be careful here. The main Parlor door is at the top of the stairs and they can see us out here if we don't stay in the dark. Left past them and through some corridors to a bridge or catwalk across to the Interpreter's Tower. There's a sentry just before the bridge. You can sneak by him and grab his dagger. Getting into the Interpreter's Tower is a bit tricky. I jumped up onto the right hand railing of the bridge. Then got close but not all the way along the railing toward the tower. While looking at the edge of the window into the tower, run, jump and mantle up onto this edge into the tower. This probably won't work the first few times you try. Keep trying and sooner or later you'll make it. Take a second to try to remember what that edge looked like just before and during the jump that did work. You'll need to get a visual sense of what sorts of things you can do to play this game well. Two chests. The right hand one has another South Grotto Gate Key. The left hand one is locked but can be picked. In this chest the Night Jewel. That's an objective. For future reference, the Night Jewel seems to operate as sort of an Invisibility potion. There's a little difference though. It takes two hands to hold it so you can't do anything except move from place to place with it. After it's used you'll see it in your inventory as 'recharging.' I assume that sooner or later it will 'recharge' so it can be used again but I've never waited long enough to see if it really does. Slide off the edge you mantled up onto to get into the tower and back down onto the railing and then down to the floor and out the way you came in. Just so you know the sentry above near the entrance to this tower will issue level one alert messages when you're trying to sneak near a wall light. If you want to Supreme Ghost this section you'll have to find another route. The first time I played this I used a series of Rope arrows up from the Library floor onto a ledge that intersects the bridge behind the sentry. Then when leaving drop down onto the ladder.
Library
The Interpreter's Tower is in the Library. You can drop off the bridge railing onto one of the ladders and down to the Library floor that way. Or, back across the bridge past the sentry around to the Parlor main doorway. Down the stairs and right. Just across a short bit of tile flooring is another stairway down. This leads to the Library. There's really not much here and with two Keepers walking around it's a challenge to scope out. But fun. Anyhow, there's a golden wine bottle and a goblet on an endtable over by the fireplace. The best route I've found for getting there is along the right hand walls from the stairway entrance. In fact, I found it easier to continue all the way to the back wall and then up the dark centre by the Interpreter's Tower to near the loot. Back out the same way. You should at least make a survey of the room and the various books and other reading materials scattered about.
Parlor or Sitting Room
Back up the stairway from the Library. But before we get into the Parlor proper, there's one large golden vase or urn that can be snagged from the stairway across from the secret door. I had to stack eleven or twelve Holy Water vials and three Speed potion vials and four Healing potion vials to get high. You can then lean into the railing between the rampway and the Parlor and grab the vase or urn. Then on up the second set of stairs to the Parlor main entrance. Here's the real challenge of the sanctuary. I'm going to give the people here names. The swordswoman guarding the main entrance I've called Mosley. The other woman standing over in the seating area I've called Calendra. The man closest to the entrance is Loren. The other man is a Keeper acolyte. You may as well douse the fire in the fireplace now. I've tried and have been unable to work this room without putting this fire out. I could get around a bit but a critical move was getting between the grandfather clock and the fireplace and I couldn't do that. I suppose the Night Jewel would do but potion usage is even lower on the shop supplies food chain than Water arrows for me.
A few items of interest throughout the room. There's a light switch on the far wall by the grandfather clock. This switch controls the large, central chandelier and the two lights on the wall by the main entrance. The acolyte has a dagger that's really, really tough to get. Loren has Loren's Statue Key that works the warrior statue in the Pawnshop to give access to the elevator behind. This elevator, by the way, comes down into the sanctuary in the area across from us behind the fireplace. In fact we can only access this elevator from behind the fireplace here since the grate access to the sanctuary in Grindle & Boggs has been blocked off since we've entered. A goblet on the endtable nearest to the main entrance. Another large golden vase or urn on the endtable by the light switch. A small white statuette and another goblet on the endtable between the clock and the fireplace. A golden wine bottle on the endtable to the right of the acolyte. Plus a couple of large purple and gold vases on a raised shelf on the wall of the main entrance off to our right.
Pawnshop Profits Room
If you've soaked up all the literature laying around you know by now that there's some loot in a room above the bridge to the Interpreter's Tower. You'll further have spied this room from atop one of the tallest ladders in the Library. We want to get into this room now before we tackle the Parlor itself. There's a ladder just in front of us. And what you don't know is that near the top of that ladder is a secret book switch that moves a painting aside from a tunnel leading to this room. I had better luck with a Rope arrow than the ladder though. It allowed me to remain on the door side of Mosley. I actually placed the Rope arrow close to the secret book switch from the balcony overlooking the Parlor from the Talisman room. There's a ledge between the lower and higher book stacks that I couldn't get past if I placed the Rope arrow from the entranceway. And before you get started with this remember to bring the basketball along. This is where it's going to come in handy. It can be dropped straight down without bouncing away at any time to free your hands for other tasks. Then when Mosley turns away creep over close to the Rope and drop and jump up onto a Speed potion. The flooring is tile and standing on the potion vial silenced my jumping up onto the Rope. Once on the Rope quickly up to the top of it and poke the secret book switch. Watch the painting slide out of the way. You're safe up here. The people in the room won't notice you. Even if you haven't put the fire out yet. Except maybe this first move. The acolyte mumbles something when I first enter the light in the Parlor. Here's another example of hand-and-eye Thief. You'll want to lower yourself down the Rope a bit and then while looking at the tunnel jump from the Rope to the tunnel. You'll further want to be quiet when you land. Play around with different heights relative to the tunnel and you'll soon have a feel for the best to land quietly. If you land on the shelf instead that's okay too. But to get into the tunnel from the shelf you'll need to back away from the tunnel a bit and then run and jump up into the tunnel. Follow the tunnel around into the Pawnshop Profits Room. Here are four chests with loot and various other goodies. There's also a Fire arrow on the floor against the wall between the couch and the crates. That's it for here, back to the shelf at the entrance to the tunnel.
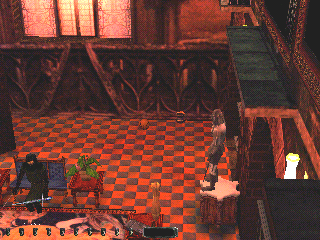 Next we want to deal with the two purple and gold vases on the shelf under the painting of Loren. The closer one can be grabbed from the first shelf as long as the fire has been doused. The second vase is definately out of reach as long as the lights are on. This is what I've carted that bloody basketball all this way for. And this move will probably need to be repeated a few times until you get it right. Throw the basketball at the vase. What you're trying to do is knock the vase off the shelf and onto the floor against the far wall over toward the fireplace. Even better is to get the basketball to end up either over near the vase or close to the wall we're against so we can retrieve it from the Talisman Room ramp. This is something new in this mission. I don't recall be able to move loot items around this way before. We could use Rope or Moss arrows too. If you haven't doused the fire yet you could try to retrieve the basketball and use it a second time on the other vase. I was able to knock the near vase down onto the floor by the entrance one time. I'm sure there a lots of variations to this. Whatever works. I was attempting to Supreme Ghost this room and that's why I tried the basketball. All I needed to do then was return it to the shelf in the Pawnshop. Alas, putting the fire out with a Water arrow busted that. You should also retrieve the Rope arrow lodged in the books near the secret book switch before we leave this shelf.
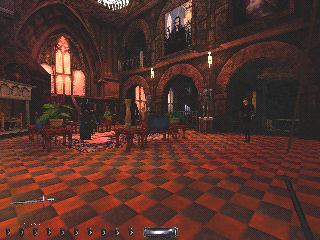
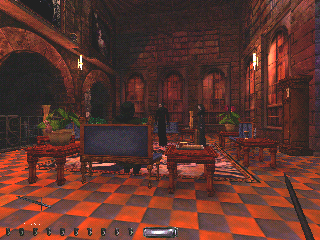 Our next objective is the rest of the loot. To get it all we'll need to turn the lights off. Jump over onto the ladder. When Mosley looks away toward the Parlor entrance down the ladder. Looking straight down when you get to the floor reduces the chance of taking a surprise step getting off the ladder. I actually did this and retrieved the Speed potion vial before moving on. Once on the floor creep straigt back to the corner of the wall with the light switch. This is the next Supreme Ghost bust. Mosley continuously hurled sweet nothings at me while I was up against this back wall whether the fire was doused or not. I'd already doused the fire so the Supreme Ghost was out. Then creep over near enough to turn the lights off. Immediately creep out toward Loren, grab the large golden vase or urn, and Loren's Statue Key, and back to the wall. You'll notice that Calendra has walked over to the light switch and turned the lights back on. As long as we're on this back wall when the lights are on we're okay. Turn the lights off again and creep over behind the couch behind Loren. You don't have time to go all the way but when you're about half way across the couch you should be able to grab the goblet on the endtable just past Loren. I put the Scouting Orb up in the inventory and when the goblet was close enough the Orb shrunk and I knew I could grab it. Hurry back to the wall before Calendra turns the lights back on. Lights off again and past the grandfather clock and grab the statuette and goblet on the endtable near the fireplace while continuing to the left behind the fireplace. You can turn the lights off by reaching through behind the clock from over near the fireplace then get the acolyte's dagger and the golden wine bottle. Depending on where exactly the purple vase and the basketball ended up you probably want to go around behind the fireplace and out the other side to get them. You can move a fair ways along that back wall without disturbing the guests. A word of warning though. When you pick the basketball up Kharras Drag will be automatically sheathed and it's stealth protection gone. Better if the basketball is close enough to the fireplace or the Talisman room to reach. Calendra has repositioned herself further away from the fireplace at each light switch trip so we can't exit the Parlor the way we came in or she'll spot us.
That's it for the Parlor. Up the stairs behind the fireplace to the elevator and up into the Pawnshop. Put the basketball back on the shelf. To get to the final room in the sanctuary we'll need to go over to Grindle & Boggs again. That Rope arrow we left hanging from the overhang at the front of the Pawnshop proves priceless for this. You'll need to turn left along the wall toward the spawned Hammer far enough to close the Pawnshop door. Then back along the wall into the corner and onto and up the Rope arrow. From the top jump off onto the surface by the barrels. We've also left the Rope arrows in the sloped roof so we're easy to get over by the bridge and back down and into Grindle & Boggs. Remember to retrieve the Rope arrows as we move past them on our way. Back into the sanctuary via the grate.
South Cavern
The lower level of the Bell Tower room has a door leading to the South Cavern. To get there down the main stairway under the painting and a sharp right at the bottom of the stairs. Along the tiles a little ways and down another set of stairs. You might want to snuff the candles on the pillars down here too. I had to jump up onto Speed potion vials to reach them though. Then through the doorway to the right of the stairs. There's a Keeper sentry here. But it's pitch black. Grab his dagger. The gate can be unlocked and opened with one of the South Grotto Gate Keys. I preferred the right side of the stairs going up and through the gateway. When the Keeper looks toward the left side of the stairway run up and through and down the steps on the other side. Across the metal catwalk are the South Cavern Doors. Before we go there up and left and into a hole and down a bunch of steps to an excavation with a skeleton and some nuggets. Back up the steps and across the catwalk.
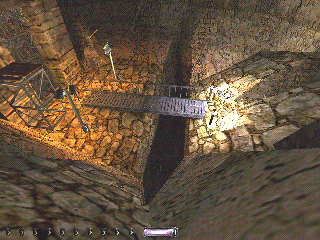 There are two loot masks high up on the walls of this cavern. One over the hole we used to access the excavation. The other up on the roof above the South Cavern Doors. An unusual trick move is required to get them both. A variation of the Quake straff-jump. Sort of a straff-run. It sure doesn't look like it would work but we can move up almost vertical walls with a straff-run combo move. By pressing both the run and straff keys at the same time. Both masks can be reached this way. The one over the doors requires a mantle too and is a little tricky to achieve while straff-running to get up high enough but can be done. In fact you can reach the roof of the cavern and pretty much all the wall surfaces throughout. Go ahead and fiddle with this a bit. It's a treat.
The Amulet opens the South Cavern Doors. Enter and loot the gem eyes from the face on the pillar straight ahead. To the right around this pillar and have a gander at Bathsheeba in all her glory. Don't fret, she won't bother us. There's a bunch of Fire arrows in a nich on the other side of the piller behind where the gem-eyes where. Then on the right wall a couple of books, some Holy Water, a golden candlestick, a slip of paper on the floor and a couple of chests. The righthand book is the one we want to read. The other book triggers the succubus so bear that in mind. The final objective is to read the runes on the back wall. This is the prophecy. Mission complete.
Statistics
Ghost: Success
Time: 4:06:11
Loot: 6,543 of 6,658
Pockets: 31 of 35
Locks: 5
Back Stabs: 1
Damage Dealt: 30
Others Killed: 1
Bodies Discovered by Enemies: 2
Shop Supplies: one Water arrow to douse the fire in the fireplace in the Parlor.
Notes
The back stab and damage dealt is due to killing Gaston the Red. This is a mission objective and therefore exempt from Ghost rules. There is another seventy-five loot behind a window near the "Site 0" sign as detailed above. That leaves only another forty needed here. This could be almost anything but I'm suspecting another couple of Lucky Coin pairs. They're usually worth twenty each. Or maybe a gold coin stack and a goblet -- twenty-five and fifteen. I haven't been able to Supreme Ghost the Parlor or Sitting Room. I'll keep trying though. Just leave all the boxes where they are. The Gas arrow trap in the Deepshine Thieves Guild could probably be worked with some potion vials. I made extensive use of potion vial stacking to get to otherwise inaccessible higher ground. I don't feel really good about this. Perhaps another way can be found. Although, this isn't really any different from box stacking. And now that I'm more aware of the Rope arrow and snow and sloped roof connection I'll be on the lookout for further areas to explore as I replay. I did get up onto the chapel roof. It, too, accepts a Rope arrow. It seems only those around the guild don't.
Thanks, Purah, and the rest of Team Calendra. Another great creation. Wish you all the best with your writing, Purah.
Navigate: Home, Thief, Working Papers, Act I, A meeting with Basso, Act II, Midnight in Murkbell.
Copyright © 2002, 700425 Ontario Limited. Last modified on Thursday, May 9th, 2002.


 Take care you don't get too far in toward them. There's a grate and if you walk on it the Thieves will alert to the noise. Quickly across to the other side. Now's your chance to grab the Broadheads on your way by the archer if you didn't already. Once over to the other side, double back toward the barrel. Look left again and lean in to grab the second purse off the right hand Thief. Then reverse direction and crouch and park it between the double pipes and the wall across from the box. Turn to look toward the fighting. With luck none of the stray swords or hammers will hit you as you lean and reach into the melee to grab the two Healing potions. When I had these two Healing potions, I scurried into the spot the Thieves had been hiding in to get as far from the fighting as possible. Fifty-seven seconds elapsed time to this point. Then just wait until it's over. If the Thieves win, the survivor will eventually return to his original hiding spot so don't be here when he does. Be on the lookout for the Hammer Mage, with the hammer on his belt, coming down and mixing it up with the survivors. You'll want to snatch his hammer if he does.
 First stop, the Pawnshop. Beware any surviving Hammers patrolling by here. Just work around them. The Skeleton Key opens the Pawnshop door. If you don't have the Skeleton Key you'll get another chance to get here from the Keeper Sanctuary. Or, if you're skilled at Rope climbing, you can get the Pawnshop key from the attic now. It doesn't matter when you do the Pawnshop. There's nothing in here that you need to proceed now. A jewelled sword on the wall worth twenty-five gold, twenty-five gems, and twenty-five goods. The Basketball. An empty barrel. Two platters worth ten goods each. Four goblets worth fifteen goods each. A golden candelstick worth fifty gold. A silver coloured nugget worth fifty gold. A necklace worth twenty-five gold and twenty-five gems. A ring worth fifty gold. A large hammer worth five gold and five goods. A small hammer worth five goods. A Water arrow, a Speed potion, a Flare, a Gas Mine, and a Flash Bomb. A cashbox behind the counter. Just behind a curtain three alcoves. The first of which has a warrior statue, a lock on the wall, and what looks like elevator flooring behind the warrior. Part way up the stairs a golden urn worth fifty gold. Run and jump over the top step to avoid a spitball trap. A note from Keeper Orland to Keeper Loren regarding his returning with the Amulet and Mercedes having left the Keepers and probably Gaston the Red's Deepshine Thieves Guild in this area. A golden candelstick worth fifty gold. Keeper Loren's journal admiting he's in deep trouble with Orland for not having the Amulet. He talks a bit about the South Cavern Doors and Orland's opening them at midwinter. Sounds like the Amulet may be some help with opening these doors. He talks also of the North Sanctuary Doors. A bed, a desk, a fern, and a lit fireplace. A vase on the mantle worth fifty goods. A pair of Lucky Coins on an endtable worth twenty gold. Also on the endtable a small statuette worth fifteen goods and the Fire Talisman but it's nailed or glued down to the table. And finally another door. I could see from the stairs there is another level, the attic. Here's hoping there's another stairway or ladder behind this door. Yes, a ladder. Upstairs is a catwalk attic with an empty unlocked chest, another golden candelstick worth fifty gold and a Pawnshop Key.
 The window behind the candlestick opens from the outside to get the Pawnshop key if the Skeleton Key is not available. In the screenshot are the two Rope arrows required to scale the side of the Pawnshop to get to the attic window. One in the eave and the other in the roof beam that extends out over the attic window. Stand as far away from the Pawnshop to shoot this one. The arrow needs to extend out as far as possible to facilitate passage between the wedge created by the two buildings. I was able to retrieve both Rope arrows. The highest by retrieving the arrow while hanging from the Rope and falling onto the second story ledge of the building next door. Then jump over to the lower Rope and down. Place another Rope arrow close to the lamp post. Up this one to retrieve the arrow in the eave, swivel and retrieve this one falling onto the lamp post. Then slide down onto the ground.
 Leaving the Pawnshop straight ahead up a ramp and sharply right back along the roof by some barrels near the Pawnshop. A couple of Thieves standing around a fire, a couple of bedrolls, a barrel, and a golden wine bottle on the ground. One Thief has a Speed potion. The golden wine bottle worth fifty goods. One or two Hammers will pass you and spot these Thieves and they'll fight it out. Just a little further on a wooden door that a Hammer Mage goes into and then comes out again. Generally he'll go back further away still but sometimes he goes on toward the Thieves. There's another Hammer Mage facing more or less toward this door. The door is locked but it can be picked. There are a couple of different paths to proceed from the Thieves. If you have the Skeleton Key you can work your way over to this door. There's a shadow running diagonally to the door from the building opposite. Go all the way to the top of the stairs, unlock the door with the Skeleton Key and out onto the roof. Then over to the edge, slide off onto a light fixture and slide again off onto the catwalk. Alternately, I've just noticed that most sloped roofing in the mission accepts a Rope arrow. There's a small peaked roofed building between the Thieves and the wooden doored warehouse. A Rope arrow there gains access onto the sloped roof and on up onto the ladders and catwalks.
 I'll lay this Easter Egg out now. If you're Ghosting this cannot be part of it since a window must be broken. Firstly get on top of the warehouse with the wooden door. There's a peaked roof over the stairway that we're going to shoot a couple of Rope arrows into. Approach this edge. The screenshot shows this roof with the arrows but from the perspective of the third floor ledge of the warehouse opposite. That's where we want to end up. And you'll have to play around with the best height on the second Rope to jump to the ledge from. It can be done with no injury. Then around the corner to a window. Break the window with the blackjack and enter.
 There are a few things in here. The golden urn or statue worth seventy-five goods is the reason this mission cannot be Perfect Thiefed. The "Site 0" sign can be "unlocked" with the Amulet, you'll hear the unlocking sound. That puts a gear on the floor by the pails and broom that isn't there at first. Poke the gear and the Broken Arts Easter Egg plaque is brought to life in the colourful corner along with one hundred Fire arrows. The screenshot can't be read so I'll cite it here: "Calendra's Legacy 2002. Any resemblance of Mercedes to Broken Arts is purely coincidental. :) This mission is dedicated to Nicole. Have fun w/ this 'Ultimate Easter Egg'. This may be my last offering so: ave atque val. And try not to cross the beams."
  That's about it for here. There's another Fire arrow on the floor beside a fountain. Also the fountain is odd. If you try the lockpick on the fountain you'll hear the unpickable sound. Or maybe it's the already unlocked sound. And although the keys and the Amulet behave as if they're unlocking something there is no sound associated. Beyond this I've not discovered any purpose behind the fountain. Reload back to the bridge area just over the peaked roof and catwalks. The last screen shot is a method to get to the window and is a whole lot more simple. Just place a Rope arrow in the sliver of snow on the ledge.
 Now's the time to get Mercedes into the mission. Go over to the centre of the bridge. Mercedes will come from the other side and cross the bridge. She'll eventually work her way down the stairs beside the bridge and over to a metal barrel with a fire in it. There's also a paganesque guy down by the fire. When Mercedes approaches he takes off. I'm not sure exactly where he goes. Once he went between Grindle & Boggs and the Hammer Seminary to a pile of snow and collapsed. Go down and stand near the fire. Have a little chat with Mercedes. I suspect this chat doesn't start up until the paganesque fellow reaches his destination. When you're finished she'll take off toward Grindle & Boggs. She'll dispose of the Hammer sentry there. Then she'll just stand there and wait for you to open the Grindle & Boggs gate so she can go in. But before we deal with Mercedes and Grindle & Boggs I'd like to take care of the Deepshine Thieves Guild. That will clean up this entire surface area of the mission so we don't need to come back up here and can finish off in the sanctuary. Although I am hoping to figure a way to Supreme Ghost an area of the sanctuary that includes the Pawnshop and will probably involve coming back to the surface for a short while.
 There's another Rope arrow we'll need to get into and out of the Pawnshop. There's an overhanging feature above the Pawnshop door that includes a small roof. We want to place a Rope arrow in this as close to the wall and ledge below as possible so we can get onto it by the barrels and down and back up. There's a Hammer that spawns over by the lamp post outside the Pawnshop door that complicates access via the front door. This Rope arrow is just enough to avoid notice by him. Okay, similary for the basketball and the box down by the ambush area. This box is a little more rickety than the others so I carried it over the peaked roof fearing it may break if I tossed it around much. The basketball can be tossed up onto the peaked roof behind the Pawnshop box we tossed up there earlier. That way we need only climb the Rope once to get all three items over the peaked roof. Go ahead and tote all this stuff down by the Grindle & Boggs gate.
 Before we open the gate for Mercedes we've got to negotiate the spiders. Just out of this room is a corridor leading off to our right. A spider is down near a powderkeg at the end of this corridor. There's plenty of shadow to work your way down. Before going any further let's lay out the mechanics of spiders. The swivelling spider has a neutral position. This is the orientation he has usually for the longest periods. In this case slightly away and to our left. There's more. The spider's sensitive or red areas are at his neutral position rear. This red zone does not swivel with the spider! So, ignore his movements. The spider's dead or green zone is from his direct right, all the way around his front to about three quarters of the way down his left side. You can do pretty much whatever you like in the green zone and he won't see you. In fact, you can butt heads with a spider from the front and he won't notice you. Peek out around the corner by the powderkeg and look left. The other spider is down there and faced away from us. That's a problem. We're in his red zone. So, we'll have to remain in complete shadow. By the way, the spider's red zone seems to extend to extreme distances. We're well within their range here. What we want to do is follow the shadow out to the corridor we can see to our right. The powderkeg is in our way. And the corridor ceiling is too low for us to jump up onto the powderkeg to get by it. We'll have to move the powderkeg to make room. Before going any further there's a Water arrow in a pool opposite the room we entered. The further problem here is a Supreme Ghost buster. Saddens the heart. I tried several times but was unable to move the powderkeg without alerting the spider. The corridor is actually a ramp also and when the powderkeg passes the transition between the ramp and the flat flooring beyond, it falls just a little bit and makes a slight noise. Too much for the spiders though. So, what I did was shoot a Moss arrow at the base of the powderkeg. I was then able to push the powderkeg aside enough to sneak out of sight of the spiders in complete shadow.
 Well, well, well! I did it! I'm playing along while I write this up. And I sat here stewing about having to use a Moss arrow to get by these spiders. This busts the Supreme Ghost. If only I could move the powderkeg further up the ramp. Leaning? Nope. Throwing stuff? Nope. Too much noise. Then, wham! Aha! Back to the Pawnshop. Let's play some basketball No Moss! If you compare the two screenshots showing the powderkeg you should be able to spot how far back up the ramp corridor it's been moved. I was a little worried I'd have to move it so far that it would hit the spider and alert him but not quite. But there's more still. I had noticed that the spider issued forth with a shrill chirping when I first tossed the ball. From then on he accepted all the bouncing. I decided this was a level one alert and therefore a Supreme Ghost bust. Let's see if we can move this powderkeg without alerting this spider at all. First off the powderkeg has spawned as if it were sitting on and level with the next hallway rather than the corridor ramp. We want to get it back up the ramp. I'm guessing the alert off the first bounce was due to the powderkeg tilting to be flat with the ramp. So, inch over in the shadow and just barely touch the powderkeg. It should tilt. Now get set to do the basketball bouncing. This work would go a lot more quickly if we threw the ball against the far wall so that it bounced off that wall directly to the powderkeg. This alerts the spider again.
 So I want to make the basketball-powderkeg contact a little less violent. To do this I first bounced the ball off the floor and into the far wall and back to the powderkeg. This seemed acceptable to the spider. Alas, the force against the powderkeg is less this way and it required many more shots. No matter, the goal is Supreme Ghost so it's worth the extra time. If you're lucky, you'll find an orientation like the one in the screenshot with the basketball coming to rest within reach and sight without having to move from the position you were in or even move your eyes from the direction you were looking when you threw it. If you don't have to move your eyes then it's simple to just retrieve the ball and throw it again in exactly the same spot. This meant I could repeatedly retrieve and rethrow the ball without changing my orientation. Also without worrying about saving between throws in case the ball ended up out of reach. Finally, when the powderkeg gets lit up near the right of the spider we're almost there. A few more tosses and we can inch over to the powderkeg and slide around it to it's left and across the hall and on toward the stairway. Remember to bring the basketball with you. I want to try something with it in the sanctuary.
 Now put a Rope arrow into the wooden beam overhead and get up onto the stone beam. Work your way down to the fireplace end of the room and place another Rope arrow in the wooden beam there so you can drop onto it and lower yourself down to the shadows beside the fireplace. I don't suppose it matters which side of the fireplace we do first. I got two of the plates from behind the Keeper side and the other from beside the woman, but on her right side, not her left. Then reclimb the Rope and retrieve the Rope arrow and across to the other side of the fireplace and repeat. You'll have to remain out of the light from the fire in the fireplace to lean and reach around the corner to get the righthandmost plate. The Keeper is angled slightly to that side of the room and will see you if you get into the light from the fire. Also, the patrols routinely come through the Dining room so keep an eye out for them. There's one last thing to take care of while we're here. The rightmost window can be opened. This opens a secret door across the sanctuary that we need opened. I placed a Rope arrow in the wooden pillar at windowledge height, climb the Rope, open the window, climb down the Rope as far as you can and still retrieve the Rope arrow, and, finally, retrieve the Rope arrow falling to the floor.
 Courtyard
 Interpreter's Tower
 Next we want to deal with the two purple and gold vases on the shelf under the painting of Loren. The closer one can be grabbed from the first shelf as long as the fire has been doused. The second vase is definately out of reach as long as the lights are on. This is what I've carted that bloody basketball all this way for. And this move will probably need to be repeated a few times until you get it right. Throw the basketball at the vase. What you're trying to do is knock the vase off the shelf and onto the floor against the far wall over toward the fireplace. Even better is to get the basketball to end up either over near the vase or close to the wall we're against so we can retrieve it from the Talisman Room ramp. This is something new in this mission. I don't recall be able to move loot items around this way before. We could use Rope or Moss arrows too. If you haven't doused the fire yet you could try to retrieve the basketball and use it a second time on the other vase. I was able to knock the near vase down onto the floor by the entrance one time. I'm sure there a lots of variations to this. Whatever works. I was attempting to Supreme Ghost this room and that's why I tried the basketball. All I needed to do then was return it to the shelf in the Pawnshop. Alas, putting the fire out with a Water arrow busted that. You should also retrieve the Rope arrow lodged in the books near the secret book switch before we leave this shelf.
 Our next objective is the rest of the loot. To get it all we'll need to turn the lights off. Jump over onto the ladder. When Mosley looks away toward the Parlor entrance down the ladder. Looking straight down when you get to the floor reduces the chance of taking a surprise step getting off the ladder. I actually did this and retrieved the Speed potion vial before moving on. Once on the floor creep straigt back to the corner of the wall with the light switch. This is the next Supreme Ghost bust. Mosley continuously hurled sweet nothings at me while I was up against this back wall whether the fire was doused or not. I'd already doused the fire so the Supreme Ghost was out. Then creep over near enough to turn the lights off. Immediately creep out toward Loren, grab the large golden vase or urn, and Loren's Statue Key, and back to the wall. You'll notice that Calendra has walked over to the light switch and turned the lights back on. As long as we're on this back wall when the lights are on we're okay. Turn the lights off again and creep over behind the couch behind Loren. You don't have time to go all the way but when you're about half way across the couch you should be able to grab the goblet on the endtable just past Loren. I put the Scouting Orb up in the inventory and when the goblet was close enough the Orb shrunk and I knew I could grab it. Hurry back to the wall before Calendra turns the lights back on. Lights off again and past the grandfather clock and grab the statuette and goblet on the endtable near the fireplace while continuing to the left behind the fireplace. You can turn the lights off by reaching through behind the clock from over near the fireplace then get the acolyte's dagger and the golden wine bottle. Depending on where exactly the purple vase and the basketball ended up you probably want to go around behind the fireplace and out the other side to get them. You can move a fair ways along that back wall without disturbing the guests. A word of warning though. When you pick the basketball up Kharras Drag will be automatically sheathed and it's stealth protection gone. Better if the basketball is close enough to the fireplace or the Talisman room to reach. Calendra has repositioned herself further away from the fireplace at each light switch trip so we can't exit the Parlor the way we came in or she'll spot us.
 There are two loot masks high up on the walls of this cavern. One over the hole we used to access the excavation. The other up on the roof above the South Cavern Doors. An unusual trick move is required to get them both. A variation of the Quake straff-jump. Sort of a straff-run. It sure doesn't look like it would work but we can move up almost vertical walls with a straff-run combo move. By pressing both the run and straff keys at the same time. Both masks can be reached this way. The one over the doors requires a mantle too and is a little tricky to achieve while straff-running to get up high enough but can be done. In fact you can reach the roof of the cavern and pretty much all the wall surfaces throughout. Go ahead and fiddle with this a bit. It's a treat.