Thief II FM -- Calendra's Legacy: A Winter's Eve
Okay, time to carry on with the second part of this Fan Mission. I restarted from my near Perfect Thief completion of Act I, A Meeting with Basso. Also carry on with Garrett difficulty.
I've been delaying writing this because I just can't figure out the best way to proceed. Just the minimum? There are so many things that can be done that aren't objectives. Plus they can be done, for the most part, in any sequence. Really open that way. Well, I can get started. The beginning pretty much has to occur the same way every time. Actually, I've decided to try to play it as the clues come up for the sake of this write-up. Remember we're Ghosting this so no weapons use. Basically unseen and unheard. I also try not to use my equipment either.
Act II: Midnight in Murkbell
Objectives
Don't kill any locals, steal the Baerulian Diamond from the Watercrest Museum, bypass the musuem's vault high security to get the Red Arrow painting.
Loadout
Garrett's Tip is about a magic dagger at the Falstaff Wizards' Guild. When you cycle through your inventory and come across this tip, getting this dagger becomes an objective. So, get it or not. Your choice. I got it. Doesn't matter, we're going to get the dagger anyhow. We have one hundred more to spend than we finished Act I with. Ah, Rope arrows. Good. Buy four Water arrows, two Scouting Orbs, five Flares, two Rope arrows, and the only thing we can afford now is a single Healing potion. Flash Bombs imply Ghost failure so we'll pass on those and the Speed potion.
 Opening Scene
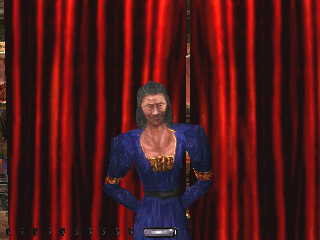
In a small room with the Duchess. Man is she ugly! Woof! Five-o'clock-shadow too. Talk about death warmed over. Change in plans already. She's only appraising the Cylix, and not buying it! The Cylix needs to be delivered to Cardinal Alcandor at St. Trinett's Cathedral. And we've only got ten minutes to get there. The map's got a dotted red line showing us the way. The Duchess gave us twenty-five thousand worth of diamonds as a fifty percent downpayment. That's enough to get us to the church. On time? We'll see. Don't let any of the priests see us either.
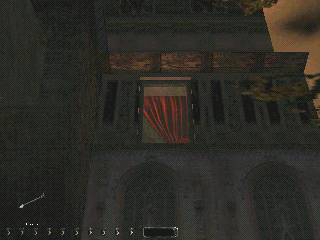
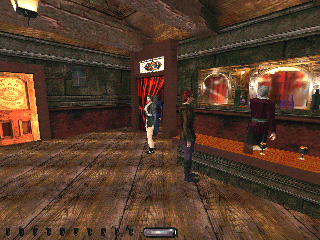
 Twenty-five grand is plenty to get us to remain focused on our objective but I did notice the frilly undies on the waitresses in the French maid outfits as we went through the Black Die Pub out onto the balcony. Read the note on the bar before leaving and you'll have no need to return upstairs here. Nothing is real loot. So, the drunk downstairs likes cats. North from the Black Die. Turn east around the Fish Monger's and over and south across the Gallan Bridge. Just on the south side of the bridge turn right down along the canal. The canal turns south here so continue to follow it past the front of the Watercrest Museum. When the canal turns east again jump in and swim west. There's a chest at the bottom of the canal under a dock with a single Water arrow in it. A little further west to the Old Tower. There's a hole in the wall of the tower we can enter through. There's a Moss arrow on the top step. I opened the door through to the Cathedral grounds and waited until the second priest walked by. He had the Balcony Key. Exit the Old Tower right and around the Cathedral to the southwest side noting the ladder up to the balcony on the northwest corner. Look up to see a window above with a wooden eave. Rope arrow up and open and enter through the window. We've got a few minutes to spare so let's try looting the Cathedral first. The priests get agitated when the alarms sound and start running around and make it all that much more difficult later. Also, while we're in the Cathedral, try to pay attention to the sound of the priests' footsteps as they make their way around. This will come in handy later when deciding whether we'll have a decent chance of moving from place to place.
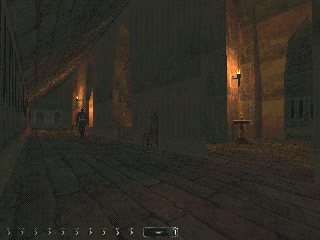
Keep an eye out for a purse on one of the priests worth ten gold. I've only ever come across him upstairs. While upstairs, get the golden vase on a pedestal near the front worth one hundred gold. Over and down the stairs. These guys are pretty much blind. What have they been doing to themselves? I've run right by them within a few feet but staying close to the outside edges of the building seems to minimize the light. There are a couple of good spots to stop and wait while the priests pass by. The first landing and in the corner between the balcony stairs and the wall. They may mumble while passing but we'll be okay. Down to the balcony level and unlock the balcony door on our left and open and enter through the door on the right. This is the pulpit. There's a golden candlestick worth twenty-five gold and a jewelled goblet worth forty gold on the pulpit. Slide off and down to the central portion of this tiled floor so now creep with no footsteps.
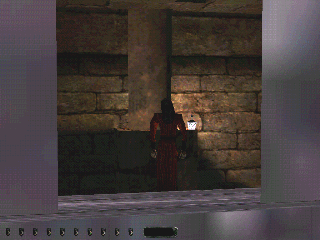 Enter the room to the right. A Canal Gate Key. This I know where to use. I had picked a lock on a gate in the canal but couldn't pick a second one in my first attempt to get here. Professor Ately T. Benjamin's journal. The three Eyes were made for King Ebendizgral of the Dead Lords Halls of Gillian-Shith. The first, Ghoul, draws the dead to the bearer or the latest bearer if cast aside. The second also draws the dead but as partners. The third draws the life from the bearer. Perhaps keeping them wrapped and deep in a pack may reduce or eliminate their effects. So, better be on the lookout for these Eyes while we're working around the town. Treatise on the Dead by Niblung. Tibetia-Leng ruins. Niblung's aide Davis. The Vampyre of Chillington Moor. Greater vampyres sometimes appear as mist. Lesser vampyres degrade to something zombie-like. Fire and Holy Water can combat them but Holy Water is more effective, especially when Fire has been countered by the vampyre casting a spell. Let's also keep an eye out for Holy Water since it sounds like we may have use of it before we're done. Continue on through the other door down and take a peek at Alcandor behind the locked steel door in the basement. If you zoom over toward him you should be able to make out an orange or red key on the ledge just to his left.
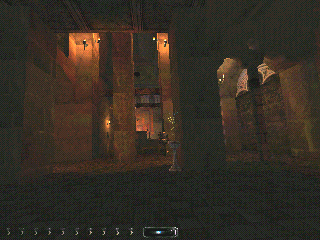 Up and out and toward the front of the building. You can stop on the second step coming out of this room and lean forward and see past the drapery. Also, I had difficulty heading straight for the front. So, instead, I crept over to the pulpit, mantled up, and went back through the door I'd entered through. Then up and down the stairs to the front. There's plenty of shadows here. Two golden candlesticks worth twenty-five gold each on tables with candles on either side. I took the time while crossing to the second candlestick to open the front doors and have a look at the mage sentry. Then back up toward the pulpit on the east side. In the first room a pool or bath with a Water arrow.
Then into the second room, read the Cardinal's 'commandments' by the chair at the confessional window, and then through and into the Cardinal's room. We can hear the Cardinal's voice saying he's in the room below us but that we should drop the Cylix in the chute in the corner. Loot the room first including the goblet on the small windowsill that opens a handy secret escape behind a painting. Another Balcony key, a chest with a stack of coins worth five gold, three candlesticks worth fifty gold each, and a Necropotence Tome of spells on the bookshelf. The Cardinal's journal. He's taken some sort of potion and thinks himself now a true Wizard. We suspect he's just another Vampyre. The Amulet setting for the Eyes is lost in the canal. This Amulet is a powerful tool. The Psychic knows something about this. Four relics somewhere in the city. The Eyes plus what? The Grail of the Dead being brought to the city by a southern count. Is this the fourth relic? Jortul's mummy on display in the museum. Mission time to this point 16:59. Don't let the clock run past this point. In fact the church bells were ringing as we entered this room so we ran over to the chute and dropped the Cylix right away. Doublecross! Jump up into the secret exit where's it dark and when there's no-one patrolling outside jump down. Now fetching our stuff from our rented room at the Old Widow Inn is also an objective. Take care just after dropping the Cylix. A preist usually runs into the room very quickly and looks about and then leaves. So, if you haven't completed looting the room first, drop the Cylix and get into the secret window and wait for the priest to come and go.
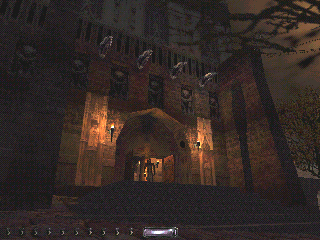 Take care now. The police treated us as just any other pedestrians before but now they know we're the thieves who set off the Cathedral alarm bells. There's a golden bottle worth fifty goods and a wine glass worth fifteen goods on a stained glass windowsill outside along the west side of the church. Another wine glass worth another fifteen goods on another stained glass windowsill on the east side. There are cops patrolling around the Cathedral now too. I got three Broadhead arrows from a patrolling police archer over near the Old Tower. We can go completely around the Cathedral on the outside if we're sneaky enough. If you didn't get the Balcony Key off the outside patrolling priest earlier, now's your chance. Also note that even though we've found two Balcony Keys we now have only one. The other one disappeared when we unlocked the Balcony door. Back to the Old Tower. What next? At least we can take a more leisurely pace now. Check the maps again.
Let's finish off with this end of town. There's an archer with three more Broadheads that comes down Cathedral Street from the Cathedral. Watch out for the patrolling swordsman with the lamp. While on our way from Cathedral Street we stopped in at Vilhrath's Gardens. There's a switch near the gate that turns off one of the nearby street lights. The garden's gate can be raised by a button on the far, inside wall. I used a Broadhead arrow for this. The statue is holding a jewel in his hands. If you recall, the Eyes have special traits. We want to make sure this Eye is not the Eye that drains our health away. The first Eye is named Ghoul so we'll know if this is that one. The second and third are unnamed so the only way we'll know them apart is the effect it has. Grabbing this one we find out it's the Eye of the Lich. So, it's not the Ghoul Eye and it may be the third, health draining, Eye. Drop it right here and leave it until we find out which it is. There are twenty-four Water and three Moss arrows, a purse with five gold, and a Holy Water Vial. Coming out, we proceed down Hollows Lane. There are archers patrolling the boardwalk down here. Plus we want to take care of the Towne Hall Clock guard house and the Meepwood Bridge.
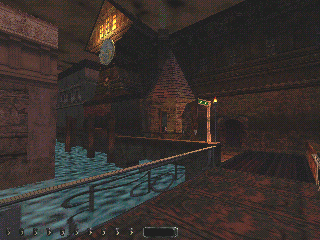
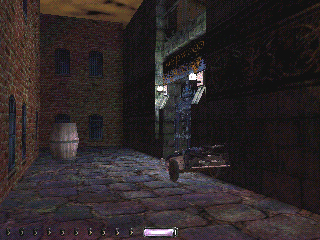 Also there's a street light across the bridge that can be turned off. The archer was waiting at the Hollows Lane end of the boardwalk. Three more Broadheads. Then on the boardwalk over to the Towne Hall. The Clock guard house has two sentries. One, an archer with three more Broadhead arrows. There is also a golden wine bottle worth fifty goods and an apple sitting in the second windowsill of the guardhouse. The second cop has a Meepwood Bridge Key. And the bridge lock is at the guardhouse too. The archer can be picked while still in shadow by leaning right to the window from the bottom of the steps. Crouch under and past the windows. Stay just out of sight of the second guard and when you notice him turn away through the Scouting Orb lean in and snag the key. Stand and when he turns away again lean over and unlock the bridge. Finally, when he looks away a third time run over to the bridge. The bridge is metal so we'll have to sneak across with no footsteps. Plus there's a little ledge that can't be crouch crept over. A short, angled crouch run will get past it. Just short of the far side of the bridge is a spot with complete shadow. The tower to the right where we come out at the Meepwood Cemetery has a locked door that can be picked and inside is a switch that turns the street lights off in this area. There's a Water arrow in the canal here. Jump over the wall. And a chest at the bottom of the canal at the very end of Hollows Lane.
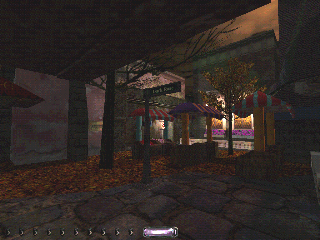 That pretty much clears out the south side of the map. What now? Let's see, our room at the Old Widow Inn, the Watercrest Museum for the painting and the diamond, and the Falstaff Wizards' Guild for the magic dagger. Let's check out the Museum. It's closest. That's very nearly due west of the canal at the end of Hollows Lane. We must have jogged a little to the right because we came out on a pebbled shore. There is another water arrow in the water here. And some stairs leading up to the Dark Rose Market. We can see where we are now on the maps. This is quite close to the Museum. As we turn to our left at the top of the stairs we see the Psychic's staight ahead. May as well check this out while we're here. The door is locked but we can pick it. Ah, a Potion of Black Lotus Nector. If memory serves this was worth three thousand at the loadout. And one each Speed and Ivisibility potions on the same shelf. A scroll on the small table. It's for us. From the Psychic in Lampfire Hills. Take what we want and gaze into the Crystal Ball. It will guide us. The Crystal Ball says "A Trunk in an Underwater Grotto Fills the Orb." A couple of ornately carved chests. One with a sack with forty goods inside. The other with a single Holy Water vial. Also another sack worth forty goods on a second shelf. We poke around in here for a little while but find nothing else. On to the museum.
Out of the Psychic's and around to the Watercrest Museum front doors. But let's have a look around the building before we go in. On the west side the Museum Shed. It's locked but we can pick it. Inside a locked chest, an empty barrel, and a handsaw on the floor. Picking the chest we find an Ultraviolet Ruby Lensed Eye of True Seeing. This is what I'm talking about! Now we're getting some where. We have no idea what this may be useful for, the museum vault security maybe, but we'll tote it along and see. At the northwest corner of the museum we spot a closed in doorway with a single Moss arrow inside on the floor. 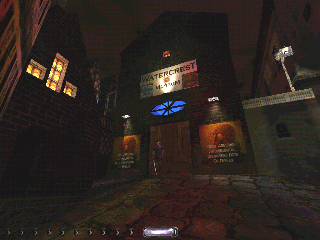
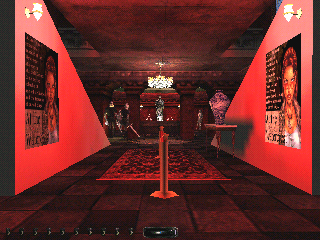 Trying to work our way around the north side of the museum building there's a single cop swordswoman right under a streetlamp and although she pivots back and forth there's no way to get by her. Let's try around the building just north of here. But this is the way we came on our way to the Cathedral. Working around the building north of the museum and coming out just south of Gallan Bridge is a doorway with a switch that turns the street light off here. Nope, can't get around the north side of the museum this way. Back the other way. We have to go all the way over to the Dark Rose Market and come out right beside this same streetlamp sentry southeast of the museum. But from here we can sneak by her when she looks mostly away. She mumbles but we're okay. We spot a window high up on the east side of the museum but no clear way to get to it. At the southeast corner of the museum a railing and a ledge around the second floor of the Cafe de l'Eau next door. Following this ledge we come out into a tower on the south side of the market with a chest with a Rope arrow in it. Okay, back to the museum front doors. There is a spot right in the centre where the two doors meet in full shadow. Ugh! Look at all that tile flooring. And there are a couple of cops patrolling inside too. One's in training for the Olympic Speed Walking race and the other is carrying a lamp so there'll be nowhere to hide. Looks like he's got a red key on his belt too. We watch these two for some time. Well, I'm going to explore some more before I venture in here. I can see some torch lighting we could douse with Water arrows but it seems mostly electric. And with that lamp guard it may be pointless anyway. Also, I'm one of those frugal thieves and I'm not going to start slinging Water and Moss around on these tiled floors until I've checked a bit more first.
Looking at the map, there's still a bit of this island we haven't had a look at yet. The northeast corner. We make our way back over to the Dark Rose Market. There's an apple on top of one of the stalls. And there's another stairway going down alongside the one we'd come up when we first arrived here. This one leads to another beach with a rowboat but nothing else interesting. Back up and around to the spot we originally came out of the canal. Looking further north there's a ladder going up the side of a building. Into the water again and mantle up onto a small stoop and onto the ladder. At the top another door. Pick the lock and go inside. A diary. Someone from the Cathedral has been asking if anyone's been trying to sell a necklace. A little further along a dark hallway is an open window. And we can see a clothesline just through it. There's a ledge on the building at the other end of the clothesline. Scamper carefully across the clothesline. Working around the ledge we come across a partially open window with Lucky Coins worth forty gold. Back over to the Dark Rose Market and northeast. We come out on a small bit of street jutting out into the canal. This may be the other end of the boardwalk we'd used to get from Hollows Lane and the Towne Hall. It ends just across the canal from here. Back and work around westward. Well, now, here's something.
A balcony above left with a vase with flowers. A Windmill across the canal. And a small islet in the canal with some machinery and a lever. I can't readily see any way to get up to the balcony with the flowers. But I can see that it seems connected to a catwalk over the canal that ends in a tower on the other side. There's also a ledge around the building on our right that looks like it may continue on around the canal side of the building. Let's see what this lever does first. We jump down onto the Water Pump islet and pull the lever. The Canal Gate just east of the Water Pump slides aside. We mantle back up onto the ledge we'd just dropped down from. Let's try the ledge around the building. We jump up onto the ledge and creep around to the other side. There's a bridge running over the canal to the other side. This bridge runs over the Canal Gate we've just opened with the lever. Beside the Windmill is a small garden. On this side there is a doorway. And a golden plate worth fifty gold and goblet worth fifteen goods and a purple fruit on the ledge of the canal. Getting back onto the bridge is tricky. We've basically got to make a leap of faith. That is, jump out over the water towards the bridge and at an angle. When we're close to the bridge we've got to reach out and grab the edge of the bridge and mantle back up onto it. Then across to the small garden beside the Windmill. There, hidden amongst the bushes, a Moss arrow.
Getting back up onto the bridge from here is no less tricky but it is easier. This time, nuzzle up as close as you can to the Windmill wall and the water's edge. Then lean left then mantle up onto the bridge. When we get back up notice a very narrow ledge along the canal side of the Windmill. We can scurry across this. I know it looks too small but if we keep ourselves flat against the Windmill we can do it. We are master thieves after all. Okay, beside the Windmill. There's a swivelling cop swordsman here. Let's see if we can get up to that balcony back over on the south side of the canal. When the coast is clear we work our way around the tower with the catwalk over to the balcony. There is a setback here. Another catwalk connects this tower with another tower beside the Gallan Bridge. We lean out and spy a doorway in this western tower. Let's sneak out and see if we can get into that tower. The sentry now guarding the north side of the Gallan Bridge turns facing north away from us every now and then and we should be able to sneak over to the doorway then. Yes, but it's locked. We go ahead and pick the lock and enter. We noticed the archer sentry at the Gallan Bridge also had a full quiver. Using the Scouting Orb from the doorway we wait until she turns away again and flit out and down to her and grab three more Broadhead arrows and scurry back through the door. A room with a sack, a lamp, and several large crates. Also a ladder going up behind a pile of two crates. Up the ladder.
The west tower upstairs is an empty room with three small windows. The west window looks right out onto the Gallan Bridge sign. We notice another archer sentry on the catwalk over to the east tower. We grab three more Broadhead arrows from her as we sneak behind her over to the east tower. This east tower upstairs is a mirror image of the west tower. One window looks out over the Windmill and another up towards Cloaca Court. There is an unlocked chest here with a single Broadhead arrow in it. There's the catwalk over to the balcony across the canal. But there's also a gate and it's locked. The archer up here comments on the noise of our picking the gate lock but otherwise does nothing. We continue across the catwalk to the balcony. Whoa! A body on the balcony floor. With an envelope in his hand. An invitation to Dr. Provost to visit the Watercrest Museum to examine the newly found Dr. Croft artifacts. Looks like all we'll need to do is show this invitation to the guards at the museum and they'll think we're Dr. Provost and let us amble around freely inside the museum. That's a break. We really weren't looking forward to trying to sneak around the guards in there. The vase with the flowers on the balcony railing is worth one hundred goods. And there's a golden goblet on a small table worth twenty-five gold. We slide down off the balcony railing and head back over to the Watercrest Museum.
Yes! The guards think we're Dr. Provost. Haha. There are single Water and Fire arrows on display on the wall at the north end of the first floor. A fountain and some statues. The sword on the wall is ceremonial. The relic display room back here is loaded with loot worth three hundred gold, three hundred gems, and one hundred fifty goods. Also Jortul's Mummified Head. Don't forget the masks on the walls. There are some other items here but we're sure Dr. Provost wouldn't be impressed so we left them there. On up to a small office on the second floor with a note for Dr. Provost. The vault is on the fourth floor. Okay, up to the third floor. There's the diamond at the south end and behind a painting worth one hundred gold the window we'd seen from the alley below. We unlock it. It may prove useful as a quick escape route after we loot the vault. And there's an elevator up here that will probably go up to the fourth floor.
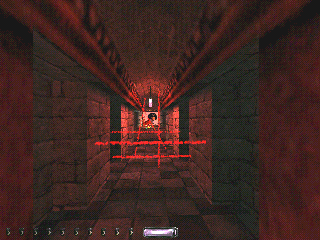 There's an archer sentry up on the fourth floor looking away out a window. Three more Broadhead arrows. Also a red button to turn the diamond alarm off for cleaning. Okay, let's clean it. And a gate with a lock. We cannot pick this lock. So, we assume the red key on the lantern guard's belt will work here. We've got to go back down to the third floor to get the diamond and will try to get this key there. Ah, an ultraviolet security system. That rings a bell. Yes, the Ultraviolet Ruby Lensed Eye of True Seeing. Back down to the third floor and snatch the diamond. Then back into the elevator and wait to see if the lamp guard comes by. He didn't come close to the elevator so we hussled down the stairs to the third floor and waited beside a chair right at the bottom of the stairs. When he came down we were able to grab the Museum Vault Key. Back up to the fourth floor and unlock the gate to the vault. Let's try out the Ultraviolet Ruby Lensed Eye of True Seeing. There are the beams of the antipersonnel system. We can duck the first, higher beam. The second beam looks like it doesn't quite make it all the way to the left wall. Flattening ourselves to this wall we inch past the second beam. The path to the Red Arrow painting and the rest of the loot is fairly easy from here. Another five hundred fifty gold, two hundred fifty gems, and fifty goods. Then back out the way we'd come in, back over to the elevator and down to the third floor. From there to the window and slide off the windowsill and down to the alley along the east side of the museum.
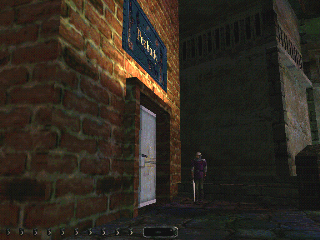
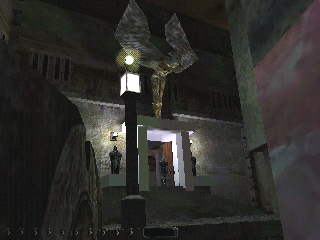 Now what? More exploring? The Vampyre Blade at the Wizards' Guild and the Old Widow Inn rented room are still outstanding. Let's check out the Wizards' Guild. Over and into the canal by the Water Pump and swim east. Mantle out by the north end of the boardwalk by Peabody Street. There's an archer sentry here but she doesn't have any Broadheads. I can also see another sentry in front of Peabody's. When the archer looks away we sneak over past the Peabody sign. When she looks away again we sneak over by the Peabody sentry and get his Smelting Factory Key. We can now see another sentry across a footbridge in front of the Murkbell Police Fort. We cross over the footbridge on the left side and work our way around the walls to the statue up by the cop shop front doors and open them. The sentry here has nothing. Back the way we came and into the canal by the boardwalk. On over toward the Falstaff Wizards' Guild. Taking the turn north we notice a few wooden beams jutting out of the canal wall and a low spot across from them that we can mantle up out onto from the canal. From here we shoot a Rope arrow into the centre beam, slide back into the canal and climb out again on the Rope. We're just north of the Falstaff Wizards' Guild front door.
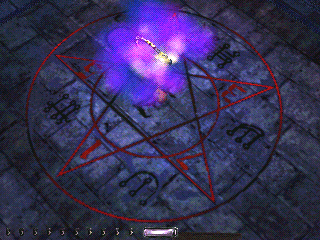
We pick the lock on the door and open and enter. There is some chanting here which includes a "We have a guest" when we enter and a "Serenity" when we hide in darkness. A book on the floor for instructions for guests noting a ladder and little else to allow mere mortals like ourselves to get around the place. Opening the inside door we spot a mage sentry swivelling back and forth and sneak in beside him. He has a Healing potion on his belt. This guy is the one chanting. Also, there's a gated display area with a sword swivelling in mist above a pedestal. The sign by the gate reads "Kharras Drahg, the Vampire Blade." That's what we want. How to open the gate? We hear footsteps in the next room. Peeking in we see another mage patrolling this other, larger room from a balcony or mezanine above. He also is chanting. There's a chest and what looks from here like a pentagram on the floor. Leafing through the spell book from Alcandor's room in the Cathedral we see a similar pentagram. So, this is where we can reset the Eyes in the Amulet if we ever find them all.
Timing our move when the mage right by us has just looked away and the one patrolling the next room is above us, we run through the doorway and into the large room, left and over to shadow from the first pillar. These are good shadows from the pillars around the room. We work our way over behind the pillar by the chest. We can now see the ladder going up to the balcony with the patrolling mage. There are a couple of steps down to the chest and the pentagram. They look like they may be tile so let's make sure we creep with no footsteps on them. We noticed from the anteroom that the ladder was not visible and if we stay on the west side of the chest the mage won't be able to see us. Just time it so the mage above can't see us either. There are red circles around the room that may be tile too. Creep down around the right side of the pillar beside the chest, unlock it, and get the Speed potion inside. Back up to the shadow behind the pillar and around and up the ladder. There is a spot just right at the top of the ladder with full shadow where even the glow from the patrolling mage won't light us. We notice a purse on this mage as he walks by and grab it. Another one hundred gold. Then follow him around to the door to the balcony above the anteroom. There's a carpet in the doorway but it looks like tile inside.
We crouched on the carpet and looked around. A painting to our left and a little further around the wall, an unlit lamp. Giving this lamp a poke we creep over and look down to see that the gate below has moved out of the way. Now we can get the magic dagger. Back around behind the patrolling mage, down the ladder, and around to the shadow of the last pillar before the doorway to the anteroom. We toss a Scouting Orb against the doorframe and when we see the anteroom mage look away we rush over and retrieve the Orb and through the door into darkness again. When he turns away rush into the display room and grab the dagger and back out. When he looks away again, out to the entrance and then out to the street again and over to a dark doorway near the Rope arrow we'd use to get out of the canal. We're going to leave the Rope arrow in the beam just in case we find the Amulet and the rest of the Eyes and want to return to the Wizards' Guild to reset it.
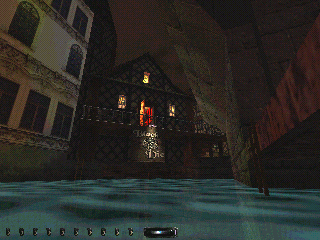
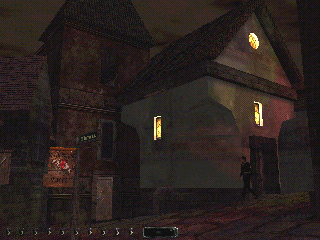 That leaves only our rented room at the Old Widow Inn. Not too far away on the map but not that easy to get to. We end up swimming back over by the Black Die. There's a nugget worth fifty gold under Gunnies Warehouse dock. And a ladder up onto the dock where there's a chest with a single Flash Mine. Another Moss arrow in a closed area just west of the Black Die. On to the Fish Monger's, unlock the door and inside. There's a sleeping thief in the far corner, some large fish on the floor, and a note and a cashbox on a shelf. The note's about his pal Pete who seems to have drowned in the canal. The thief awakens and stands facing a second doorway when we begin picking the cashbox lock. A coin stack worth fifty gold. Nothing else here except a couple of small fish and bottles on the floor. Heading back over toward the door to leave we stumble over something else on the floor and pick it up. A "Tasty Bone." Huh? Out and north to Hillcrest Court. There's a sentry under a streetlight on the way but he only mumbles when we slink around the corner near him. Unlocking the Gleaming Facet Jewellery Shop door we enter and find six hundred seventy-five gold and eight hundred twenty-five gems in various jewelled items. And a note about the cleaner from over by the Windmill having stolen a second special jewel. Up a ladder to a small, wooden floored room with a safe. Unlocking the safe we find the Vampyre Eye. That's two of them now. This one, Vampyre, like the Eye of the Lich we found earlier is not clearly either the second or the third one so we'd better drop it. Take it with us down just outside on the cobblestones though so we don't have to climb all the way up here again.
I guess we'd better check out the Windmill on the way to the Old Widow Inn. Working our way over toward the Windmill we come across a locked wooden door just north of the Gallan Bridge. Picking the lock and entering we find a Lucky Coin worth twenty gold on the floor beside a short stairway and a light switch on the wall. We turn the lights off. Turning to leave we can see a balcony a short way out. That looks like a goblet on the metal railing of the balcony. We push a large barrel just outside this little room over by the balcony and jump up onto it and grab the goblet worth another fifteen goods. On over to Cloaca court. Here's this notice about Bob Grenadine's cat gone missing we'd seen in Lampfire yesterday. The note in the Black Die indicated that Bob Grenadine was drunk downstairs. Onward to the Windmill.
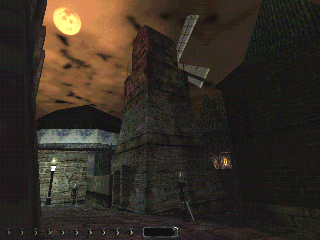 We spot the lady cop archer up on the building beside the Windmill. We're across from the Windmill door now. It looks like we may be able to get into the Windmill that way. If not the upper sections of the mill are wooden so maybe a Rope arrow may do. Although, we can't see any way in up there. There are two cops here. And one has had too much coffee. He's spinning like a top. He's just not getting happy that he's facing the correct way. Hard to time our moves while he's looking away. There is some shadow in the Windmill doorway but we're not sure it's enough. Turns out it wasn't locked so we were able to get inside the mill quickly enough. We can see a ladder going up inside but we'll need to get up to the second floor to get to it. There is a barrel and a box here as well as three sacks. A couple of Holy Water vials in the corner behind one of the sacks. Rope arrow up to a beam and we're there. At the top a Toolbox and a book. The gearing to the sails are above me yet but we can't see any way to them from here. The book first. Jeb's diary. He's the fellow that cleans the Gleaming Facet. And he's confessing stealing the other ruby in the diary. The Toolbox? The last ruby, the Ghoul's Eye. This one's okay to carry around with us. Also a Rare Coin worth five gold on the boards beside the diary.
Nothing left but to go to the Old Widow Inn and finish things off. Or should we take a last look around town first? We're close so let's at least have a look around the Old Widow Inn. Back over to Cloaca Court and then a sidestreet across to Knife Street to Whore Court and the Old Widow Inn. Taking a look at the Police Courtyard across the canal we fire a Rope arrow into one of the piles holding up the Inn and jump over to the Police Courtyard. Leave the Rope arrow where it is. We're going to being using it some more. At least there's an archer sentry here we can get three more Broadheads. When we get up behind the archer we can see there's another open area here and scurry over into the shadows. Plus now we can see a ladder going up the side of Peabody's. Looks like we can jump and mantle over the canal to the ladder. Yes, and up the ladder to a small metal roof. Open the windows and creep through onto some beams. Below we see a couple of guards and a ladder just down from the beams. But we'll need some way to get back up onto the beams from the ladder when we're leaving. We place another Rope arrow into the beam nearest the ladder. We can jump from the top of the ladder onto the Rope and then climb and mantle up onto the beam. We jump down onto the ladder and climb down onto the floor. Both guards have Smelting Factory Keys. And there's a warning here about not getting too close to the forge furnace. Okay, back up the ladder and out. Retrieve the Rope arrow before leaving. Down the outside ladder and run and jump over onto the Police Courtyard again.
Looks like there's a back door to the cop shop. We'll have to wait until the patrolling swordsman back here is away. Then up the stairs and open the door and enter. There are a couple of glass windows on either side of this entryway and a gate blocking passage further in. There's a red button on the wall through the gate. A pair of glasses worth five gold on a table past the glass on the left. There is also some paper on the desk but we can't reach it from here. A Water arrow at the red button raises the gate. We proceed into the room with the desk and read about Ms. Croft having rented a house near the museum and also of the Zjilich Amulet having been lost in the canal behind the Black Die. I guess we'd better check out that part of the canal and the Guest House.
We were able also with some tricky moves to get close enough to the chest in the other room to get three more Broadhead arrows. We could crouch run into a shadow between the stairs and the door to this room. But then we had to slow crouch across and up the steps into this room until we could reach the chest. Similarly while getting out. Turns out there's a sentry that can see this doorway area from further inside. He'll do a lot of chattering while you work this out but we were able to do it without him getting disturbed. So we continued on past Lt. Grindle's office to this guy. Another red button that raised the gate to the main entryway of the police station. We could see the front doors that we'd opened earlier. Also an Office Key that opened Lt. Grindle's office. And a chest with four Flash Bombs. We checked out the office which had a desk and a safe in it but were unable to open the safe. Back outside to the Police Courtyard and into the canal.
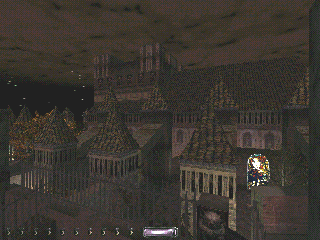 We swim around to the Water Pump, mantle up and jump and mantle out to Watercrest Island right below the balcony with Dr. Provost's body. Thence through Dark Rose Market and around in front of the Watercrest Museum to the alley between the museum and the Guest House. We'd noticed an open window high up in the Guest House while casing the museum but couldn't relate that to our museum plan so left it. We now shot a Rope arrow into the window and climbed up inside. A cashbox with a coin stack worth five gold. A chest with five Moss arrows. A swivelling telescope. And L. Croft's diary regarding suspicious activities at the Cathedral and especially at the canal. The stained glass window she refers to would be the one right beside the secret exit we'd used to get out of the Cardinal's room in the Cathedral. She says she's going diving. Looking for the Zjilich Amulet it sounds like. It also looks like we could put a Rope into the canal side window and cross over to the Cathedral grounds from here. We figure we may as well check out this section of the canal too and dive out the window into the water. The Canal Gate just south is locked and we can't pick it but it does open to the Canal Gate Key we got in the study in the Cathedral earlier. We continue to look closely around the bottom of the canal here. There! A hole going down past the regular bottom right next to the wall the next Canal Gate is in. And yes, a chest with the Zjilich Amulet inside. Great! Now we've got all the things we need to reset the Eyes in the Amulet as per the instructions in the spell book. Back up and to the surface and pick the lock on the other Canal Gate. Turns out to be just beside the Old Tower we'd used earlier to get into the Cathedral.
We decided to pick up the Eye of the Lich while we were close to the Vilhrath's Garden and run it over by the Wizards. Came across another patrolling archer near the garden with three more Broadheads. Then back over to the Police Courtyard, another Rope arrow on the Knife Street side of the canal, and down Knife street to the Gleaming Facet to pick up the Vampyre Eye and run it over to the Wizards. Ran across a blue sashed gentleman with a purse with five gold. Whichever of the Vampyre and Lich Eyes ebbs our health we weren't holding long enough to suffer any injury. Just need to be able to carry them just inside the Wizards and onto the pentagram yet. I want to delay the Amulet resetting for a while though. So, let's go ahead and do the last objective.
Just south of the door to the Wizards' Guild is a box on the cobblestones near a window ledge. We jumped up onto the box and then jumped onto the ledge. We ran along the ledge as far south as it went. A small dead end piece of the boardwalk was just across from us. We shot a Rope arrow into the boardwalk, jumped over onto the Rope, and mantled up onto the boardwalk. Some footsteps getting closer. And then an archer came by on our left with another three Broadheads. Retrieve the Rope arrow and move west along the boardwalk a short ways then drop down onto a ledge around the building and along the wall and around the corner and slide off into the canal. Swim around and climb the Rope up to the Old Widow Inn. Up the stairs and open the door with our key. Relock the door. You wouldn't know but something's going to happen in here that we want to stiffle. Jump up onto the bed near the headboard. Don't go toward the foot of the bed any more than you need to to get the Moss arrows. Gather up the equipment Basso left in our room. Seven Water, three Moss, and three Fire arrows. A mine in an unlocked chest, one Invisibility and two Speed potions. Six Flash Bombs, and our Blackjack. When we've got them all, slide off the foot of the bed under the light switch. 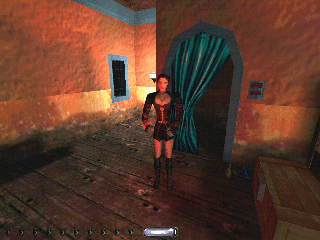
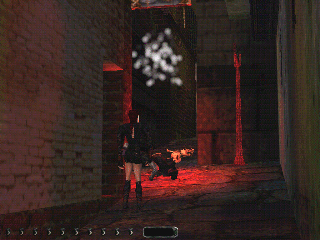 Be prepared to pick Mercedes' purse when she comes out of the closet. We move over by the door and turn facing Mercedes. Go ahead and let her have her say. Check out her purse. Read the diary. When she's finished sneak over and turn the lights off. Mercedes will have given us the Meepwood Cemetery Keys ring. After she asks about Laura Croft and then doesn't move we're safe. If the door had been unlocked she would have left and started up Knife Street hurling firebolts (see the red sparks on her right hand) at the undead that are there now. Let's see if we can get through this with no deaths whatsoever. It's not that we're averse to killing these guys but they may have pockets to pick and they don't count if we pick them off dead bodies. Another new objective to retrieve the Cylix from the Cardinal in the Meepwood Cemetery and destroy it in Peabody's Smelting furnace.
Did I mention the multitude of undead that Alcandor has created in the Cylix and just unleashed on the town when we triggered Mercedes? And I mean a multitude! Just for fun I saved at this point and went ahead and set out to kill all the undead. It took me all day trying to have no injuries to myself and even when there were at least ten left to kill I had racked up more than twenty thousand damage to enemies points! Now is the time to check out the properties of the Eyes. Go ahead and save the game. Then travel around and call up your Zombie pal with the Vampyre Eye and watch him take on the various undead. I never had very much luck with it but the Ghoul Eye is supposed to make the undead come to you. At the very least this would be a good way to call them to deal with any police or civilians that haven't already been killed by the undead. When you've finished checking out the Eyes we'll reload this save in our room and proceed.
When we finished reading Mercedes' diary a new objective to leave the diary in Lt. Grindle's office in the police station came up. So, head back over to the police station and into his office. Standing in front of the desk, scroll through our inventory to Mercedes' diary. It should disappear and the objective should get checked off. We have another look around the room and there's Lt. Grindle's Safe Key under the desk chair. Unlock and open the safe. Three more Fire arrows. We aren't going to make use of the Eyes' special properties so let's go back to the Wizards and reset the Eyes in the Amulet. On our way over to the Wizards remember to pick up the Eye of the Lich and the Vampyre Eye just outside. Work your way to the centre of the pentagram. If you're careful and stay to the shadows as much as possible and not make any footsteps on the tiled floors, the most you should get out of the sentries is a comment or two. They should not change their routine. Now open the spell book and read up to the point when it tells exactly which items to put on which sections of the pentagram. Go ahead and place the items. Try to actually place them rather than drop them. They do make noise when landing on the floor and this can disturb the sentries. When the last item, the spell book, is placed if nothing happens right away, sneak back off the pentagram to the shadows outside the ring of pillars and just wait patiently. Sooner or later the spell book will begin to mist and spin. That's what we've been waiting for. Sneak back over and grab the spell book and return back to the shadows.
The best spot I found for the last part of the Amulet spell was just to the right off the top of the ladder. When we finish reading the spell book again as instructed, two more mages appear downstairs. 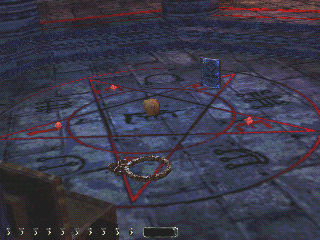
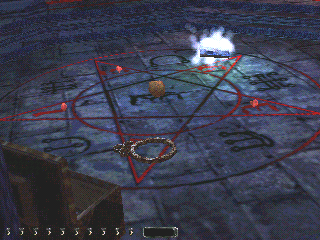 If we're upstairs and in the dark they won't bother with us. Wait until they relax and start their patrol. They should take a tour of the main room and then go out to the entrance and back. One of them stops in the door between the two circular rooms sometimes and blocks the second one from continuing. We're going to make use of this to make our escape. But before we do anything make sure all four mages have settled back down to their routines. We've got to retrieve the reset Amulet from the centre of the pentagram. Remember the best approach to the pentagram is around the right side of the pillar behind the chest coming out on the right side of the chest. This blocks the view of us from the small anteroom. Also wait until the first of the two new mages stops in the anteroom and blocks the second new mage. This way the only mage we need concern ourselves with while retrieving the Amulet is the one upstairs. It wasn't just the two new mages that were added to the Guild. The Eye in the Sky has appeared too.
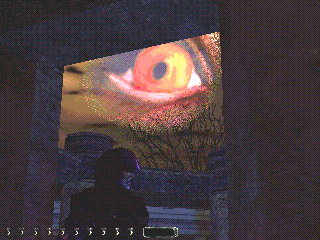 And it's more or less directly over the ladder so we're best to snatch the reset Amulet quickly so the Eye in the Sky doesn't get a bead on us with it's firebolts. When we're done we're back in the shadow of the pillar. You should have observed that the new mages' route through the room is outside the ring of pillars except right near the chest and again inside around the last pillar before heading for the entrance. Not only that but the first trip they make through the main room they make more or less together as a result of them being stuck together in the anteroom while the first one stopped. This gives us a perfect opportunity to sort of follow them out into the anteroom. Anyhow when they turn inside the pillars near the chest start to follow them toward the door to the anteroom. We're not going to stop so try to time this with the upstairs mage being over this doorway when we get there. Also we want the mage in the anteroom to be facing away. When we go through the door to the anteroom we scurry to full darkness along the wall just left of the single mage. Then when the two new mages come back and reenter the main room and this single mage is facing the main room we can sneak out behind him. And now's your chance to try out the Amulet. Go ahead and make a save and head for the cemetery. That's a good spot to try it. When you're finished reload here and we'll continue.
note: I'm playing along while I write this up. Turns out the two new mages did not get hung up in the doorway when the one stopped. No matter. A little different approach. The one just entering the main room cannot see the door we want to go through until he turns at the ladder to come back. So, we followed the other one as he went through the doorway. In this case they were spaced so that one was entering as the other was just about to go through the doorway. And they may be walking at slightly different speeds. Or they may be bumping into something in the entrance someplace and altering their spacing somehow. Anyway, just sit in the shadows and think about what's going on and we're sure an opportunity to get out will present itself. I thought I'd been able to slide off the balcony of the anteroom onto the stationery mage once before but when I tried that another time the tile flooring messed me up so we don't suggest that method.
Mercedes said Alcandor was over in the Meepwood Cemetery conjuring up more undead with the Cylix. So, we've got to go there to get the Cylix. That's why we set this trip up by clearing the Meepwood Bridge area and extending the bridge. But before we do there's one little detail we'd better see to first. You may have noticed from time to time while playing the Thief games that some characters visible at a distance aren't animated. This is a variable setting in the game to free up computer resources to calculate what's important or what's near you. If it's far enough away the game doesn't spend time worrying about them. In fact, the game doesn't even bother with their movement either. So, what may have happened is that pockets of characters have formed at distances from us. They would continue going away from us along their routes until they reach this limit and then stop until we're close enough again. We'll have to make a slow tour around the map to get all these guys moving again. We swim around the canal especially in all the corners and listen at various locations until the sounds of fighting between the live and undead subside. Now when we encounter the undead during the rest of our trip they should be relaxed and hopefully more easily dealt with. Pay special attention while doing this. There are still some pockets to pick. And some things may have changed since we were there last.
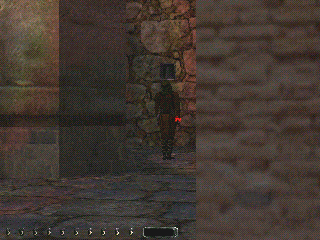
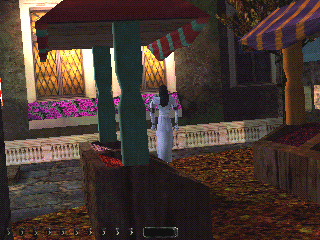 Yes, we mantle out at the very end of Hollows Lane and spot a Keeper or Greater Vampyre with a purse worth one hundred gold. Did you notice that when these Keeper Vampyres are sufficiently injured they do become a groaning and moaning mist just like it said they would in the Treatise on the Dead by Niblung? They also use firebolts and destroy our Vampyre Eye Zombie buddy given half a chance. We got out of the canal at the rowboat and climbed the stairway but stopped just short of the top landing because we could hear some growling. This gal in white walked by and we grabbed her purse with another one hundred gold. The action was too fast paced while getting the loot so I saved and reloaded back a bit and took the shot with her where she seems to settle in and with her purse still intact. There's also a golden vase worth one hundred in the museum now that wasn't there before (thanks Lady Jo). So, find time while here to get that. I surfaced for air between the Guest House and the Cathedral and could hear zombies above. Also I noticed everything seemed undisturbed at the Black Die.
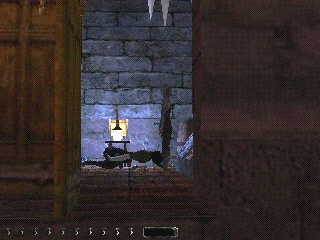
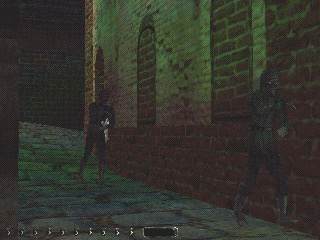 I could hear the servers still humming and walking about up there. But when I approached the Fish Monger's I could hear zombie sounds again. Yes, and it's Pete! Remember, the note from the Fish Monger, about his buddy Pete and the fish? I grabbed the fish but it didn't count as a pocket picked. Perhaps appropriately too, if you think about it a bit. I think I just ate this fish! Ugh! Yuck! Ptui! Well, looks like he got his revenge. His proper burial will have to wait though. I noticed some wooden eaves in Gweldwyn Court and Rope arrowed up and tried to jump onto a sloped roof near a tower with a ledge but kept sliding off. And the Gleaming Facet door is jammed shut now so I can't see if anything's changed in there. Working my way over to Gallan Bridge I ran across a couple of Zombies walking toward me. One had something under his arm. Haha, a Dead Cat! I wonder? Let's swim back over to the Black Die and see if this is Grenadine's cat. Yes, and he gives us a Holy Water vial for returning it. Take care here.
 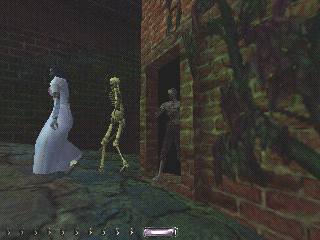 She came down and stood facing away from me this time but before the waitress had spooked and noticed we were the thieves the cops were looking for. And that's twenty-four of twenty-six pockets! Only two more to go. I know the game says there are twenty-seven but that's a bug in Thief II. Just before I got to Gallan Bridge on my way to see about the zombies near the Guest House I could hear a Haunt fracas going on around the corner so hunkered down in a corner near the small wooden doored room where I'd found a Lucky Coin before. Odd, I usually leave doors open so I can see readily where I've been. But this one is closed. Whoa! The door splinters open and this cute threesome comes out and takes off. I can't see inside? No changes inside though. Now I can't see out? Oh, well. I'll wait in here until the Haunt sounds fade. Just for fun I saved and drank an Invisibility Potion and ran out by the Windmill in the middle of a bunch of them and blasted the Amulet. Nine kills and 1,686 damage. That's some powerful Amulet! Reload in the small room. Hehe. I tossed a Scouting Orb out and when I could see no more undead nearby and the sounds had subsided I bolted out, picked up the Orb, and across the Gallan Bridge over beside the Guest House in a corner. Now to check out the museum. For those following along there's something you should know about the Watercrest Island now. There's an invisible beast wandering around over here. I think this is the same beast that was guarding the Cylix the other night under the Weeping Angel. He growls when he notices you and he doesn't move very quickly but take care anyway.
We used the Guest House route over to the Cathedral. Slick! Here's something different. A note on the front of the Cathedral. From Alcandor ordering his priests to send someone over to the Falstaff Wizards' Guild to warn them of the thefts so they can guard the magic dagger. And in the Cathedral study, an orange key under the desk that wasn't there before. At least I don't think it was. Perhaps I just didn't see it. A Cathedral Basement Key. I wonder? Yes! Taking the key on down to that locked metal door we'd seen Alcandor through before, it opens this door. Haha, I was actually looking at the key we'd seen on the shelf beside Alcandor when I unlocked the door and it disappeared. The other end of the chute from his room, an empty large barrel and a powderkeg. Some stairs going down. A room with four crypts. A zombie on the floor, a skull, and, what's that? A nugget near the zombie's head. Let's keep our distance from the zombie while fetching the nugget worth one hundred gold. And a corridor. At the first turn, a Skeleton "Cylix Born" Haunt under a torch. "Cylix Born" huh? "Bad to the Bone!" Yes, if we creep with no footsteps we can sneak by him. Oh, oh, here comes one of those Keeperesque Greater Vampyres. Fortunately there's a dark little cubbyhole right here that we can duck into while he passes. Further on another cubbyhole with another Skeleton Haunt patrolling.
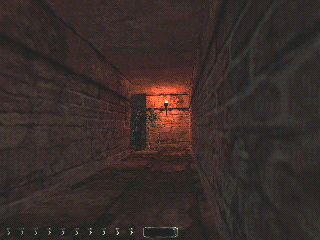
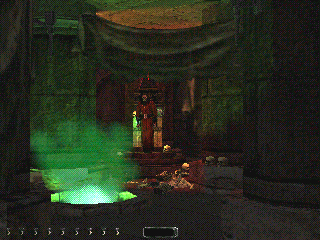 And a Haunt sentry at the next turn. Following the Skeleton Haunt down to the Haunt when he turns to face away we duck around to his left and crouch in a pretty dark corner here. We slide along the left wall here into darkness and pass the Skeleton Haunt returning. A little further along a ramp going up. And at the end? What's this? Alcandor and the Cylix! Alright! Grab the Cylix. More gold mummy types, like those recently conscripted by Alcandor in the museum, bumbling around here. And another ramp going up the other side. The mummies wander up and down this ramp between their trips through the Alcandor throne room. Above the ramp a crypt with a winged statue worth fifteen goods on top. And touching a skull on a raised brick area up here opens a doorway. Through the doorway to ... outside, in a cemetery. The door is in a mausoleum. This must be the Meepwood Cemetery. And there's the Caretaker's Manor just on the other side of the cemetery. Spook central. All varieties and lots wandering about. We work our way amongst the shadows over to the gate and unlock it with the keys Mercedes gave us. There 's a dead cop swordsman here. I don't recall him being here when we came over the bridge and turned the lights off? We've got a pretty good view of the front entrance to the manor from the gate. Doesn't look like we'll be able to get through those doors very easily.
 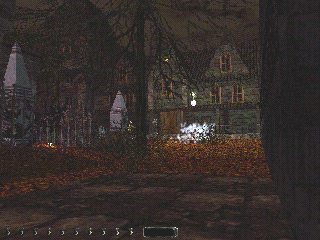 A ring worth one hundred gold on the ground beside an obelisk gravestone in a small, fenced off section of the cemetery. We work our way back over to the mausoleum door. There seems an unusual amount of activity along the south side of the manor. And ... is that firefly like sparkling in the bushes and vines? Let's see what's over that way. An entrance to the basement. And a hole in the basement floor down to Alcandor's sub-basement throne room. And a ladder up to a trapdoor. Tile flooring! At least it's dark here. A large room with books, a fireplace, and a harp. And a Lucky Coin on the floor besdie the harp worth twenty gold. We cross to a stairway going up. Upstairs a nursery with a rocking horse and a cradle rocker in mid air and spinning. A child's ring on the floor near the cradle rocker worth one hundred (thanks telliamed.) A golden vase worth one hundred gold on the floor in the hallway. And a Fire arrow in the rubble blocked doorway across from the nursery. That seems it for here. Back out through the basement and back by the mausoleum to the cemetery gates, past the streetlight switch, jump up onto the retaining wall, and slide into the water. Swim over to the Old Widow Inn via the Wizards' Guild retrieving all three of the Rope arrows we'd left ending up on the Police Courtyard side. Sneak around, jump and mantle across the canal, up the Peabody outside ladder, inside and down the ladder. Over to the furnace and place, quietly since the guards are still here, the Cylix on the brick ledge. Back over to the ladder and a couple of Moss arrows knocks the Cylix into the fire without disturbing the guards. That's it, final objective completed. Mission successful!
Statistics:
Time: ............................................. 3:57:10
Loot: ............................................. 5,095 of 5,230
Pockets: ........................................ 24 of 27
Locks: ........................................... 16
Bodies Discovered by Enemies: ...... 6
Shop Supplies: ................................ a Broadhead arrow to raise the Vilhrath's Gardens gate, a Water arrow to raise the Murkbell Station rear gate, two Moss arrows to knock the Cylix into the furnace.
Notes:
I suppose the Bodies Discovered statistic is dead humans discovered by live humans. There is certainly some chance of this happending while the undead are cleaning up the town. I haven't a clue where the rest of the loot (loot reconciled, thanks all!) or the two missing pockets are. I really, really enjoyed this mission and will return as many times as I need to to find this stuff. Thanks again, Team Calendra!
Loot:
0010/0010 - in the Cathedral a purse on one of the inside priests upstairs worth ten gold
0110/0100 - in the Cathedral a golden vase on a pedestal near the front upstairs worth one hundred gold
0135/0025 - a golden candlestick worth twenty-five gold on the Cathedral pulpit
0175/0040 - a jewelled goblet worth forty gold on the Cathedral pulpit
0225/0050 - two golden candlesticks worth twenty-five gold each on tables at the front of the Cathedral
0230/0005 - a chest with a stack of coins worth five gold in Alcandor's room in the Cathedral
0380/0150 - three candlesticks worth fifty gold each in Alcandor's room in the Cathedral
0445/0065 - a golden bottle worth fifty goods and a wine glass worth fifteen goods on a stained glass windowsill outside along the west side of the Cathedral
0460/0015 - a wine glass worth another fifteen goods on another stained glass windowsill on the east side of the Cathedral
0465/0005 - a purse worth five gold in Vilhrath's Gardens
0515/0050 - a fine wind bottle in the Towne Hall Guard House window(thanks jiansonz)
0615/0100 - a chest at the bottom of the canal at the very end of Hollows Lane
0655/0040 - a sack of gold worth forty in a chest at the Psychic's
0695/0040 - a sack of gold worth forty on a shelf at the Psychic's
0715/0020 - a partially open second floor window above the boardwalk with Lucky Coins worth forty gold(only twenty thanks again jiansonz)
0780/0065 - a golden plate worth fifty gold and goblet worth fifteen goods on the south side of the canal ledge across from the windmill garden
0880/0100 - a vase with the flowers on the balcony railing is worth one hundred goods near Dr. Provost
0905/0025 - a golden goblet on a small table worth twenty-five gold near Dr. Provost
1655/0750 - the museum relic display room with three hundred gold, three hundred gems, and one hundred fifty goods
1755/0100 - a painting worth one hundred gold on the third floor of the museum, a window behind it
2605/0850 - five hundred fifty gold, two hundred fifty gems, and fifty goods various items by the Red Arrow
2705/0100 - in a purse from the upstairs mage in the Wizards' Guild
2755/0050 - a nugget worth fifty gold under Gunnies Warehouse dock
2805/0050 - a coin stack worth fifty gold in a cashbox in the Fish Monger's
4305/1500 - six hundred seventy-five gold and eight hundred twenty-five gems in various jewelled items in the Gleaming Facet
4325/0020 - a lucky coin pair worth twenty in a small room just north of the Gallan Bridge
4340/0015 - a goblet worth fifteen goods on a balcony railing north of the Gallan Bridge
4345/0005 - a Rare Coin worth five gold on the floor of the Windmill loft
4350/0005 - a pair of glasses worth five gold on a table in the Police Station
4355/0005 - a cashbox with a coin stack worth five gold in the Guest House
4360/0005 - a purse worth five gold on a pedestrian with a blue sash
4370/0010 - a small ring worth ten on the cart just outside the Meepwood Cemetery Gate (thanks Anarchic Fox)
4375/0005 - a lucky coin pair worth five on the canal bottom just southwest of bridge between the Psychic's and Hollows Lane (thanks Anarchic Fox)
4495/0020 - a lucky coin pair worth twenty on the cobblestones in the northeast corner of the Dark Rose Market (thanks Anarchic Fox)
After Mercedes
4495/0100 - a Keeper or Greater Vampyre with a purse worth one hundred gold at the end of Hollows Lane
4595/0100 - gal in white with a purse worth one hundred gold in the Dark Rose Market
4665/0100 - a golden vase worth one hundred in the museum near the second foor at the north end
4795/0100 - a nugget worth one hundred gold beside a sleeping Zombie in the Cathedral sub-basement
4810/0015 - above the ramp up from Alcandor's throne room, a crypt with a winged statue worth fifteen goods on top
4910/0100 - a ring worth one hundred gold on the ground beside an obelisk gravestone in a small, fenced off section of the cemetery
4930/0020 - a Lucky Coin on the floor besdie the harp worth twenty gold in the Caretaker's Manor
5030/0100 - a child's ring on the floor near the cradle rocker worth one hundred in the Caretaker's Manor
5130/0100 - a golden vase worth one hundred gold on the floor in the upstairs hallway in the Caretaker's Manor
5130/0000 - thirty loot I can't find in the narrative (thanks jiansonz)
5230/0100 - unreachable loot embedded in wall of museum vault
Pick Ups:
- a chest at the bottom of the canal by the Old Tower under a dock with a single Water arrow
- a Moss arrow on the top step of the Old Tower
- the second priest that came by the Old Tower door had a Balcony Key
- a Canal Gate Key on a desk in the room just down and right from the pulpit
- a pool or bath with a Water arrow in the room next to Alcandor's
- a Balcony key in Alcandor's room in the Cathedral
- a Necropotence Tome of spells on the bookshelf in Alcandor's room in the Cathedral
- three Broadhead arrows from a patrolling police archer over near the Old Tower
- three more Broadheads off an archer that patrols down Cathedral Street from the Cathedral
- the Eye of the Lich from the statue in Vilhrath's Gardens
- twenty-four Water arrows, three Moss arrows, and a Holy Water vial in Vilhrath's Gardens
- three Broadhead arrows from the archer waiting at the Hollows Lane end of the boardwalk
- three Broadhead arrows from the Towne Hall guardhouse archer
- a golden wine bottle worth fifty goods and an apple sitting in the second windowsill of the guardhouse
- a Meepwood Bridge Key from the swordsman sentry in the guardhouse
- a Water arrow in the canal on the cemetery side near the Meepwood Bridge
- a Water arrow in the water at the bottom of the stairway nearest the Dark Rose Market
- a Potion of Black Lotus Nector in the Psychic's
- a Speed potion and an Invisibility potion in the Psychic's
- a Holy Water vial in a chest at the Psychic's
- a chest with an Ultraviolet Ruby Lensed Eye of True Seeing in the Museum Shed
- a Moss arrow in a closed in doorway northwest of the museum
- a tower on the south side of the market with a chest with a Rope arrow
- an apple on top of one of the stalls in the Dark Rose Market
- a purple fruit on the south side of the canal ledge across from the windmill garden
- a Moss arrow in the bushes in the windmill garden
- three Broadhead arrows from the archer sentry at the north end of the Gallan Bridge
- three Broadhead arrows from the archer sentry on the walkway connecting the two towers by Gallan Bridge
- a Broadhead arrow in an unlocked chest in the east Gallan Bridge tower
- an invitation to examine the Watercrest Museum artifacts in Dr. Provost's hand
- single Water and Fire arrows on display on the wall at the north end of the first floor of the museum
- Jortul's Mummified Head in the museum relic display room
- a note for Dr. Provost in a small office on the second floor of the museum
- three Broadhead arrows off the archer-sentry on the fourth floor of the museum
- the Baerulian Diamond from the third floor of the museum
- the Museum Vault Key off the lamp toting museum patrol guard
- the Red Arrow painting from the museum vault on the third floor
- a Smelting Factory Key from the outside guard at Peabody's
- a Healing potion off the entrance sentry at the Wizards'Guild
- a Speed potion in a chest in the Wizards' Guild
- Kharras Drahg, the Vampyre Blade, in the Wizards' Guild
- a Flash mine in a chest on Gunnies Warehouse dock
- a Moss arrow in a closed area just west of the Black Die
- a Tasty Bone on the Fish Monger's floor
- the Vampyre Eye in the safe in the Gleaming Facet
- two Holy Water vials in a ground floor corner of the Windmill
- the Ghoul's Eye in a toolbox in the Windmill loft
- three Broadheads from the archer sentry in Police Courtyard
- two Smelting Factory Keys from the Peabody inside guards
- an Office Key that opened Lt. Grindle's office on a shelf in the Police Station
- four Flash Bombs in a chest in the Police Station
- a chest with five Moss arrows in the Guest House
- a chest with the Zjilich Amulet inside in a cavern below the canal just north of the sourth Canal Gate
- three Broadheads from an archer patrolling near Vilhrath's Gardens
- three Broadheads from an archer sentry on the boardwalk near the Wizards' Guild
- seven Water, three Moss, and three Fire arrows, a mine in an unlocked chest, one Invisibility and two Speed potions, and six Flash Bombs, and our Blackjack in our room
- Mercedes purse with her diary in our room
- the Meepwood Cemetery Keys ring from Mercedes
- Lt. Grindle's safe key on the floor in his office in the Police Station
- three Fire arrows from Lt. Grindle's safe
- a fish from Pete in the Fish Monger's
- a dead cat from a Zombie walking north of the Gallan Bridge
- a Holy Water vial from Bob Grenadine in the Black Die as reward for returning his, now dead, cat
- an orange Cathedral Basement key under the desk of the Cathedral study
- the Cylix of Jortul from Alcandor's throne room in the sub-basement of the cemetery Caretaker's Manor
- a Fire arrow in the rubble blocked doorway across from the nursery in the Caretaker's Manor
Navigate: Home, Thief, Working Papers, Act I, A meeting with Basso, Act III, A Winter's Eve.
Copyright © 2002, 700425 Ontario Limited. Last modified on Tuesday, September 23rd, 2003.


 Opening Scene
 Twenty-five grand is plenty to get us to remain focused on our objective but I did notice the frilly undies on the waitresses in the French maid outfits as we went through the Black Die Pub out onto the balcony. Read the note on the bar before leaving and you'll have no need to return upstairs here. Nothing is real loot. So, the drunk downstairs likes cats. North from the Black Die. Turn east around the Fish Monger's and over and south across the Gallan Bridge. Just on the south side of the bridge turn right down along the canal. The canal turns south here so continue to follow it past the front of the Watercrest Museum. When the canal turns east again jump in and swim west. There's a chest at the bottom of the canal under a dock with a single Water arrow in it. A little further west to the Old Tower. There's a hole in the wall of the tower we can enter through. There's a Moss arrow on the top step. I opened the door through to the Cathedral grounds and waited until the second priest walked by. He had the Balcony Key. Exit the Old Tower right and around the Cathedral to the southwest side noting the ladder up to the balcony on the northwest corner. Look up to see a window above with a wooden eave. Rope arrow up and open and enter through the window. We've got a few minutes to spare so let's try looting the Cathedral first. The priests get agitated when the alarms sound and start running around and make it all that much more difficult later. Also, while we're in the Cathedral, try to pay attention to the sound of the priests' footsteps as they make their way around. This will come in handy later when deciding whether we'll have a decent chance of moving from place to place.
 Enter the room to the right. A Canal Gate Key. This I know where to use. I had picked a lock on a gate in the canal but couldn't pick a second one in my first attempt to get here. Professor Ately T. Benjamin's journal. The three Eyes were made for King Ebendizgral of the Dead Lords Halls of Gillian-Shith. The first, Ghoul, draws the dead to the bearer or the latest bearer if cast aside. The second also draws the dead but as partners. The third draws the life from the bearer. Perhaps keeping them wrapped and deep in a pack may reduce or eliminate their effects. So, better be on the lookout for these Eyes while we're working around the town. Treatise on the Dead by Niblung. Tibetia-Leng ruins. Niblung's aide Davis. The Vampyre of Chillington Moor. Greater vampyres sometimes appear as mist. Lesser vampyres degrade to something zombie-like. Fire and Holy Water can combat them but Holy Water is more effective, especially when Fire has been countered by the vampyre casting a spell. Let's also keep an eye out for Holy Water since it sounds like we may have use of it before we're done. Continue on through the other door down and take a peek at Alcandor behind the locked steel door in the basement. If you zoom over toward him you should be able to make out an orange or red key on the ledge just to his left.
 Up and out and toward the front of the building. You can stop on the second step coming out of this room and lean forward and see past the drapery. Also, I had difficulty heading straight for the front. So, instead, I crept over to the pulpit, mantled up, and went back through the door I'd entered through. Then up and down the stairs to the front. There's plenty of shadows here. Two golden candlesticks worth twenty-five gold each on tables with candles on either side. I took the time while crossing to the second candlestick to open the front doors and have a look at the mage sentry. Then back up toward the pulpit on the east side. In the first room a pool or bath with a Water arrow.
 Take care now. The police treated us as just any other pedestrians before but now they know we're the thieves who set off the Cathedral alarm bells. There's a golden bottle worth fifty goods and a wine glass worth fifteen goods on a stained glass windowsill outside along the west side of the church. Another wine glass worth another fifteen goods on another stained glass windowsill on the east side. There are cops patrolling around the Cathedral now too. I got three Broadhead arrows from a patrolling police archer over near the Old Tower. We can go completely around the Cathedral on the outside if we're sneaky enough. If you didn't get the Balcony Key off the outside patrolling priest earlier, now's your chance. Also note that even though we've found two Balcony Keys we now have only one. The other one disappeared when we unlocked the Balcony door. Back to the Old Tower. What next? At least we can take a more leisurely pace now. Check the maps again.
 Also there's a street light across the bridge that can be turned off. The archer was waiting at the Hollows Lane end of the boardwalk. Three more Broadheads. Then on the boardwalk over to the Towne Hall. The Clock guard house has two sentries. One, an archer with three more Broadhead arrows. There is also a golden wine bottle worth fifty goods and an apple sitting in the second windowsill of the guardhouse. The second cop has a Meepwood Bridge Key. And the bridge lock is at the guardhouse too. The archer can be picked while still in shadow by leaning right to the window from the bottom of the steps. Crouch under and past the windows. Stay just out of sight of the second guard and when you notice him turn away through the Scouting Orb lean in and snag the key. Stand and when he turns away again lean over and unlock the bridge. Finally, when he looks away a third time run over to the bridge. The bridge is metal so we'll have to sneak across with no footsteps. Plus there's a little ledge that can't be crouch crept over. A short, angled crouch run will get past it. Just short of the far side of the bridge is a spot with complete shadow. The tower to the right where we come out at the Meepwood Cemetery has a locked door that can be picked and inside is a switch that turns the street lights off in this area. There's a Water arrow in the canal here. Jump over the wall. And a chest at the bottom of the canal at the very end of Hollows Lane.
 That pretty much clears out the south side of the map. What now? Let's see, our room at the Old Widow Inn, the Watercrest Museum for the painting and the diamond, and the Falstaff Wizards' Guild for the magic dagger. Let's check out the Museum. It's closest. That's very nearly due west of the canal at the end of Hollows Lane. We must have jogged a little to the right because we came out on a pebbled shore. There is another water arrow in the water here. And some stairs leading up to the Dark Rose Market. We can see where we are now on the maps. This is quite close to the Museum. As we turn to our left at the top of the stairs we see the Psychic's staight ahead. May as well check this out while we're here. The door is locked but we can pick it. Ah, a Potion of Black Lotus Nector. If memory serves this was worth three thousand at the loadout. And one each Speed and Ivisibility potions on the same shelf. A scroll on the small table. It's for us. From the Psychic in Lampfire Hills. Take what we want and gaze into the Crystal Ball. It will guide us. The Crystal Ball says "A Trunk in an Underwater Grotto Fills the Orb." A couple of ornately carved chests. One with a sack with forty goods inside. The other with a single Holy Water vial. Also another sack worth forty goods on a second shelf. We poke around in here for a little while but find nothing else. On to the museum.
 Trying to work our way around the north side of the museum building there's a single cop swordswoman right under a streetlamp and although she pivots back and forth there's no way to get by her. Let's try around the building just north of here. But this is the way we came on our way to the Cathedral. Working around the building north of the museum and coming out just south of Gallan Bridge is a doorway with a switch that turns the street light off here. Nope, can't get around the north side of the museum this way. Back the other way. We have to go all the way over to the Dark Rose Market and come out right beside this same streetlamp sentry southeast of the museum. But from here we can sneak by her when she looks mostly away. She mumbles but we're okay. We spot a window high up on the east side of the museum but no clear way to get to it. At the southeast corner of the museum a railing and a ledge around the second floor of the Cafe de l'Eau next door. Following this ledge we come out into a tower on the south side of the market with a chest with a Rope arrow in it. Okay, back to the museum front doors. There is a spot right in the centre where the two doors meet in full shadow. Ugh! Look at all that tile flooring. And there are a couple of cops patrolling inside too. One's in training for the Olympic Speed Walking race and the other is carrying a lamp so there'll be nowhere to hide. Looks like he's got a red key on his belt too. We watch these two for some time. Well, I'm going to explore some more before I venture in here. I can see some torch lighting we could douse with Water arrows but it seems mostly electric. And with that lamp guard it may be pointless anyway. Also, I'm one of those frugal thieves and I'm not going to start slinging Water and Moss around on these tiled floors until I've checked a bit more first.
 There's an archer sentry up on the fourth floor looking away out a window. Three more Broadhead arrows. Also a red button to turn the diamond alarm off for cleaning. Okay, let's clean it. And a gate with a lock. We cannot pick this lock. So, we assume the red key on the lantern guard's belt will work here. We've got to go back down to the third floor to get the diamond and will try to get this key there. Ah, an ultraviolet security system. That rings a bell. Yes, the Ultraviolet Ruby Lensed Eye of True Seeing. Back down to the third floor and snatch the diamond. Then back into the elevator and wait to see if the lamp guard comes by. He didn't come close to the elevator so we hussled down the stairs to the third floor and waited beside a chair right at the bottom of the stairs. When he came down we were able to grab the Museum Vault Key. Back up to the fourth floor and unlock the gate to the vault. Let's try out the Ultraviolet Ruby Lensed Eye of True Seeing. There are the beams of the antipersonnel system. We can duck the first, higher beam. The second beam looks like it doesn't quite make it all the way to the left wall. Flattening ourselves to this wall we inch past the second beam. The path to the Red Arrow painting and the rest of the loot is fairly easy from here. Another five hundred fifty gold, two hundred fifty gems, and fifty goods. Then back out the way we'd come in, back over to the elevator and down to the third floor. From there to the window and slide off the windowsill and down to the alley along the east side of the museum.
 Now what? More exploring? The Vampyre Blade at the Wizards' Guild and the Old Widow Inn rented room are still outstanding. Let's check out the Wizards' Guild. Over and into the canal by the Water Pump and swim east. Mantle out by the north end of the boardwalk by Peabody Street. There's an archer sentry here but she doesn't have any Broadheads. I can also see another sentry in front of Peabody's. When the archer looks away we sneak over past the Peabody sign. When she looks away again we sneak over by the Peabody sentry and get his Smelting Factory Key. We can now see another sentry across a footbridge in front of the Murkbell Police Fort. We cross over the footbridge on the left side and work our way around the walls to the statue up by the cop shop front doors and open them. The sentry here has nothing. Back the way we came and into the canal by the boardwalk. On over toward the Falstaff Wizards' Guild. Taking the turn north we notice a few wooden beams jutting out of the canal wall and a low spot across from them that we can mantle up out onto from the canal. From here we shoot a Rope arrow into the centre beam, slide back into the canal and climb out again on the Rope. We're just north of the Falstaff Wizards' Guild front door.
 That leaves only our rented room at the Old Widow Inn. Not too far away on the map but not that easy to get to. We end up swimming back over by the Black Die. There's a nugget worth fifty gold under Gunnies Warehouse dock. And a ladder up onto the dock where there's a chest with a single Flash Mine. Another Moss arrow in a closed area just west of the Black Die. On to the Fish Monger's, unlock the door and inside. There's a sleeping thief in the far corner, some large fish on the floor, and a note and a cashbox on a shelf. The note's about his pal Pete who seems to have drowned in the canal. The thief awakens and stands facing a second doorway when we begin picking the cashbox lock. A coin stack worth fifty gold. Nothing else here except a couple of small fish and bottles on the floor. Heading back over toward the door to leave we stumble over something else on the floor and pick it up. A "Tasty Bone." Huh? Out and north to Hillcrest Court. There's a sentry under a streetlight on the way but he only mumbles when we slink around the corner near him. Unlocking the Gleaming Facet Jewellery Shop door we enter and find six hundred seventy-five gold and eight hundred twenty-five gems in various jewelled items. And a note about the cleaner from over by the Windmill having stolen a second special jewel. Up a ladder to a small, wooden floored room with a safe. Unlocking the safe we find the Vampyre Eye. That's two of them now. This one, Vampyre, like the Eye of the Lich we found earlier is not clearly either the second or the third one so we'd better drop it. Take it with us down just outside on the cobblestones though so we don't have to climb all the way up here again.
 We spot the lady cop archer up on the building beside the Windmill. We're across from the Windmill door now. It looks like we may be able to get into the Windmill that way. If not the upper sections of the mill are wooden so maybe a Rope arrow may do. Although, we can't see any way in up there. There are two cops here. And one has had too much coffee. He's spinning like a top. He's just not getting happy that he's facing the correct way. Hard to time our moves while he's looking away. There is some shadow in the Windmill doorway but we're not sure it's enough. Turns out it wasn't locked so we were able to get inside the mill quickly enough. We can see a ladder going up inside but we'll need to get up to the second floor to get to it. There is a barrel and a box here as well as three sacks. A couple of Holy Water vials in the corner behind one of the sacks. Rope arrow up to a beam and we're there. At the top a Toolbox and a book. The gearing to the sails are above me yet but we can't see any way to them from here. The book first. Jeb's diary. He's the fellow that cleans the Gleaming Facet. And he's confessing stealing the other ruby in the diary. The Toolbox? The last ruby, the Ghoul's Eye. This one's okay to carry around with us. Also a Rare Coin worth five gold on the boards beside the diary.
 We swim around to the Water Pump, mantle up and jump and mantle out to Watercrest Island right below the balcony with Dr. Provost's body. Thence through Dark Rose Market and around in front of the Watercrest Museum to the alley between the museum and the Guest House. We'd noticed an open window high up in the Guest House while casing the museum but couldn't relate that to our museum plan so left it. We now shot a Rope arrow into the window and climbed up inside. A cashbox with a coin stack worth five gold. A chest with five Moss arrows. A swivelling telescope. And L. Croft's diary regarding suspicious activities at the Cathedral and especially at the canal. The stained glass window she refers to would be the one right beside the secret exit we'd used to get out of the Cardinal's room in the Cathedral. She says she's going diving. Looking for the Zjilich Amulet it sounds like. It also looks like we could put a Rope into the canal side window and cross over to the Cathedral grounds from here. We figure we may as well check out this section of the canal too and dive out the window into the water. The Canal Gate just south is locked and we can't pick it but it does open to the Canal Gate Key we got in the study in the Cathedral earlier. We continue to look closely around the bottom of the canal here. There! A hole going down past the regular bottom right next to the wall the next Canal Gate is in. And yes, a chest with the Zjilich Amulet inside. Great! Now we've got all the things we need to reset the Eyes in the Amulet as per the instructions in the spell book. Back up and to the surface and pick the lock on the other Canal Gate. Turns out to be just beside the Old Tower we'd used earlier to get into the Cathedral.
 Be prepared to pick Mercedes' purse when she comes out of the closet. We move over by the door and turn facing Mercedes. Go ahead and let her have her say. Check out her purse. Read the diary. When she's finished sneak over and turn the lights off. Mercedes will have given us the Meepwood Cemetery Keys ring. After she asks about Laura Croft and then doesn't move we're safe. If the door had been unlocked she would have left and started up Knife Street hurling firebolts (see the red sparks on her right hand) at the undead that are there now. Let's see if we can get through this with no deaths whatsoever. It's not that we're averse to killing these guys but they may have pockets to pick and they don't count if we pick them off dead bodies. Another new objective to retrieve the Cylix from the Cardinal in the Meepwood Cemetery and destroy it in Peabody's Smelting furnace.
 If we're upstairs and in the dark they won't bother with us. Wait until they relax and start their patrol. They should take a tour of the main room and then go out to the entrance and back. One of them stops in the door between the two circular rooms sometimes and blocks the second one from continuing. We're going to make use of this to make our escape. But before we do anything make sure all four mages have settled back down to their routines. We've got to retrieve the reset Amulet from the centre of the pentagram. Remember the best approach to the pentagram is around the right side of the pillar behind the chest coming out on the right side of the chest. This blocks the view of us from the small anteroom. Also wait until the first of the two new mages stops in the anteroom and blocks the second new mage. This way the only mage we need concern ourselves with while retrieving the Amulet is the one upstairs. It wasn't just the two new mages that were added to the Guild. The Eye in the Sky has appeared too.
 And it's more or less directly over the ladder so we're best to snatch the reset Amulet quickly so the Eye in the Sky doesn't get a bead on us with it's firebolts. When we're done we're back in the shadow of the pillar. You should have observed that the new mages' route through the room is outside the ring of pillars except right near the chest and again inside around the last pillar before heading for the entrance. Not only that but the first trip they make through the main room they make more or less together as a result of them being stuck together in the anteroom while the first one stopped. This gives us a perfect opportunity to sort of follow them out into the anteroom. Anyhow when they turn inside the pillars near the chest start to follow them toward the door to the anteroom. We're not going to stop so try to time this with the upstairs mage being over this doorway when we get there. Also we want the mage in the anteroom to be facing away. When we go through the door to the anteroom we scurry to full darkness along the wall just left of the single mage. Then when the two new mages come back and reenter the main room and this single mage is facing the main room we can sneak out behind him. And now's your chance to try out the Amulet. Go ahead and make a save and head for the cemetery. That's a good spot to try it. When you're finished reload here and we'll continue.
 Yes, we mantle out at the very end of Hollows Lane and spot a Keeper or Greater Vampyre with a purse worth one hundred gold. Did you notice that when these Keeper Vampyres are sufficiently injured they do become a groaning and moaning mist just like it said they would in the Treatise on the Dead by Niblung? They also use firebolts and destroy our Vampyre Eye Zombie buddy given half a chance. We got out of the canal at the rowboat and climbed the stairway but stopped just short of the top landing because we could hear some growling. This gal in white walked by and we grabbed her purse with another one hundred gold. The action was too fast paced while getting the loot so I saved and reloaded back a bit and took the shot with her where she seems to settle in and with her purse still intact. There's also a golden vase worth one hundred in the museum now that wasn't there before (thanks Lady Jo). So, find time while here to get that. I surfaced for air between the Guest House and the Cathedral and could hear zombies above. Also I noticed everything seemed undisturbed at the Black Die.
 I could hear the servers still humming and walking about up there. But when I approached the Fish Monger's I could hear zombie sounds again. Yes, and it's Pete! Remember, the note from the Fish Monger, about his buddy Pete and the fish? I grabbed the fish but it didn't count as a pocket picked. Perhaps appropriately too, if you think about it a bit. I think I just ate this fish! Ugh! Yuck! Ptui! Well, looks like he got his revenge. His proper burial will have to wait though. I noticed some wooden eaves in Gweldwyn Court and Rope arrowed up and tried to jump onto a sloped roof near a tower with a ledge but kept sliding off. And the Gleaming Facet door is jammed shut now so I can't see if anything's changed in there. Working my way over to Gallan Bridge I ran across a couple of Zombies walking toward me. One had something under his arm. Haha, a Dead Cat! I wonder? Let's swim back over to the Black Die and see if this is Grenadine's cat. Yes, and he gives us a Holy Water vial for returning it. Take care here.
  She came down and stood facing away from me this time but before the waitress had spooked and noticed we were the thieves the cops were looking for. And that's twenty-four of twenty-six pockets! Only two more to go. I know the game says there are twenty-seven but that's a bug in Thief II. Just before I got to Gallan Bridge on my way to see about the zombies near the Guest House I could hear a Haunt fracas going on around the corner so hunkered down in a corner near the small wooden doored room where I'd found a Lucky Coin before. Odd, I usually leave doors open so I can see readily where I've been. But this one is closed. Whoa! The door splinters open and this cute threesome comes out and takes off. I can't see inside? No changes inside though. Now I can't see out? Oh, well. I'll wait in here until the Haunt sounds fade. Just for fun I saved and drank an Invisibility Potion and ran out by the Windmill in the middle of a bunch of them and blasted the Amulet. Nine kills and 1,686 damage. That's some powerful Amulet! Reload in the small room. Hehe. I tossed a Scouting Orb out and when I could see no more undead nearby and the sounds had subsided I bolted out, picked up the Orb, and across the Gallan Bridge over beside the Guest House in a corner. Now to check out the museum. For those following along there's something you should know about the Watercrest Island now. There's an invisible beast wandering around over here. I think this is the same beast that was guarding the Cylix the other night under the Weeping Angel. He growls when he notices you and he doesn't move very quickly but take care anyway.
 And a Haunt sentry at the next turn. Following the Skeleton Haunt down to the Haunt when he turns to face away we duck around to his left and crouch in a pretty dark corner here. We slide along the left wall here into darkness and pass the Skeleton Haunt returning. A little further along a ramp going up. And at the end? What's this? Alcandor and the Cylix! Alright! Grab the Cylix. More gold mummy types, like those recently conscripted by Alcandor in the museum, bumbling around here. And another ramp going up the other side. The mummies wander up and down this ramp between their trips through the Alcandor throne room. Above the ramp a crypt with a winged statue worth fifteen goods on top. And touching a skull on a raised brick area up here opens a doorway. Through the doorway to ... outside, in a cemetery. The door is in a mausoleum. This must be the Meepwood Cemetery. And there's the Caretaker's Manor just on the other side of the cemetery. Spook central. All varieties and lots wandering about. We work our way amongst the shadows over to the gate and unlock it with the keys Mercedes gave us. There 's a dead cop swordsman here. I don't recall him being here when we came over the bridge and turned the lights off? We've got a pretty good view of the front entrance to the manor from the gate. Doesn't look like we'll be able to get through those doors very easily.
  A ring worth one hundred gold on the ground beside an obelisk gravestone in a small, fenced off section of the cemetery. We work our way back over to the mausoleum door. There seems an unusual amount of activity along the south side of the manor. And ... is that firefly like sparkling in the bushes and vines? Let's see what's over that way. An entrance to the basement. And a hole in the basement floor down to Alcandor's sub-basement throne room. And a ladder up to a trapdoor. Tile flooring! At least it's dark here. A large room with books, a fireplace, and a harp. And a Lucky Coin on the floor besdie the harp worth twenty gold. We cross to a stairway going up. Upstairs a nursery with a rocking horse and a cradle rocker in mid air and spinning. A child's ring on the floor near the cradle rocker worth one hundred (thanks telliamed.) A golden vase worth one hundred gold on the floor in the hallway. And a Fire arrow in the rubble blocked doorway across from the nursery. That seems it for here. Back out through the basement and back by the mausoleum to the cemetery gates, past the streetlight switch, jump up onto the retaining wall, and slide into the water. Swim over to the Old Widow Inn via the Wizards' Guild retrieving all three of the Rope arrows we'd left ending up on the Police Courtyard side. Sneak around, jump and mantle across the canal, up the Peabody outside ladder, inside and down the ladder. Over to the furnace and place, quietly since the guards are still here, the Cylix on the brick ledge. Back over to the ladder and a couple of Moss arrows knocks the Cylix into the fire without disturbing the guards. That's it, final objective completed. Mission successful!