Walkthrough for Missions 1, 2 and 3
All locks that require keys are noted. Anything else is either unlocked or can be unlocked with your picks.
These walkthroughs are written for the Expert difficulty setting but will also guide you through on Normal or Hard. You will notice small differences, such as the amount of equipment available, etc. but the main objectives remain the same on all settings.
Mission 1
You begin the first mission as Garrett drops into a flooded sewer pipe. Climb through the opening in the north wall, follow the passageway to the round sewer room at the end and then head west through another sewer tunnel. Climb the ladder on the left at the end. When you get to the top jump out quickly and head over into the shadows on the north side before you're spotted by the guards. Climb the rocks in the northwest corner and you'll find a disturbing sight...your friend, Rupert, impaled on a fence. This can't be good! Pick up his equipment (after all, he has no further use for it) which includes a rope arrow and some moss arrows. Rupert is wearing a purse (+50) and there are 5 gold coins (+100 = 150) lying on the rock where the fence meets the south wall. Head back down the rocks, sneak in the front entrance when the way is clear and slip into the door on the left (S).
Cross to the wooden door, go through it and listen for the footsteps of a guard who patrols through the upstairs room. When he is walking away, ride the elevator up to a bunk room. Pick up 2 gold plates (+100 = 250) and 3 purple goblets (+45 = 295) from the dining table. The chests hold a silver coinstack (+12 = 307) and a gold plate (+50 = 357). In the next bunk room there are 3 gold plates (+150 = 507) and 3 purple goblets (+45 = 552) on the table and a gold wine bottle (+50 = 602) carelessly left on the floor underneath it. One of the chests holds a ring (+40 = 642).
Walk through the door on the north wall into a hallway. In the bedroom on the left a purse (+50 = 692) is tucked away in a chest. Enter the room at the end of the hall and open the door on the east wall. Beyond it is a passageway that looks out over the front gate - the guard stationed here is wearing a purse (+50 = 742). Open one of the doors on the north wall and use the button to bring up the elevators then ride one of them down to the lower floor.
The Armory
In the room to the north there's a locked gate. You'll come back to that much later on. Also take note of the locked panel on the center of the elevator control here. Frob the lockbox and you'll receive a new objective to find the basement key. Walk down the stairs, out the door and turn right (W) into the main courtyard of the building. Take care not to be spotted by the guard by the barrier who is blocking access to double doors set into the ground.
Work your way around to the right (N) and over to the guard standing in front of the armory doors. Deal with him, continue past the doors and along the wall of the building, past the rocks on the left. Turn left in between the rock walls and walk to the end. Pick up the scroll left for you by Rupert, read it and you'll receive a new objective to find access to the private rooms of Sir Barthol Geringdal. The note tells you that Rupert left the armory key on the window ledge of the rooms. Frob the big bag beside the scroll to pick up some water arrows, as well as some food. Walk back towards the armory wall and stop before you turn left alongside the armory.
Look above you and you'll see beams that protrude from the building wall. Put a rope arrow into the one nearest to the armory, climb up far enough to see the ledge of the window to the left and pick up the armory key, which completes the objective to find the key that Rupert left for you.
While you're in the neighbourhood, creep over and take care of the guard standing by the barriers in the courtyard. Help yourself to his purse (+50 = 792) then go over and let yourself into the armory. Pick up the equipment from the shelves and read the scroll on the table which mentions an emergency exit. Hmmm! That bears looking into.
Shift the boxes that are piled up in one corner and you'll find a lever set into the floor. Frob it to move a bookcase and go through the doorway behind. (This is a one way trip as the lever on the other side has shorted out.)
In the room beyond, there's an unfrobbable door to the left, a bunch of barrels full of explosives and a door to the right. Go through the latter and move a box that is tucked in under the stairs. You'll see an "X" marked on the floor. Crawl in under the stairs and look above the "X" for a button to push. Go back to the other room and the unfrobbable door will be open.
The Gem Cave
Follow the passageway to a small yard at the end and climb the rocks in the SW corner where you can pick up a gem (+100 = 892). Continue up the rocks and creep into a passageway in the rock wall. Walk along it to the end, through a tiny round cave and into another passageway. You'll emerge on a ledge that overlooks the courtyard where you came up out of the sewers. Turn right, slip down over the edge onto a slightly lower ledge and look for an opening in the wall behind a bush at the east end. Follow that tunnel to the far end where you'll end up on a ledge that overlooks a neglected graveyard. You've just found Secret #1. There are a few frogbeasts in the vegetation so you might want to get rid of them first then put a rope arrow into the wooden beam overhead and climb down the rope. Don't try to go down the ladder as it has rotted and will give way as soon as you start down it.
Look behind the bushes in the SE corner and you'll see a funny yellow thing in the ground. Frob it and a tombstone on the west side of the graveyard will rise, revealing a passageway into a gem cave. It's dangerous in here and you will lose health points by touching the water and the coffins but there's a healing fountain at the far end so there's no need to worry too much about it. Gather up the 15 gems (+1500 = 2392), using rope arrows to reach the highest ones. If you lose a point or two of health on your way out, eat the supplies that Rupert left for you and you'll be as good as new. Once you're back in the graveyard, climb up to the top of the vine on the right hand side (N) of the raised tombstone (if you have trouble getting onto it, frob the yellow "thing" in the corner again to lower the tombstone and get it out of the way), and you'll reach a small platform outside a cave that has obviously been used as living quarters by someone. There's nothing much in here, just a book to read so if you have difficulty with the vine, there's no real need to worry about it. Retrace your path all the way back to the room with the explosives barrels and go back through the door to the stairway with the "X" underneath it.
Creep quietly up the stairs and relieve the guard of his purse (+50 = 2442). Pick up 2 gold urns (+200 = 2642) and go through south door very quietly as there's a guard dozing out here and a very alert archer patrolling out on the rooftop above the armory. Take the Private key from the sleeping guard and use it to open the door beside him. (Don't open the door on the west wall because there are 2 very alert guards right outside. There's another way out into that area that you'll find shortly.)
Sir Geringdal's Private Rooms
You're now in Sir Geringdal's private rooms - objective complete. Open the chests to get the Watch Big Gate key and some flares then slash the banner on the wall between the two chests. Walk through the doorway that it concealed and you've just found Secret #2. There are lots of goodies in here. There's a green rolled tapestry (+150 = 2792) sitting on top of the bookcase and a ring (+40 = 2832) lying on the floor behind it. Open the chest to pick up a mask (+50 = 2882) and grab the necklace (+200 = 3082) that is adorning the statue. There are 3 silver statues (+45 = 3127) and 2 jars (+60 = 3167) on the floor. You'll also notice a rug that highlights. Frob it (stand back far enough to allow it to move) and you'll see a pair of closed shutters set into the floor. Open the window, lean out and look below the window for a lever. Frob it and the shutters in the floor will open. Lean over the opening to take care of the big green spider wandering around in the room below, then climb down and have a look around. You'll notice a corpse all nice and neatly wound up in spider webs. Frob it and you'll find a purse (+50 = 3217). Head back up to the secret room, back through the doorway and climb the ladder to the attic rooms.
Unlock the south door with the Private key and enter a small sitting room at the end of the hallway. Pick up a gold candelabra (+40 = 3257) and then read the scroll that is sitting on the desk. You'll receive an objective to find the golden skull of Yorick that is mentioned in it. Grab 3 silver plates (+30 = 3287) that are mounted on the wall above the fireplace and 3 gold coins (+60 = 3347) that have been dropped on the floor by the fireplace and on top of the fireplace log. That's your clue for where to find the skull. Why would coins be here? Crouch and walk right through the fireplace into a long narrow room. Open the chest at the far end and you'll find the gold skull of Yorick. Objective complete.
Return to the top of the ladder and check the floor by the hatch for a key labeled "???". Pick it up and use it to unlock the other door. You'll see someone running off down the hall but don't bother trying to catch him. Instead just walk to the end and pick up a scroll that is sitting on some barrels. You'll receive two new objectives after reading the scroll. The first one is to find the Vault IGNIS and to activate the firelock. It also mentions that you need to be careful not to misplace Yorick's skull so don't sit it down anywhere and misplace it. You'll need it more than once.
Climb over the barrels and up a ladder to a hatch in the ceiling. Open the hatch and carefully mantle up onto the edge of the roof. You'll be overlooking a trellised garden, the one that has two guards facing the entry door that you bypassed downstairs. Quietly drop down onto the trellis covering the garden (make sure you aim for the wood frame and not the vines or you'll give a whole new meaning to "dropping in for a visit"), then make your way towards the back of the garden and up onto the rock ledge. Creep along to the right (N) and down the ramp just inside the railings. Sneak up to the guards by using the shadows created by the wood support beams and staying close to the walls, and take their purses (+100 = 3447). Climb back up the ramp and walk along the rock ledge at the back of the garden until you see an arrow. Climb the vines growing on the back wall above the arrow, enter the tunnel at the top and follow it to the far end.
Drop down onto a rock ledge and watch the path below until a patrolling archer appears from the right. When he turns round, follow him east along the path until you come to a door on the left. Pick it open and enter a room with a few boxes and broken barrels. Go through the opening in the wall and along the passage into another room. (You'll have to shove on the barrel in the opening a bit to move it enough to get in.) Use the opening in the corner to the left of the door to shoot a water arrow at the torch near the big gates. Now it's dark enough to sneak out through the doorway. Take the Gate 2nd Embankment key from the guard standing below the torch and use it to open the big, colorful gates. Go through and close them behind you. You're now back in the main courtyard.
Capt. Murdock's Treasure
Cross to the small building in the NE corner, unlock the door with the Watch Big Gate key, go inside and push the "Pedestrians" button which opens 2 doors in the Big Gate beside this building. Creep through when it's safe but don't take too long as the gates close again automatically. Evade the burricks and use the Watch Big Gate key to get into the watch building on this side of the gate. Grab the gold wine bottle (+50 = 3497) on the table and another one (+50 = 3447) tucked in beside the bookcase. The toolbox holds a fire arrow and inside the chest you'll find a blue crystal (+25 = 3572).
Back out in the garden, cross to the opening in the hedge to the north. Enter the building, which is labelled as the house that Capt. Murdock used to live in but is obviously used as a burrick stable nowadays. Walk around to the back corner on the east side and you'll find a water arrow tucked in by the foundation then head inside but beware the sleeping burrick! Climb the ladder to the loft and take the two gold wine bottles (+100 = 3672) that are lying near the sleeping guard then peek in the barrels nearby. In one of them you'll find 3 moss arrows and in another, 3 gold coins (+75 = 3747). Walk along the south side and you'll find a scroll on top of the wall. Read it to get a new objective to find the treasure of the stranded Capt. Murdock and get a clue about how to find it. Now turn to your right and open the chest tucked in behind the pile of refuse to acquire a navigation globe (+40 = 3787).
Climb back downstairs, go outside and over to the west side of the building, where it meets with a hedge. Put a rope arrow into the roof eave, climb the rope and jump over the hedge into the back garden. Pick up a rope arrow that is sitting on the foundation edge then think of the clue you read. "A gnome gleaming bright"?? The only thing gleaming out here is a little red mushroom so hit it with a water arrow and it changes color. At the same time, the big rock slides aside and below is the entrance to Capt. Murdock's stash. Objective complete!
Help yourself to all the goodies which include 2 plates (+20 = 3807), a gold statue (+75 = 3882), 3 black jars (+60 = 3942), a tiara (+125 = 4067) and a gem (+100 = 4167). Take your sword out and slash the pirate banner on the back wall to find even more valuables. Here you'll add a mask (+50 = 4217), 3 blue crystals (+75 = 4292), 3 silver coinstacks (+36 = 4328), 7 gold coinstacks (+175 = 4503) and 3 silver statues (+45 = 4548) to your loot bag. You've cleaned the stash out so climb back up the ladder, use a rope arrow to get back over the hedge and leave Capt. Murdock's. To the left of the doorway is a tunnel to the monastery that is patrolled by a burrick and 2 guards wearing purses (+100 = 4648). Walk along the tunnel and into the gardens on the left-hand side. As you approach the monastery, the guard inside the gates will close them and the objective to find Avicenna's Cannon Medicinae in the Monastery will be Xed out and you'll receive a new objective to find another way in.
The Fire Lock
The guard standing outside the Monastery gates is wearing a purse (+50 = 4698) but it's a bit hard to get as the area is well lit. I found the easiest way was to make a noise in the garden to get him to investigate, then BJ him there. Walk along the hedge on the south side of the path and turn right into the entrance nearest the Monastery gate. There's a large rock on the right. Climb up on it and jump down into the small bit of space between the hedge and the rocks. Check the ground for a water arrow (counts as 3) then turn around, climb back up on the big rock but this time, jump down on the south side of it into a small clearing. There's a red face carved into the rock with a golden skull set in above the eyes. Use the skull of Yorick on the golden skull, and a secret passageway will open in the ground to your right.
Enter, walk along a short hallway and climb a ladder at the end. Flip a lever on the wall to open the hatch at the top and climb out into a room with a pool of lava steaming in the middle. This completes the objective to find the Vault IGNIS. Pick up some water arrows and a bottle of holy water from a table and read the scroll then stroll over to the southeast corner and search the floor for 6 gold coins (+120 = 4818) (near a broken arrow). Jump up on the boxes that are lying beside the lava pool and from there onto the central pedestal.
Remove the plain skull lying there and drop Yorick's skull on top. (I'd suggest saving before dropping the skull as a few people have reported having problems picking it up again if it doesn't work the first time. It has to land in exactly the right spot to activate the mechanism.) Objective complete! Be prepared to get off as soon as the device activates (you may lose a few health points here) and get into the shadows in the corner of the room. A gate at the far side of the room will open and two haunts will start patrolling the room. After a while the obelisk on the west side will slowly move away from the wall. Enter the room behind it and pick up another water arrow (counts as 5), a vial of holy water and the lift key. This completes the objective to find the basement key.
Head over to the gate on the west side of the room, use the lift key on the lockbox, which is mounted outside the gate on the left-hand side and the gate will open. Walk along the hallway, frob the gate at the end to open it and you'll find yourself back at the elevator control panel that has the lockbox on it. Use the lift key on it and a small panel will open, exposing another elevator control button. Push it and get on one of the elevators which is heading for the basement. Partway down, you'll see a floor that the elevators don't stop at. Jump off and open the chest here to find Secret #3. Inside is a silver statue (+150 = 4968) and you'll find a breath potion sitting on the floor beside the chest. Push the button to bring the elevator back up and jump on as it goes past then ride it all the way back down to the basement level.
Walk up the ramped passageway opposite the elevator, staying to the right at the intersection and take another elevator up. Wait in the dark on the elevator for a few minutes and a man will walk past the opening and through a gate. (Don't bother to try to follow him. There's nothing down that passageway except a dead end and no way out.) Once he's gone head into the room and pick up a candelabra (+40 = 5008) - loot objective complete - and a tiny gold ring (+40 = 5048) from the table. Read the book then go over to the box on the sideboard, open it and pick up the trapdoor over gap key. Head out onto the balcony and pick up 2 silver statues (+30 = 5078), then climb out of one of the windows and onto the ledge with the spotlights. Walk west, jump a small gap and then go around the corner where you'll find a toolbox, which is Secret #4. Open it to pick up 3 moss arrows, a breath potion and a purse (+50 = 5128).
Return to the ledge with the spotlights, jump down onto the rocks then onto the roof of the Big Gate watch building and from there to the courtyard. Head over to the trap doors behind the barriers, unlock the lockbox on the wall with the trapdoor over gap key and flip the big red lever to open the doors. Shoot a rope arrow into the wood support and descend into the caves below.
The Monastery
Walk towards the far end, stopping to pick up some flares that are lying on the left-hand side and then look for a hole in the wall on the right. (You should have a number of flares in your inventory now. Use them to help find your way through the dark areas and underwater areas of the next section.) Climb through and into a flooded cave. Swim east to a flooded cave at the far end and look for a hole to wiggle through just above the water line in the NE corner. This area looks like part of an old building that is sloped. At the end, to the right, it drops off. You need to get down into the red water below. You can just jump from up here, if you're careful or you can hop over the rock ledges until you're down closer to the water level and jump from there.
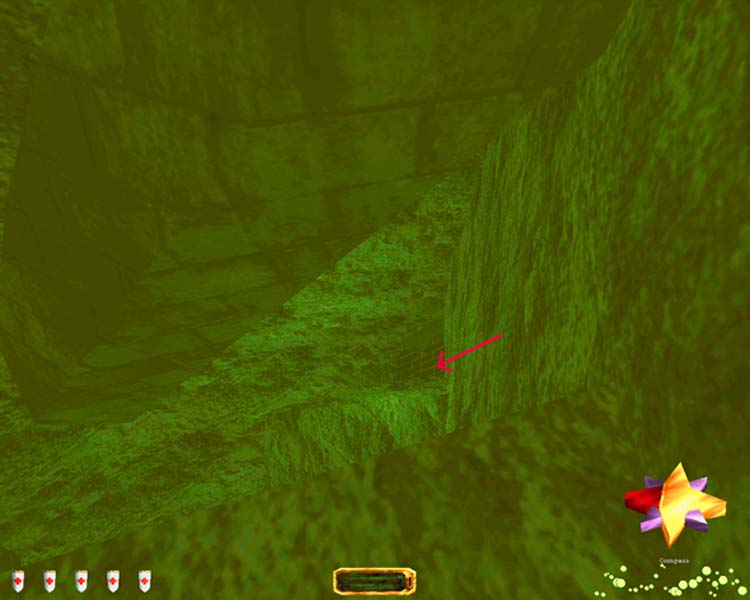
Once you're in the water, swim to the southeast corner and look for a rift in the floor. Swim down through it and then into a big metal pipe. (You can do this part without using a breath potion if you don't dillydally and you might appreciate having all three for the next part if you want to find all the loot mentioned in this walkthrough.) At the end, you'll come up in a flooded cave with a collapsed building on the east side. Dive down to the bottom right-hand corner of the building and squeeze through the gap - it's a tight fit! (Once you're through it, you'll have to rely on breath potions for a while as there are no air holes.) Head east, hugging the right hand wall. Swim under the sloping brick pillar, then follow the roof line down to the small brick wall in the corner (arrowed in the picture).
When you get there, dive south-west down the hole, then go round to the left to emerge in a cave with a tunnel opening on the north-east side. Before entering the tunnel (and if you have some breath left!) look in the upper SE corner of this cave for a crevice. Swim through it and pick up a gold nugget (+100 = 5228), a gold statue (+75 = 5303) and a jar (+20 = 5323). Now swim into the tunnel.
At the end, you'll come up into a section of sewers. Climb up out of the deep water and mantle up into the pipe that is jutting out of the wall. Frob the grate to open it and crawl along the pipe. Keep an eye out for a red spider that you'll meet along the way. At the top of this pipe, head north (there's another red spider patrolling here) and you'll arrive at the entrance to a room with a pool of toxic water and a dead body on the left. Thankfully the roof is wood, so you can use rope arrows to get over near him to pick up a healing potion and a rope arrow (counts as 3). You now need to get into the pipe to the north of the body, so use rope arrows to get in front of it and jump in.
Frob the gate to open it and walk along the pipe to the end where there's a red lit opening in the south wall. Mantle up into it (it's a bit high so you'll have to stand back a bit and do a run/jump to reach it) and proceed to the end where there's a ladder down into a sewer pipe. Climb down and just before you jump off the ladder, look towards the north end of the room. You'll see a gold nugget sitting on the edge of a pipe. Once you're down in the water, go and get the nugget (+100 = 5423.) (It's very hard to get it to highlight even when you're standing right beside it. Crouch and keep walking around it and it will highlight momentarily, allowing you to pick it up. It is also possible to get it by swimming into just the right place.)
Now head through the opening on the east wall, then north through an underwater tunnel. You come up in a well, and when you get to the ladder on the north wall the mission will end.
NB: 125g of loot is unobtainable in Mission 1, version 1.2 (5423 + 125 = 5548)
Mission 2
You begin this mission climbing up the ladder up from the well you were in at the end of Mission 1. At the top, you'll find yourself in a courtyard inside the Monastery. Enter the storeroom on the west side and pick up a ring (+50) from the floor behind the box in the SE corner. There are 3 gold coins (+30 = 80) in between the bags beside the WC sign. Once you've got those, open the north doors and enter a hallway. To the right, there are glass doors on the far side, but there's a guard standing inside so you can't go through that way. Wait until he's not looking and head to the far end of the hallway to investigate the chest sitting there. Read the note from Rupert, then climb up on top of the chest and walk through the wall banner into a secret room. You've just found Secret #1. There is a scouting orb in a chest over in the corner and a green rolled tapestry (+80 = 160) on top of the bookcase.
Return to the hallway and walk west to some stairs that lead down. You'll encounter a patrolling thief on your way down and he's wearing a purse (+50 = 210). (You must steal this purse to cause the Saal X key to appear - see end of para.) At the bottom, go through the double doors where you'll see a passageway on the right and stairs going up on the left. Duck under the stairs and wait for another thief AI to patrol by. Get rid of him and then go upstairs and through the west door on the first landing. Climb a few more stairs, go through a red curtain and enter a bunk room with a couple of sleeping guards. The chests in here contain a black jar (+20 = 230) a note and a purse (+50 = 280). The single bedroom at the north end of this room has one man sleeping on the bed. On the table, you'll find the Saal X key.
You can also add a gold wine bottle (+50 = 330) and a gold goblet (+25 = 355) to your haul. Read the note on the table to get a new objective to find the Horn of Tarquinius and you'll hear the haunting music of the Horn. There is a button on the floor concealed behind the back left-hand leg of the desk. Press it and the middle small animal head that mounted below the burrick head will move aside to reveal the Gallery key.
Go back downstairs, turn left and go through the door into the foyer. On the left is the door to Hall X, which unlocks with the Saal X key. The entranceway to the hall itself is blocked with rocks, as was mentioned in the note you found, but you can pick up a drill bit (+250 = 605) that has been carelessly dropped on the floor. Head through the door opposite the one to Hall X but watch out for the guard stationed near the entrance gate to the Monastery.
The Horn of Tarquinius
Open the gate blocking the north passageway, and walk along the hallway. There's a reception room on the left where you can pick up 2 gold candelabra (+100 = 705) and 4 purple urns (+100 = 805) and the door at the end of the hallway unlocks with the Gallery key. Inside the Gallery, pick up 2 plates (+20 = 825) and 2 gold urns (+150 = 975) from the tables then open the door to Tower of Tarquinius. Put out the torch at the far end of the passage then creep over by the tower gate and wait for the guard walking around inside to come close enough for you to take the Tower key from him. Use it on the lockbox on the wall to the left, go in and climb the stairs to the top. Hmmmm! You can hear the Horn but there's still no sign of it. Rope arrow up to the ledge on the south side of the tower and pick up 2 silver bracelets (+40 = 1015) then rope arrow up to the top rafters of the tower. Aha! There it is! Objective complete! Rope arrow back down and go down the stairs, through the Gallery and along the hallway again. Cross to the gate on the south side, go through and into a storeroom on the right (W).
Climb the box stack and jump down behind them in the SW corner to pick up a purse (+50 =1065). Now climb to the very top crate, open the trap door in the ceiling and mantle up through into a storeroom beside the bunk room you were in earlier.
There are a couple of different ways to get to the roof area and I found them all difficult as the guards here are touchy. You can go out the upper door of the Tower of Tarquinius, climb a rope to a set of trap doors and climb out when the patrolling archers aren't nearby then hide in the shadows, or go through the red curtain in the barracks room and up the stairs. I chose the last option for this walkthrough but any of them will get you to the same place.
At the top of the stairs, go out of the door but stay to the right until you get to the big hammer. Lean out and put out the torch that is partway up the hallway to the west. Sneak up, staying to the right in the dark, because there is another guard in the guardroom across from the extinguished torch. You'll need to deal with the guards here as you see fit and take the Monastery key from one of them. Now head through the door in the northeast corner which unlocks with the Monastery key.
Pick up a gold candelabra (+50 = 1115) and 2 vases (+100 = 1215), read the guest register, then proceed along the hallway and up the ramp into a circular room with 4 red-curtained doorways. Behind the left one is a locked door that you will return to much later in the mission. The doorway opposite the entrance opens into a sitting room where you can pick up a gold wine bottle (+50 = 1265). The doorway to the right of the entrance opens into a small library, with a plate (+10 = 1275) and 2 vases (+100 = 1375) on display above the fire. Go through the doorway between the library and the sitting room into a hallway, walk east through the door at the end into another hallway, and collect the gold urn (+75 = 1450) from the table. Through the double glass doors on the right is a balcony where you can pick up a gold wine bottle (+50 = 1500) and 3 purple goblets (+45 = 1545). Check the floor behind the east table for another gold wine bottle (+50 = 1595). Go through the curtains on the north side of the hallway into another corridor. One of the guards patrolling these hallways is wearing the Courtyard key. (It doesn't matter too much if you don't get it - the courtyard doors can be picked open.)
Pick up a vase (+50 = 1645) from a table in the hallway, then go through the door on the north wall and take 10 gold coins (+100 = 1745) from the fountain on the balcony. You can also pick up an extra water arrow (counts as 2) here. Return to the hallway and turn left (E). There is a hard-to-see necklace inside the large vase to the left of the door at the end (+200 = 1945). If you can't see it, just frob the vase. Go out, turn right, then go through the far door into a bunk room. Grab a purple urn (+25 = 1970) and go through the door marked Hall VII into a room full of desks. There's nothing but books in here so continue on through and out the far side into yet another hallway.
Pick up the 2 silver statues (+30 = 2000) that are displayed near the door on the right-hand (S) side. Put out the torches beside the door and then open it. Wait until the Watcher inside is turned away and dart into the side behind the wall. Peek out and when the Watcher is turned away again, run up to the altar. Flip the lever on the back to turn off the Watcher then go back out into the main room and sink a rope arrow into the ceiling by the center beam. Climb up and push the button on top to open one of the stones in the floor, revealing a ladder. Go down it, and in the room below, frob the coffin lid to open it, then take the crypt key lying by the skeleton. Leave the chapel, cross the hallway, unlock the glass door with the Courtyard key and go out into the courtyard. Unlock the north door with the courtyard key, enter a hallway and turn right(E).
The Hand of Glory
Go through the double doors at the end into a Library, but make sure you're not spotted by the Watcher at the back of the room. Sneak past it into the area between the bookcases at the north end, climb the ladder and flip the switch to deactivate it. As you start to climb the ladder, the Book of Wisdom drops onto the floor and you'll see someone running off at the far side of the room. You receive a new objective: Find the Hand of Glory. If you read the book, you'll learn that it is secreted away somewhere in the Archives. It also says the Cannon Medicinae that you are searching for is in Hall 10.
Go down the stairs to two doors that are labeled "Archives". Lying by the one on the right is a scroll and the Archives key. Use it to unlock the door, enter and turn left (N) into a room with a table in the middle and bookcases on all the walls. Rope arrow up to the top of the south bookcase and pick up 2 green rolled tapestries (+160 = 2160) then proceed into the room at the back. Pick up a gold candelabra (+50 = 2210) from one table and a climb the ladder against the north bookcase. On top of it there's a scepter (+120 = 2330) that you can add to your stash. There's a gold urn (+75 = 2405) on one of the small side tables beside a plain metal candlestick. Frob the candlestick and go back to the other room where you'll find a floor grate has opened in the SE corner.
Climb down into the hallway below, walk to the end and climb the ladder to another hallway that ends in a room with a pedestal topped by a glowing red ball. Read the clue on the floor plaque. Hmmm -the greatest enemy of the book is fire, isn't it?. OK, douse the red ball with a water arrow. Once you've done that, a door slides open in the hallway behind you. Enter the room and pick up the Hand of Glory. Objective complete!
Return to the Archives, walk up the ramp and then down into the south section of the Archives. In the back room which is used for storage, there are some crates stacked against the back wall. There's a lever on the wall behind the single crate that moves the 2 stacked ones and reveals a passageway as well as a second copy of the Archives key. Follow the passageway, which turns from brick walls to stone partway along. When you arrive at a section where you can hear running water and the ceiling is open to the sky, climb into the opening on the left side (W) just before the railings. Drop down into a little crevice and pick up the goodies which include 2 silver nuggets (+50 = 2455) and 3 gold nuggets (+150 = 2605) then continue north along the passageway to the end where you frob a stone panel to open it.
Go through and into Asparagus' bedroom. Take green rolled tapestry (+80 = 2685) from the chest near the bed then read the book that is lying on the desk. You'll receive a three new objectives: Find the skull of St. Gregor, Find the skull of Pater Ignatius and find the Gorge key. Take the Dining room key from under the paper tray and walk up the stairs and down the other side. At the end of the hallway is a dining room which is loaded with valuables. Help yourself to 3 gold candelabra (+150 = 2835), 5 gold wine bottles (+250 = 3085), a china plate (+10 = 3095), 7 gold plates (+350 = 3445) and 7 purple goblets (+105 = 3550).
The Skull of Ignatius
Open the bathroom door at the bottom of the stairs, go in and unlock the hall door with the Dining room key. Turn left, go through the doors on the right into the courtyard and over to the east door. Unlock it, but don't rush in as there's a Watcher in the hallway to the right. When it's facing towards the NE, run into the SE corner behind a big turbine and flip the switch on the east wall to deactivate the Watcher, then head over to the door in the NE corner. Pick it open, jump into the water inside the room and check the NE corner for a ring (+50 = 3600), then climb back out and pick open the door at the end of the short hallway east of the Watcher.
Go through it, turn right and pick up a plate (+10 = 3610) from the coffee table. Now get in behind the sofa and slash the banner that is hanging on the wall. Remove the loose bricks, crawl through the opening and unlock the door here with the Crypt key. Enter a creepy crypt with a statue of a knight in an alcove at the far end. Frob the knight's sword and the tombstone to the left (E) will slide down, revealing a secret passageway. Head through, along a hallway and down a couple of ladders. You'll end up in a room containing the Well of Oblivion.
Approach the statue on the right (W) and slide in behind it from the right side (there should be energy balls shooting out from the left side by now). Flip the lever on the back to deactivate the traps then pick up 6 purple urns (+150 = 3760) from beside the statues. Open the chests to find a tiara and a gold coinstack (+125 = 3885) in one and a gold coinstack and a mask (+75 = 3960) in the other. Swim down to the bottom of the well, grab a pink gem (+100 = 4060), a necklace (+200 = 4260), 7 gold coins (+70 = 4230) and the skull of Ignatius - objective complete! (You will find your movement is slow while you are carrying the skull, as if you were carrying a large boulder.) Return to the crypt and you'll notice *gasp* that the statue of the knight is now missing and you can hear something creepy. The tombstone on the west wall that is closest to the door has moved and there's an opening behind it. Enter cautiously because it's occupied and open the chest to acquire a tiara (+100 = 4430).
Return to the hallway, climb out from behind the couch and go through the door to H2O services, back out into the courtyard and through the north door. Turn left (W), go through the door at the end to the top of the stairs to the lower floor. Drop the skull somewhere out of the way here so you don't have to move at a snail's pace, but remember where you leave it. Go down the stairs and over to the Mess door.
Enter the Mess, pick up 6 gold wine bottles (+300 = 4730) and 3 gold candelabra (+150 = 4880) and take the Yard key from it's hiding place behind a stack of plates on the shelves. Return to the stairwell and go through the door to the left of the Kitchen door (there's nothing of interest in the kitchen or pantry unless you want to nibble on a deerleg), along the hallway and out through a door into a large maze garden. Turn north and enter the H20 Service Connection Building. Walk to the east end, where a Mechanist occasionally stands to fiddle with a machine. Take the Drawing Room key from him - this gives access to the Gorge: objective complete!
Squeeze in beside the two big turbines in the NE corner and go through a hole in the wall. At the end, mantle up onto the ledge and from there to the top of a wall that is blocking the passageway then pick up a dagger (+50 = 4930) that is stuck into the right-hand wall. Jump down on the northwest side and you'll find a small campsite. Read the scroll that is lying on the ground and you'll see it's where Garrett's friend Rupert has been hiding out. Crouch and walk through the banner by the fire and out into a small yard where you can pick up a rope arrow from the ground. Shoot it into the hedge to the south and climb up on top then jump down into the gardens but watch out for the patrolling guard. He's carrying a lantern so he spots you quite easily when he's in the area. (You can't knock him out, so it's best to avoid him.) Leave the small garden area, turn left and walk to the south hedge where you can just see the top of two barred windows showing above the top of the hedge. Rope arrow up on top of the hedge in front of the right-hand (W) window, open the bars and enter the Store. (If you have difficulty with the hedge, you can also get into the Store from a door near the Mess and Kitchen doors but there is a guard in the hallway there you will have to deal with.)
The Canon Medinicae
Collect the water arrows from the chest in the NW corner, then go over to the two armoires standing against the east wall. Check behind the one farthest from the windows and you'll just be able to see a mark. "Use" the Hand of Glory on it and one of the coffins nearby will move aside, exposing an opening beneath. Go down the ladder. Apparently this is an alternate way into Hall 10 so keep on walking, following the signs but staying close to the wall at the first corner, as there's a trigger for a trap in the center of the hallway here. At the end, frob the sewer cover to move it and climb down a ladder. (You might want to moss the floor at the bottom first, as you have to jump off the ladder and it can alert the occupants if one of them happens to be close by at the time.) Push a button on the wall to open a door into the Lost Library.
Get into the water under the bridge and you'll find a chest that holds 6 fire arrows then look up at the underside of the bridge and you'll see a handprint. "Use" the Hand of Glory on it then get out of the water at the north end. Slash the banner on the back side of the column straight ahead of you and inside you'll find the Canon Medicinae. Objective complete! You'll find more fire arrows in the brazier fire on top of the bridge which might come in useful later on. Return to the Store and pick up the Store key, which is lying on the floor to the left of the door and use it to unlock the door to the hallway. Take care of the guard and then help yourself to a gold urn (+75 = 5005) and 3 china plates (+30 = 5035).
The Skull of Gregor
Go through the east door and up the stairs and pick up Ignatius' skull from where you left it (don't get too close or you'll stub your toe on it and take damage) and take it back out to the garden with you. Walk west then south, past the spot where you roped up onto the hedge to enter the Store. Turn right (N) into a garden area with a set of large gates guarded by a Mechanist creature. Drop the skull in the corner here, take the Vault key from the guard and use it to unlock the gate. Walk through the double doors and into what appears to be an old abandoned church. There are 3 green gems (+300 = 5335) on the SE windowsill and a white gem (+100 = 5435) on the NW windowsill. Head along the passageway underneath the huge mask, turn right into a hallway that has a burning brazier at the end and unlock the gate to the left of it with the Vault key. Collect 8 jars (+160 = 5595) and 8 vases (+400 = 5995) from the shelves. Frob the last (W) skull on the north shelf to open the gate at the far end of the room.
Climb the ladder and walk in to the alcove on either side of the holy water fountain, look up and you'll see a wooden beam. Shoot a rope arrow up, climb it and jump into a small room above the holy water fountain to find Secret #2. There is a healing potion and a bottle of holy water on the floor. Climb back down, return to the church and use a holy water arrow on the two statues flanking the north doors, which will then open. Go through and over to the statue on the west side. Flip the lever on the back of it and the central statue will shift, exposing a hole beneath it. Climb down and into a tomb with 3 coffins. There is pressure plate in the floor to the left of the floor plaque that's labeled "Saint Bromelius". Use the head of the broken statue lying on the floor to weigh it down and the coffin will sink into the floor. In the hole behind it, you'll find the skull of Gregor. Objective complete! At the same time, you receive a new objective to find out who your new partner is and to go to the gorge, open the gate and wait for him.
Climb back out (which can be a bit difficult so it might take a few tries. I found it easier to climb out on the sides than to go over the coffin itself), go over to the northeast corner and pick up a couple of water arrows then pick up a bottle of holy water that is lying in the small tunnel that leads down to a lava stream. You'll also find a ring, the Seal of Bromelius, but it doesn't seem to have any use. Farther along the tunnel, there's a gold nugget (+50 = 6045) - loot objective complete! - and at the end, across the lava, there's a mask (+50 = 6095). Once you pick it up, be prepared - a zombie will appear in the crypt and make a beeline for you. Picking up the mask has also caused Saint Polemus' tomb to swivel, revealing a cavity in the floor containing a gemstone (+100 = 6195).
Return to the upper room, drop the skull near the exit doors then creep in beside the broken walkway and go upstairs. This area is lined with coffins and patrolled by 3 or 4 zombies but you have plenty of ammunition to get rid of them.
At the top, turn left (E) and check beside the third coffin for a gold goblet (+25 = 6220). Beside the next coffin is a bottle of holy water. Head back past the ramp and over to the west side where you'll find a gold statue (+75 = 6295) and a gold goblet (+25 = 6320). Continue around to the end where there's a large lever. Flip it to open the exit doors downstairs and head back down. Pick up the skull and head back outside. Grab the second skull and go over to a bush on the west side. Frob it and you'll pick it up. Toss it away, read the scroll you find underneath and you'll have located Secret #3. It says you can drop the skulls down the hole in the wall so you don't have to carry them with you. Terrific! Dump them down the hole, go back through the gardens, into the house and upstairs. Go through one of the west doors in a hallway (either one is fine) and return to the round room with the red-curtained doorways. Find the one with the locked door behind it and use the Drawing room key to unlock it.
The Gorge
Walk up the rocks to the north and jump out the window. Climb the rock stairs to the top and off to the north, you'll see the gorge. If you walk south and slide down a steep rock wall on the west side near a big tree, you'll be in a small grassy area. Pick up a rope arrow and walk east along the wall of the building to a hole. Crawl through and enter a basement room. This is Secret #4. There's not really a lot of purpose to this area. You can jump in the water, swim through some tunnels and come up underneath a monument in the hedge maze garden. Flipping a lever on the side moves it so you can climb out. The other option is to flip a lever on the wall then climb the ladder to come out in the hallway near the red curtained rooms. Take the latter, go back through the Drawing room window, up the stairs and turn north towards the gorge.
Hop up onto the ledge to the left (W) and from there, drop down on a grassy ledge to the north. Walk along it, turn left (N) and follow the passageway down to a stone bridge. Cross it, open the gate and enter the rooms beyond. On the north side of the second room, there's a doorway with a big tree beyond it. Jump down onto the ledge below then put a rope arrow into the tree and climb down to the next ledge. (If you want a bit of target practice, you can pick off the fire elementals from up here.) Go through the doorway to the left (S) and you'll find the skulls in the last room. Pick them both up, go back and head through the east doorway. Pass through a room with 2 braziers that light when you enter, walk down a ramp and around a corner. There's a big red spider here that you'll need to take care of. Once that's done, continue on and open the gate to the lava. Drop the skulls and mantle up onto the ledge to the left. Follow it to the end, climb a steep rock wall and mantle onto a ledge where you'll find a water arrow (counts as 2) and a healing fruit. Return to the lava, pick up the skulls and cross over to the ledge on the west side.
Here you'll find the body of your new partner. That didn't last long! Put the skulls on the two pedestals (stand well back, poison gas is emitted) and pick up the !!! key that is lying by the NW corner of the big green door. Use it on the lockbox in the floor (under the body) and the door will open. Walk through the door and the mission will end.
NB: If you are very quick you may be able to grab the three crystal chunks here (+75) before the fat lady sings.
An additional 125g of loot is unobtainable in Mission 2, version 1.2 (6320 + 75 + 125 = 6520)
Mission 3
You begin the mission just inside the big green doors that were opening as the last mission ended. Follow the corridor and you'll come to a broken bridge. Obviously that won't get you where you need to go so come back a bit and go south. Continue down, emerging from the passage along a walkway that overlooks a very nasty looking area and go through the metal door. Wend your way through the narrow hallways to a room with a locked door on the south wall and another hallway entrance on the west wall. Head through it and into a bedroom at the end. Read a book that is lying on the west bed and then pick up the light gold key from the floor at the head of that same bed. Go back to the room with the locked door and use the key to open it. Try to frob the big lever: objective complete! (It's the first objective you have, which is to find out who is shadowing you, and find suitable cover.) At the same time, you also receive a new objective to stay undercover, as someone else may do your job. (You'll see the reason for the change of objectives if you look out of the small side window.) Climb the ladder near the door to an upper room and pick the lock on the door here: second objective complete!
Walk along the hallway past a gap in the wall and you'll receive a new optional objective that perhaps you should kill these creatures, referring to the strange flaming treebeasts that have just escaped from the enclosure below. Continue ahead and into a room where you flip a big lever to open a gate. Go through, climb the ladder in the next room and pick up a gas arrow (counts as 4) then watch the fight. If the thieves fail to kill all the treebeasts, finish them off yourself with gas arrows. Objective complete! Jump down through the hole in the wall, walk to your right alongside the building you just exited from and crawl in underneath the edge of it, near the lava. Crouch and follow the edge of the lava all the way around underneath the building until you get to a lava pond with a rock in the middle of it and a large pipe running across the ceiling. Jump over to the rock and look above your head for an opening in the pipe. Climb up into it and walk north.
Jump down into a machinery room, climb the ladder and open the hatch at the top. You'll emerge in a room at the base of a tower. Call the elevator down and ride it to the top level. You'll see some large white crystals spaced around the edges here. Peer into them and you'll see that 3 of them contain fire arrows. Once you have them, go to the east opening and lean out. There's a sword stuck into the wall to your left with a rope dangling from it and a metal spike below the opening. Walk out onto the metal spike (this would be a GOOD place to save) and jump from it onto the rope. At the bottom, you'll land on the far side of the broken bridge you saw near the beginning of the mission.
Go through the door, around the center wall and over to the west doorway. Oops! Another chasm. This is where the fire arrows come into play. Use one to hit the big white emblem on the far wall and a particle bridge will appear. Walk across it, through a passageway and jump down into a green space. Go over to the sign that says "The End?" and the mission will, well, end!
NB: 525g of loot is unobtainable in Mission 3, version 1.2
Nightwalker and Freddy Fox - 28th July 2005
These walkthroughs are written for the Expert difficulty setting but will also guide you through on Normal or Hard. You will notice small differences, such as the amount of equipment available, etc. but the main objectives remain the same on all settings.
Mission 1
You begin the first mission as Garrett drops into a flooded sewer pipe. Climb through the opening in the north wall, follow the passageway to the round sewer room at the end and then head west through another sewer tunnel. Climb the ladder on the left at the end. When you get to the top jump out quickly and head over into the shadows on the north side before you're spotted by the guards. Climb the rocks in the northwest corner and you'll find a disturbing sight...your friend, Rupert, impaled on a fence. This can't be good! Pick up his equipment (after all, he has no further use for it) which includes a rope arrow and some moss arrows. Rupert is wearing a purse (+50) and there are 5 gold coins (+100 = 150) lying on the rock where the fence meets the south wall. Head back down the rocks, sneak in the front entrance when the way is clear and slip into the door on the left (S).
Cross to the wooden door, go through it and listen for the footsteps of a guard who patrols through the upstairs room. When he is walking away, ride the elevator up to a bunk room. Pick up 2 gold plates (+100 = 250) and 3 purple goblets (+45 = 295) from the dining table. The chests hold a silver coinstack (+12 = 307) and a gold plate (+50 = 357). In the next bunk room there are 3 gold plates (+150 = 507) and 3 purple goblets (+45 = 552) on the table and a gold wine bottle (+50 = 602) carelessly left on the floor underneath it. One of the chests holds a ring (+40 = 642).
Walk through the door on the north wall into a hallway. In the bedroom on the left a purse (+50 = 692) is tucked away in a chest. Enter the room at the end of the hall and open the door on the east wall. Beyond it is a passageway that looks out over the front gate - the guard stationed here is wearing a purse (+50 = 742). Open one of the doors on the north wall and use the button to bring up the elevators then ride one of them down to the lower floor.
The Armory
In the room to the north there's a locked gate. You'll come back to that much later on. Also take note of the locked panel on the center of the elevator control here. Frob the lockbox and you'll receive a new objective to find the basement key. Walk down the stairs, out the door and turn right (W) into the main courtyard of the building. Take care not to be spotted by the guard by the barrier who is blocking access to double doors set into the ground.
Work your way around to the right (N) and over to the guard standing in front of the armory doors. Deal with him, continue past the doors and along the wall of the building, past the rocks on the left. Turn left in between the rock walls and walk to the end. Pick up the scroll left for you by Rupert, read it and you'll receive a new objective to find access to the private rooms of Sir Barthol Geringdal. The note tells you that Rupert left the armory key on the window ledge of the rooms. Frob the big bag beside the scroll to pick up some water arrows, as well as some food. Walk back towards the armory wall and stop before you turn left alongside the armory.
Look above you and you'll see beams that protrude from the building wall. Put a rope arrow into the one nearest to the armory, climb up far enough to see the ledge of the window to the left and pick up the armory key, which completes the objective to find the key that Rupert left for you.
While you're in the neighbourhood, creep over and take care of the guard standing by the barriers in the courtyard. Help yourself to his purse (+50 = 792) then go over and let yourself into the armory. Pick up the equipment from the shelves and read the scroll on the table which mentions an emergency exit. Hmmm! That bears looking into.
Shift the boxes that are piled up in one corner and you'll find a lever set into the floor. Frob it to move a bookcase and go through the doorway behind. (This is a one way trip as the lever on the other side has shorted out.)
In the room beyond, there's an unfrobbable door to the left, a bunch of barrels full of explosives and a door to the right. Go through the latter and move a box that is tucked in under the stairs. You'll see an "X" marked on the floor. Crawl in under the stairs and look above the "X" for a button to push. Go back to the other room and the unfrobbable door will be open.
The Gem Cave
Follow the passageway to a small yard at the end and climb the rocks in the SW corner where you can pick up a gem (+100 = 892). Continue up the rocks and creep into a passageway in the rock wall. Walk along it to the end, through a tiny round cave and into another passageway. You'll emerge on a ledge that overlooks the courtyard where you came up out of the sewers. Turn right, slip down over the edge onto a slightly lower ledge and look for an opening in the wall behind a bush at the east end. Follow that tunnel to the far end where you'll end up on a ledge that overlooks a neglected graveyard. You've just found Secret #1. There are a few frogbeasts in the vegetation so you might want to get rid of them first then put a rope arrow into the wooden beam overhead and climb down the rope. Don't try to go down the ladder as it has rotted and will give way as soon as you start down it.
Look behind the bushes in the SE corner and you'll see a funny yellow thing in the ground. Frob it and a tombstone on the west side of the graveyard will rise, revealing a passageway into a gem cave. It's dangerous in here and you will lose health points by touching the water and the coffins but there's a healing fountain at the far end so there's no need to worry too much about it. Gather up the 15 gems (+1500 = 2392), using rope arrows to reach the highest ones. If you lose a point or two of health on your way out, eat the supplies that Rupert left for you and you'll be as good as new. Once you're back in the graveyard, climb up to the top of the vine on the right hand side (N) of the raised tombstone (if you have trouble getting onto it, frob the yellow "thing" in the corner again to lower the tombstone and get it out of the way), and you'll reach a small platform outside a cave that has obviously been used as living quarters by someone. There's nothing much in here, just a book to read so if you have difficulty with the vine, there's no real need to worry about it. Retrace your path all the way back to the room with the explosives barrels and go back through the door to the stairway with the "X" underneath it.
Creep quietly up the stairs and relieve the guard of his purse (+50 = 2442). Pick up 2 gold urns (+200 = 2642) and go through south door very quietly as there's a guard dozing out here and a very alert archer patrolling out on the rooftop above the armory. Take the Private key from the sleeping guard and use it to open the door beside him. (Don't open the door on the west wall because there are 2 very alert guards right outside. There's another way out into that area that you'll find shortly.)
Sir Geringdal's Private Rooms
You're now in Sir Geringdal's private rooms - objective complete. Open the chests to get the Watch Big Gate key and some flares then slash the banner on the wall between the two chests. Walk through the doorway that it concealed and you've just found Secret #2. There are lots of goodies in here. There's a green rolled tapestry (+150 = 2792) sitting on top of the bookcase and a ring (+40 = 2832) lying on the floor behind it. Open the chest to pick up a mask (+50 = 2882) and grab the necklace (+200 = 3082) that is adorning the statue. There are 3 silver statues (+45 = 3127) and 2 jars (+60 = 3167) on the floor. You'll also notice a rug that highlights. Frob it (stand back far enough to allow it to move) and you'll see a pair of closed shutters set into the floor. Open the window, lean out and look below the window for a lever. Frob it and the shutters in the floor will open. Lean over the opening to take care of the big green spider wandering around in the room below, then climb down and have a look around. You'll notice a corpse all nice and neatly wound up in spider webs. Frob it and you'll find a purse (+50 = 3217). Head back up to the secret room, back through the doorway and climb the ladder to the attic rooms.
Unlock the south door with the Private key and enter a small sitting room at the end of the hallway. Pick up a gold candelabra (+40 = 3257) and then read the scroll that is sitting on the desk. You'll receive an objective to find the golden skull of Yorick that is mentioned in it. Grab 3 silver plates (+30 = 3287) that are mounted on the wall above the fireplace and 3 gold coins (+60 = 3347) that have been dropped on the floor by the fireplace and on top of the fireplace log. That's your clue for where to find the skull. Why would coins be here? Crouch and walk right through the fireplace into a long narrow room. Open the chest at the far end and you'll find the gold skull of Yorick. Objective complete.
Return to the top of the ladder and check the floor by the hatch for a key labeled "???". Pick it up and use it to unlock the other door. You'll see someone running off down the hall but don't bother trying to catch him. Instead just walk to the end and pick up a scroll that is sitting on some barrels. You'll receive two new objectives after reading the scroll. The first one is to find the Vault IGNIS and to activate the firelock. It also mentions that you need to be careful not to misplace Yorick's skull so don't sit it down anywhere and misplace it. You'll need it more than once.
Climb over the barrels and up a ladder to a hatch in the ceiling. Open the hatch and carefully mantle up onto the edge of the roof. You'll be overlooking a trellised garden, the one that has two guards facing the entry door that you bypassed downstairs. Quietly drop down onto the trellis covering the garden (make sure you aim for the wood frame and not the vines or you'll give a whole new meaning to "dropping in for a visit"), then make your way towards the back of the garden and up onto the rock ledge. Creep along to the right (N) and down the ramp just inside the railings. Sneak up to the guards by using the shadows created by the wood support beams and staying close to the walls, and take their purses (+100 = 3447). Climb back up the ramp and walk along the rock ledge at the back of the garden until you see an arrow. Climb the vines growing on the back wall above the arrow, enter the tunnel at the top and follow it to the far end.
Drop down onto a rock ledge and watch the path below until a patrolling archer appears from the right. When he turns round, follow him east along the path until you come to a door on the left. Pick it open and enter a room with a few boxes and broken barrels. Go through the opening in the wall and along the passage into another room. (You'll have to shove on the barrel in the opening a bit to move it enough to get in.) Use the opening in the corner to the left of the door to shoot a water arrow at the torch near the big gates. Now it's dark enough to sneak out through the doorway. Take the Gate 2nd Embankment key from the guard standing below the torch and use it to open the big, colorful gates. Go through and close them behind you. You're now back in the main courtyard.
Capt. Murdock's Treasure
Cross to the small building in the NE corner, unlock the door with the Watch Big Gate key, go inside and push the "Pedestrians" button which opens 2 doors in the Big Gate beside this building. Creep through when it's safe but don't take too long as the gates close again automatically. Evade the burricks and use the Watch Big Gate key to get into the watch building on this side of the gate. Grab the gold wine bottle (+50 = 3497) on the table and another one (+50 = 3447) tucked in beside the bookcase. The toolbox holds a fire arrow and inside the chest you'll find a blue crystal (+25 = 3572).
Back out in the garden, cross to the opening in the hedge to the north. Enter the building, which is labelled as the house that Capt. Murdock used to live in but is obviously used as a burrick stable nowadays. Walk around to the back corner on the east side and you'll find a water arrow tucked in by the foundation then head inside but beware the sleeping burrick! Climb the ladder to the loft and take the two gold wine bottles (+100 = 3672) that are lying near the sleeping guard then peek in the barrels nearby. In one of them you'll find 3 moss arrows and in another, 3 gold coins (+75 = 3747). Walk along the south side and you'll find a scroll on top of the wall. Read it to get a new objective to find the treasure of the stranded Capt. Murdock and get a clue about how to find it. Now turn to your right and open the chest tucked in behind the pile of refuse to acquire a navigation globe (+40 = 3787).
Climb back downstairs, go outside and over to the west side of the building, where it meets with a hedge. Put a rope arrow into the roof eave, climb the rope and jump over the hedge into the back garden. Pick up a rope arrow that is sitting on the foundation edge then think of the clue you read. "A gnome gleaming bright"?? The only thing gleaming out here is a little red mushroom so hit it with a water arrow and it changes color. At the same time, the big rock slides aside and below is the entrance to Capt. Murdock's stash. Objective complete!
Help yourself to all the goodies which include 2 plates (+20 = 3807), a gold statue (+75 = 3882), 3 black jars (+60 = 3942), a tiara (+125 = 4067) and a gem (+100 = 4167). Take your sword out and slash the pirate banner on the back wall to find even more valuables. Here you'll add a mask (+50 = 4217), 3 blue crystals (+75 = 4292), 3 silver coinstacks (+36 = 4328), 7 gold coinstacks (+175 = 4503) and 3 silver statues (+45 = 4548) to your loot bag. You've cleaned the stash out so climb back up the ladder, use a rope arrow to get back over the hedge and leave Capt. Murdock's. To the left of the doorway is a tunnel to the monastery that is patrolled by a burrick and 2 guards wearing purses (+100 = 4648). Walk along the tunnel and into the gardens on the left-hand side. As you approach the monastery, the guard inside the gates will close them and the objective to find Avicenna's Cannon Medicinae in the Monastery will be Xed out and you'll receive a new objective to find another way in.
The Fire Lock
The guard standing outside the Monastery gates is wearing a purse (+50 = 4698) but it's a bit hard to get as the area is well lit. I found the easiest way was to make a noise in the garden to get him to investigate, then BJ him there. Walk along the hedge on the south side of the path and turn right into the entrance nearest the Monastery gate. There's a large rock on the right. Climb up on it and jump down into the small bit of space between the hedge and the rocks. Check the ground for a water arrow (counts as 3) then turn around, climb back up on the big rock but this time, jump down on the south side of it into a small clearing. There's a red face carved into the rock with a golden skull set in above the eyes. Use the skull of Yorick on the golden skull, and a secret passageway will open in the ground to your right.
Enter, walk along a short hallway and climb a ladder at the end. Flip a lever on the wall to open the hatch at the top and climb out into a room with a pool of lava steaming in the middle. This completes the objective to find the Vault IGNIS. Pick up some water arrows and a bottle of holy water from a table and read the scroll then stroll over to the southeast corner and search the floor for 6 gold coins (+120 = 4818) (near a broken arrow). Jump up on the boxes that are lying beside the lava pool and from there onto the central pedestal.
Remove the plain skull lying there and drop Yorick's skull on top. (I'd suggest saving before dropping the skull as a few people have reported having problems picking it up again if it doesn't work the first time. It has to land in exactly the right spot to activate the mechanism.) Objective complete! Be prepared to get off as soon as the device activates (you may lose a few health points here) and get into the shadows in the corner of the room. A gate at the far side of the room will open and two haunts will start patrolling the room. After a while the obelisk on the west side will slowly move away from the wall. Enter the room behind it and pick up another water arrow (counts as 5), a vial of holy water and the lift key. This completes the objective to find the basement key.
Head over to the gate on the west side of the room, use the lift key on the lockbox, which is mounted outside the gate on the left-hand side and the gate will open. Walk along the hallway, frob the gate at the end to open it and you'll find yourself back at the elevator control panel that has the lockbox on it. Use the lift key on it and a small panel will open, exposing another elevator control button. Push it and get on one of the elevators which is heading for the basement. Partway down, you'll see a floor that the elevators don't stop at. Jump off and open the chest here to find Secret #3. Inside is a silver statue (+150 = 4968) and you'll find a breath potion sitting on the floor beside the chest. Push the button to bring the elevator back up and jump on as it goes past then ride it all the way back down to the basement level.
Walk up the ramped passageway opposite the elevator, staying to the right at the intersection and take another elevator up. Wait in the dark on the elevator for a few minutes and a man will walk past the opening and through a gate. (Don't bother to try to follow him. There's nothing down that passageway except a dead end and no way out.) Once he's gone head into the room and pick up a candelabra (+40 = 5008) - loot objective complete - and a tiny gold ring (+40 = 5048) from the table. Read the book then go over to the box on the sideboard, open it and pick up the trapdoor over gap key. Head out onto the balcony and pick up 2 silver statues (+30 = 5078), then climb out of one of the windows and onto the ledge with the spotlights. Walk west, jump a small gap and then go around the corner where you'll find a toolbox, which is Secret #4. Open it to pick up 3 moss arrows, a breath potion and a purse (+50 = 5128).
Return to the ledge with the spotlights, jump down onto the rocks then onto the roof of the Big Gate watch building and from there to the courtyard. Head over to the trap doors behind the barriers, unlock the lockbox on the wall with the trapdoor over gap key and flip the big red lever to open the doors. Shoot a rope arrow into the wood support and descend into the caves below.
The Monastery
Walk towards the far end, stopping to pick up some flares that are lying on the left-hand side and then look for a hole in the wall on the right. (You should have a number of flares in your inventory now. Use them to help find your way through the dark areas and underwater areas of the next section.) Climb through and into a flooded cave. Swim east to a flooded cave at the far end and look for a hole to wiggle through just above the water line in the NE corner. This area looks like part of an old building that is sloped. At the end, to the right, it drops off. You need to get down into the red water below. You can just jump from up here, if you're careful or you can hop over the rock ledges until you're down closer to the water level and jump from there.
Once you're in the water, swim to the southeast corner and look for a rift in the floor. Swim down through it and then into a big metal pipe. (You can do this part without using a breath potion if you don't dillydally and you might appreciate having all three for the next part if you want to find all the loot mentioned in this walkthrough.) At the end, you'll come up in a flooded cave with a collapsed building on the east side. Dive down to the bottom right-hand corner of the building and squeeze through the gap - it's a tight fit! (Once you're through it, you'll have to rely on breath potions for a while as there are no air holes.) Head east, hugging the right hand wall. Swim under the sloping brick pillar, then follow the roof line down to the small brick wall in the corner (arrowed in the picture).
When you get there, dive south-west down the hole, then go round to the left to emerge in a cave with a tunnel opening on the north-east side. Before entering the tunnel (and if you have some breath left!) look in the upper SE corner of this cave for a crevice. Swim through it and pick up a gold nugget (+100 = 5228), a gold statue (+75 = 5303) and a jar (+20 = 5323). Now swim into the tunnel.
At the end, you'll come up into a section of sewers. Climb up out of the deep water and mantle up into the pipe that is jutting out of the wall. Frob the grate to open it and crawl along the pipe. Keep an eye out for a red spider that you'll meet along the way. At the top of this pipe, head north (there's another red spider patrolling here) and you'll arrive at the entrance to a room with a pool of toxic water and a dead body on the left. Thankfully the roof is wood, so you can use rope arrows to get over near him to pick up a healing potion and a rope arrow (counts as 3). You now need to get into the pipe to the north of the body, so use rope arrows to get in front of it and jump in.
Frob the gate to open it and walk along the pipe to the end where there's a red lit opening in the south wall. Mantle up into it (it's a bit high so you'll have to stand back a bit and do a run/jump to reach it) and proceed to the end where there's a ladder down into a sewer pipe. Climb down and just before you jump off the ladder, look towards the north end of the room. You'll see a gold nugget sitting on the edge of a pipe. Once you're down in the water, go and get the nugget (+100 = 5423.) (It's very hard to get it to highlight even when you're standing right beside it. Crouch and keep walking around it and it will highlight momentarily, allowing you to pick it up. It is also possible to get it by swimming into just the right place.)
Now head through the opening on the east wall, then north through an underwater tunnel. You come up in a well, and when you get to the ladder on the north wall the mission will end.
NB: 125g of loot is unobtainable in Mission 1, version 1.2 (5423 + 125 = 5548)
Mission 2
You begin this mission climbing up the ladder up from the well you were in at the end of Mission 1. At the top, you'll find yourself in a courtyard inside the Monastery. Enter the storeroom on the west side and pick up a ring (+50) from the floor behind the box in the SE corner. There are 3 gold coins (+30 = 80) in between the bags beside the WC sign. Once you've got those, open the north doors and enter a hallway. To the right, there are glass doors on the far side, but there's a guard standing inside so you can't go through that way. Wait until he's not looking and head to the far end of the hallway to investigate the chest sitting there. Read the note from Rupert, then climb up on top of the chest and walk through the wall banner into a secret room. You've just found Secret #1. There is a scouting orb in a chest over in the corner and a green rolled tapestry (+80 = 160) on top of the bookcase.
Return to the hallway and walk west to some stairs that lead down. You'll encounter a patrolling thief on your way down and he's wearing a purse (+50 = 210). (You must steal this purse to cause the Saal X key to appear - see end of para.) At the bottom, go through the double doors where you'll see a passageway on the right and stairs going up on the left. Duck under the stairs and wait for another thief AI to patrol by. Get rid of him and then go upstairs and through the west door on the first landing. Climb a few more stairs, go through a red curtain and enter a bunk room with a couple of sleeping guards. The chests in here contain a black jar (+20 = 230) a note and a purse (+50 = 280). The single bedroom at the north end of this room has one man sleeping on the bed. On the table, you'll find the Saal X key.
You can also add a gold wine bottle (+50 = 330) and a gold goblet (+25 = 355) to your haul. Read the note on the table to get a new objective to find the Horn of Tarquinius and you'll hear the haunting music of the Horn. There is a button on the floor concealed behind the back left-hand leg of the desk. Press it and the middle small animal head that mounted below the burrick head will move aside to reveal the Gallery key.
Go back downstairs, turn left and go through the door into the foyer. On the left is the door to Hall X, which unlocks with the Saal X key. The entranceway to the hall itself is blocked with rocks, as was mentioned in the note you found, but you can pick up a drill bit (+250 = 605) that has been carelessly dropped on the floor. Head through the door opposite the one to Hall X but watch out for the guard stationed near the entrance gate to the Monastery.
The Horn of Tarquinius
Open the gate blocking the north passageway, and walk along the hallway. There's a reception room on the left where you can pick up 2 gold candelabra (+100 = 705) and 4 purple urns (+100 = 805) and the door at the end of the hallway unlocks with the Gallery key. Inside the Gallery, pick up 2 plates (+20 = 825) and 2 gold urns (+150 = 975) from the tables then open the door to Tower of Tarquinius. Put out the torch at the far end of the passage then creep over by the tower gate and wait for the guard walking around inside to come close enough for you to take the Tower key from him. Use it on the lockbox on the wall to the left, go in and climb the stairs to the top. Hmmmm! You can hear the Horn but there's still no sign of it. Rope arrow up to the ledge on the south side of the tower and pick up 2 silver bracelets (+40 = 1015) then rope arrow up to the top rafters of the tower. Aha! There it is! Objective complete! Rope arrow back down and go down the stairs, through the Gallery and along the hallway again. Cross to the gate on the south side, go through and into a storeroom on the right (W).
Climb the box stack and jump down behind them in the SW corner to pick up a purse (+50 =1065). Now climb to the very top crate, open the trap door in the ceiling and mantle up through into a storeroom beside the bunk room you were in earlier.
There are a couple of different ways to get to the roof area and I found them all difficult as the guards here are touchy. You can go out the upper door of the Tower of Tarquinius, climb a rope to a set of trap doors and climb out when the patrolling archers aren't nearby then hide in the shadows, or go through the red curtain in the barracks room and up the stairs. I chose the last option for this walkthrough but any of them will get you to the same place.
At the top of the stairs, go out of the door but stay to the right until you get to the big hammer. Lean out and put out the torch that is partway up the hallway to the west. Sneak up, staying to the right in the dark, because there is another guard in the guardroom across from the extinguished torch. You'll need to deal with the guards here as you see fit and take the Monastery key from one of them. Now head through the door in the northeast corner which unlocks with the Monastery key.
Pick up a gold candelabra (+50 = 1115) and 2 vases (+100 = 1215), read the guest register, then proceed along the hallway and up the ramp into a circular room with 4 red-curtained doorways. Behind the left one is a locked door that you will return to much later in the mission. The doorway opposite the entrance opens into a sitting room where you can pick up a gold wine bottle (+50 = 1265). The doorway to the right of the entrance opens into a small library, with a plate (+10 = 1275) and 2 vases (+100 = 1375) on display above the fire. Go through the doorway between the library and the sitting room into a hallway, walk east through the door at the end into another hallway, and collect the gold urn (+75 = 1450) from the table. Through the double glass doors on the right is a balcony where you can pick up a gold wine bottle (+50 = 1500) and 3 purple goblets (+45 = 1545). Check the floor behind the east table for another gold wine bottle (+50 = 1595). Go through the curtains on the north side of the hallway into another corridor. One of the guards patrolling these hallways is wearing the Courtyard key. (It doesn't matter too much if you don't get it - the courtyard doors can be picked open.)
Pick up a vase (+50 = 1645) from a table in the hallway, then go through the door on the north wall and take 10 gold coins (+100 = 1745) from the fountain on the balcony. You can also pick up an extra water arrow (counts as 2) here. Return to the hallway and turn left (E). There is a hard-to-see necklace inside the large vase to the left of the door at the end (+200 = 1945). If you can't see it, just frob the vase. Go out, turn right, then go through the far door into a bunk room. Grab a purple urn (+25 = 1970) and go through the door marked Hall VII into a room full of desks. There's nothing but books in here so continue on through and out the far side into yet another hallway.
Pick up the 2 silver statues (+30 = 2000) that are displayed near the door on the right-hand (S) side. Put out the torches beside the door and then open it. Wait until the Watcher inside is turned away and dart into the side behind the wall. Peek out and when the Watcher is turned away again, run up to the altar. Flip the lever on the back to turn off the Watcher then go back out into the main room and sink a rope arrow into the ceiling by the center beam. Climb up and push the button on top to open one of the stones in the floor, revealing a ladder. Go down it, and in the room below, frob the coffin lid to open it, then take the crypt key lying by the skeleton. Leave the chapel, cross the hallway, unlock the glass door with the Courtyard key and go out into the courtyard. Unlock the north door with the courtyard key, enter a hallway and turn right(E).
The Hand of Glory
Go through the double doors at the end into a Library, but make sure you're not spotted by the Watcher at the back of the room. Sneak past it into the area between the bookcases at the north end, climb the ladder and flip the switch to deactivate it. As you start to climb the ladder, the Book of Wisdom drops onto the floor and you'll see someone running off at the far side of the room. You receive a new objective: Find the Hand of Glory. If you read the book, you'll learn that it is secreted away somewhere in the Archives. It also says the Cannon Medicinae that you are searching for is in Hall 10.
Go down the stairs to two doors that are labeled "Archives". Lying by the one on the right is a scroll and the Archives key. Use it to unlock the door, enter and turn left (N) into a room with a table in the middle and bookcases on all the walls. Rope arrow up to the top of the south bookcase and pick up 2 green rolled tapestries (+160 = 2160) then proceed into the room at the back. Pick up a gold candelabra (+50 = 2210) from one table and a climb the ladder against the north bookcase. On top of it there's a scepter (+120 = 2330) that you can add to your stash. There's a gold urn (+75 = 2405) on one of the small side tables beside a plain metal candlestick. Frob the candlestick and go back to the other room where you'll find a floor grate has opened in the SE corner.
Climb down into the hallway below, walk to the end and climb the ladder to another hallway that ends in a room with a pedestal topped by a glowing red ball. Read the clue on the floor plaque. Hmmm -the greatest enemy of the book is fire, isn't it?. OK, douse the red ball with a water arrow. Once you've done that, a door slides open in the hallway behind you. Enter the room and pick up the Hand of Glory. Objective complete!
Return to the Archives, walk up the ramp and then down into the south section of the Archives. In the back room which is used for storage, there are some crates stacked against the back wall. There's a lever on the wall behind the single crate that moves the 2 stacked ones and reveals a passageway as well as a second copy of the Archives key. Follow the passageway, which turns from brick walls to stone partway along. When you arrive at a section where you can hear running water and the ceiling is open to the sky, climb into the opening on the left side (W) just before the railings. Drop down into a little crevice and pick up the goodies which include 2 silver nuggets (+50 = 2455) and 3 gold nuggets (+150 = 2605) then continue north along the passageway to the end where you frob a stone panel to open it.
Go through and into Asparagus' bedroom. Take green rolled tapestry (+80 = 2685) from the chest near the bed then read the book that is lying on the desk. You'll receive a three new objectives: Find the skull of St. Gregor, Find the skull of Pater Ignatius and find the Gorge key. Take the Dining room key from under the paper tray and walk up the stairs and down the other side. At the end of the hallway is a dining room which is loaded with valuables. Help yourself to 3 gold candelabra (+150 = 2835), 5 gold wine bottles (+250 = 3085), a china plate (+10 = 3095), 7 gold plates (+350 = 3445) and 7 purple goblets (+105 = 3550).
The Skull of Ignatius
Open the bathroom door at the bottom of the stairs, go in and unlock the hall door with the Dining room key. Turn left, go through the doors on the right into the courtyard and over to the east door. Unlock it, but don't rush in as there's a Watcher in the hallway to the right. When it's facing towards the NE, run into the SE corner behind a big turbine and flip the switch on the east wall to deactivate the Watcher, then head over to the door in the NE corner. Pick it open, jump into the water inside the room and check the NE corner for a ring (+50 = 3600), then climb back out and pick open the door at the end of the short hallway east of the Watcher.
Go through it, turn right and pick up a plate (+10 = 3610) from the coffee table. Now get in behind the sofa and slash the banner that is hanging on the wall. Remove the loose bricks, crawl through the opening and unlock the door here with the Crypt key. Enter a creepy crypt with a statue of a knight in an alcove at the far end. Frob the knight's sword and the tombstone to the left (E) will slide down, revealing a secret passageway. Head through, along a hallway and down a couple of ladders. You'll end up in a room containing the Well of Oblivion.
Approach the statue on the right (W) and slide in behind it from the right side (there should be energy balls shooting out from the left side by now). Flip the lever on the back to deactivate the traps then pick up 6 purple urns (+150 = 3760) from beside the statues. Open the chests to find a tiara and a gold coinstack (+125 = 3885) in one and a gold coinstack and a mask (+75 = 3960) in the other. Swim down to the bottom of the well, grab a pink gem (+100 = 4060), a necklace (+200 = 4260), 7 gold coins (+70 = 4230) and the skull of Ignatius - objective complete! (You will find your movement is slow while you are carrying the skull, as if you were carrying a large boulder.) Return to the crypt and you'll notice *gasp* that the statue of the knight is now missing and you can hear something creepy. The tombstone on the west wall that is closest to the door has moved and there's an opening behind it. Enter cautiously because it's occupied and open the chest to acquire a tiara (+100 = 4430).
Return to the hallway, climb out from behind the couch and go through the door to H2O services, back out into the courtyard and through the north door. Turn left (W), go through the door at the end to the top of the stairs to the lower floor. Drop the skull somewhere out of the way here so you don't have to move at a snail's pace, but remember where you leave it. Go down the stairs and over to the Mess door.
Enter the Mess, pick up 6 gold wine bottles (+300 = 4730) and 3 gold candelabra (+150 = 4880) and take the Yard key from it's hiding place behind a stack of plates on the shelves. Return to the stairwell and go through the door to the left of the Kitchen door (there's nothing of interest in the kitchen or pantry unless you want to nibble on a deerleg), along the hallway and out through a door into a large maze garden. Turn north and enter the H20 Service Connection Building. Walk to the east end, where a Mechanist occasionally stands to fiddle with a machine. Take the Drawing Room key from him - this gives access to the Gorge: objective complete!
Squeeze in beside the two big turbines in the NE corner and go through a hole in the wall. At the end, mantle up onto the ledge and from there to the top of a wall that is blocking the passageway then pick up a dagger (+50 = 4930) that is stuck into the right-hand wall. Jump down on the northwest side and you'll find a small campsite. Read the scroll that is lying on the ground and you'll see it's where Garrett's friend Rupert has been hiding out. Crouch and walk through the banner by the fire and out into a small yard where you can pick up a rope arrow from the ground. Shoot it into the hedge to the south and climb up on top then jump down into the gardens but watch out for the patrolling guard. He's carrying a lantern so he spots you quite easily when he's in the area. (You can't knock him out, so it's best to avoid him.) Leave the small garden area, turn left and walk to the south hedge where you can just see the top of two barred windows showing above the top of the hedge. Rope arrow up on top of the hedge in front of the right-hand (W) window, open the bars and enter the Store. (If you have difficulty with the hedge, you can also get into the Store from a door near the Mess and Kitchen doors but there is a guard in the hallway there you will have to deal with.)
The Canon Medinicae
Collect the water arrows from the chest in the NW corner, then go over to the two armoires standing against the east wall. Check behind the one farthest from the windows and you'll just be able to see a mark. "Use" the Hand of Glory on it and one of the coffins nearby will move aside, exposing an opening beneath. Go down the ladder. Apparently this is an alternate way into Hall 10 so keep on walking, following the signs but staying close to the wall at the first corner, as there's a trigger for a trap in the center of the hallway here. At the end, frob the sewer cover to move it and climb down a ladder. (You might want to moss the floor at the bottom first, as you have to jump off the ladder and it can alert the occupants if one of them happens to be close by at the time.) Push a button on the wall to open a door into the Lost Library.
Get into the water under the bridge and you'll find a chest that holds 6 fire arrows then look up at the underside of the bridge and you'll see a handprint. "Use" the Hand of Glory on it then get out of the water at the north end. Slash the banner on the back side of the column straight ahead of you and inside you'll find the Canon Medicinae. Objective complete! You'll find more fire arrows in the brazier fire on top of the bridge which might come in useful later on. Return to the Store and pick up the Store key, which is lying on the floor to the left of the door and use it to unlock the door to the hallway. Take care of the guard and then help yourself to a gold urn (+75 = 5005) and 3 china plates (+30 = 5035).
The Skull of Gregor
Go through the east door and up the stairs and pick up Ignatius' skull from where you left it (don't get too close or you'll stub your toe on it and take damage) and take it back out to the garden with you. Walk west then south, past the spot where you roped up onto the hedge to enter the Store. Turn right (N) into a garden area with a set of large gates guarded by a Mechanist creature. Drop the skull in the corner here, take the Vault key from the guard and use it to unlock the gate. Walk through the double doors and into what appears to be an old abandoned church. There are 3 green gems (+300 = 5335) on the SE windowsill and a white gem (+100 = 5435) on the NW windowsill. Head along the passageway underneath the huge mask, turn right into a hallway that has a burning brazier at the end and unlock the gate to the left of it with the Vault key. Collect 8 jars (+160 = 5595) and 8 vases (+400 = 5995) from the shelves. Frob the last (W) skull on the north shelf to open the gate at the far end of the room.
Climb the ladder and walk in to the alcove on either side of the holy water fountain, look up and you'll see a wooden beam. Shoot a rope arrow up, climb it and jump into a small room above the holy water fountain to find Secret #2. There is a healing potion and a bottle of holy water on the floor. Climb back down, return to the church and use a holy water arrow on the two statues flanking the north doors, which will then open. Go through and over to the statue on the west side. Flip the lever on the back of it and the central statue will shift, exposing a hole beneath it. Climb down and into a tomb with 3 coffins. There is pressure plate in the floor to the left of the floor plaque that's labeled "Saint Bromelius". Use the head of the broken statue lying on the floor to weigh it down and the coffin will sink into the floor. In the hole behind it, you'll find the skull of Gregor. Objective complete! At the same time, you receive a new objective to find out who your new partner is and to go to the gorge, open the gate and wait for him.
Climb back out (which can be a bit difficult so it might take a few tries. I found it easier to climb out on the sides than to go over the coffin itself), go over to the northeast corner and pick up a couple of water arrows then pick up a bottle of holy water that is lying in the small tunnel that leads down to a lava stream. You'll also find a ring, the Seal of Bromelius, but it doesn't seem to have any use. Farther along the tunnel, there's a gold nugget (+50 = 6045) - loot objective complete! - and at the end, across the lava, there's a mask (+50 = 6095). Once you pick it up, be prepared - a zombie will appear in the crypt and make a beeline for you. Picking up the mask has also caused Saint Polemus' tomb to swivel, revealing a cavity in the floor containing a gemstone (+100 = 6195).
Return to the upper room, drop the skull near the exit doors then creep in beside the broken walkway and go upstairs. This area is lined with coffins and patrolled by 3 or 4 zombies but you have plenty of ammunition to get rid of them.
At the top, turn left (E) and check beside the third coffin for a gold goblet (+25 = 6220). Beside the next coffin is a bottle of holy water. Head back past the ramp and over to the west side where you'll find a gold statue (+75 = 6295) and a gold goblet (+25 = 6320). Continue around to the end where there's a large lever. Flip it to open the exit doors downstairs and head back down. Pick up the skull and head back outside. Grab the second skull and go over to a bush on the west side. Frob it and you'll pick it up. Toss it away, read the scroll you find underneath and you'll have located Secret #3. It says you can drop the skulls down the hole in the wall so you don't have to carry them with you. Terrific! Dump them down the hole, go back through the gardens, into the house and upstairs. Go through one of the west doors in a hallway (either one is fine) and return to the round room with the red-curtained doorways. Find the one with the locked door behind it and use the Drawing room key to unlock it.
The Gorge
Walk up the rocks to the north and jump out the window. Climb the rock stairs to the top and off to the north, you'll see the gorge. If you walk south and slide down a steep rock wall on the west side near a big tree, you'll be in a small grassy area. Pick up a rope arrow and walk east along the wall of the building to a hole. Crawl through and enter a basement room. This is Secret #4. There's not really a lot of purpose to this area. You can jump in the water, swim through some tunnels and come up underneath a monument in the hedge maze garden. Flipping a lever on the side moves it so you can climb out. The other option is to flip a lever on the wall then climb the ladder to come out in the hallway near the red curtained rooms. Take the latter, go back through the Drawing room window, up the stairs and turn north towards the gorge.
Hop up onto the ledge to the left (W) and from there, drop down on a grassy ledge to the north. Walk along it, turn left (N) and follow the passageway down to a stone bridge. Cross it, open the gate and enter the rooms beyond. On the north side of the second room, there's a doorway with a big tree beyond it. Jump down onto the ledge below then put a rope arrow into the tree and climb down to the next ledge. (If you want a bit of target practice, you can pick off the fire elementals from up here.) Go through the doorway to the left (S) and you'll find the skulls in the last room. Pick them both up, go back and head through the east doorway. Pass through a room with 2 braziers that light when you enter, walk down a ramp and around a corner. There's a big red spider here that you'll need to take care of. Once that's done, continue on and open the gate to the lava. Drop the skulls and mantle up onto the ledge to the left. Follow it to the end, climb a steep rock wall and mantle onto a ledge where you'll find a water arrow (counts as 2) and a healing fruit. Return to the lava, pick up the skulls and cross over to the ledge on the west side.
Here you'll find the body of your new partner. That didn't last long! Put the skulls on the two pedestals (stand well back, poison gas is emitted) and pick up the !!! key that is lying by the NW corner of the big green door. Use it on the lockbox in the floor (under the body) and the door will open. Walk through the door and the mission will end.
NB: If you are very quick you may be able to grab the three crystal chunks here (+75) before the fat lady sings.
An additional 125g of loot is unobtainable in Mission 2, version 1.2 (6320 + 75 + 125 = 6520)
Mission 3
You begin the mission just inside the big green doors that were opening as the last mission ended. Follow the corridor and you'll come to a broken bridge. Obviously that won't get you where you need to go so come back a bit and go south. Continue down, emerging from the passage along a walkway that overlooks a very nasty looking area and go through the metal door. Wend your way through the narrow hallways to a room with a locked door on the south wall and another hallway entrance on the west wall. Head through it and into a bedroom at the end. Read a book that is lying on the west bed and then pick up the light gold key from the floor at the head of that same bed. Go back to the room with the locked door and use the key to open it. Try to frob the big lever: objective complete! (It's the first objective you have, which is to find out who is shadowing you, and find suitable cover.) At the same time, you also receive a new objective to stay undercover, as someone else may do your job. (You'll see the reason for the change of objectives if you look out of the small side window.) Climb the ladder near the door to an upper room and pick the lock on the door here: second objective complete!
Walk along the hallway past a gap in the wall and you'll receive a new optional objective that perhaps you should kill these creatures, referring to the strange flaming treebeasts that have just escaped from the enclosure below. Continue ahead and into a room where you flip a big lever to open a gate. Go through, climb the ladder in the next room and pick up a gas arrow (counts as 4) then watch the fight. If the thieves fail to kill all the treebeasts, finish them off yourself with gas arrows. Objective complete! Jump down through the hole in the wall, walk to your right alongside the building you just exited from and crawl in underneath the edge of it, near the lava. Crouch and follow the edge of the lava all the way around underneath the building until you get to a lava pond with a rock in the middle of it and a large pipe running across the ceiling. Jump over to the rock and look above your head for an opening in the pipe. Climb up into it and walk north.
Jump down into a machinery room, climb the ladder and open the hatch at the top. You'll emerge in a room at the base of a tower. Call the elevator down and ride it to the top level. You'll see some large white crystals spaced around the edges here. Peer into them and you'll see that 3 of them contain fire arrows. Once you have them, go to the east opening and lean out. There's a sword stuck into the wall to your left with a rope dangling from it and a metal spike below the opening. Walk out onto the metal spike (this would be a GOOD place to save) and jump from it onto the rope. At the bottom, you'll land on the far side of the broken bridge you saw near the beginning of the mission.
Go through the door, around the center wall and over to the west doorway. Oops! Another chasm. This is where the fire arrows come into play. Use one to hit the big white emblem on the far wall and a particle bridge will appear. Walk across it, through a passageway and jump down into a green space. Go over to the sign that says "The End?" and the mission will, well, end!
NB: 525g of loot is unobtainable in Mission 3, version 1.2
Nightwalker and Freddy Fox - 28th July 2005