(Basic knowledge of Anim8or required)
This tutorial was written to help you with texturing your models and learning to make them quicker. As you work through the tutorial, please remember to save your work!
Shall we begin?
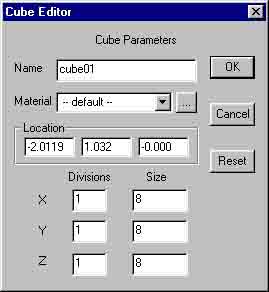
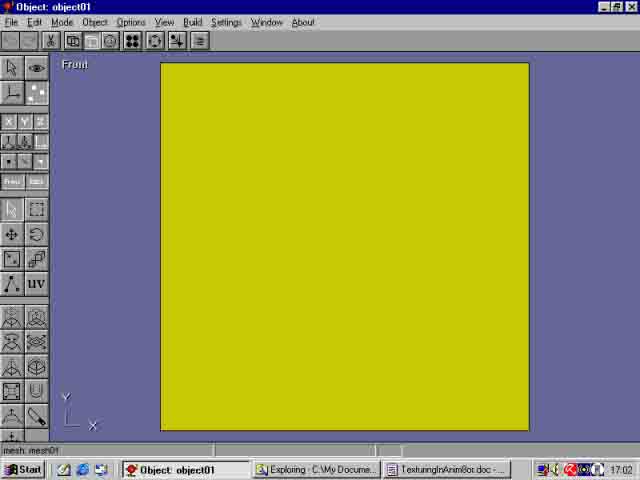
First off, let's make the mesh. Drag a cube
Next, select EDIT/LOCATE/CENTER ABOUT ORIGIN to centralize the mesh.
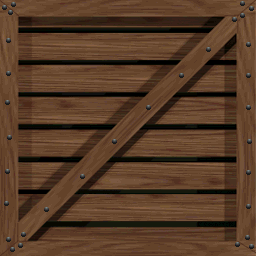
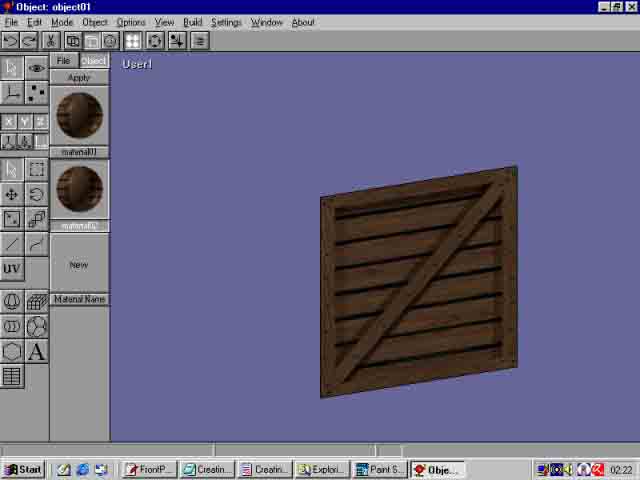
Load in a couple of crate textures. I'm using CREAT2.PCX and CREAT3.PCX taken from FAM/CORE_2 and converted to .gif using PaintShop Pro 7.
Now goto a view like this and select the front face...
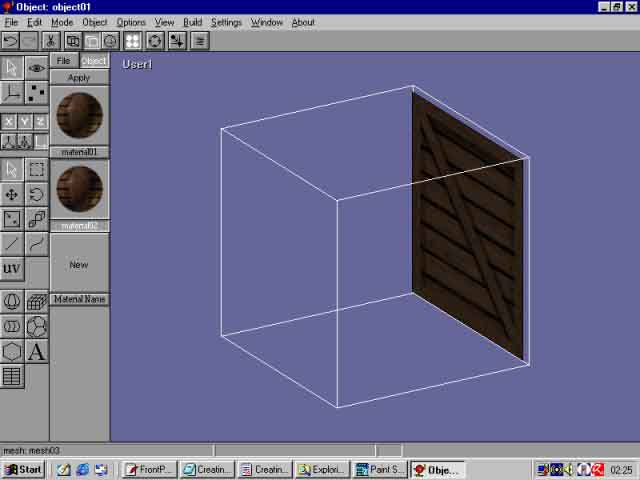
Next goto EDIT/DETACH FACES and you'll end up with a new object...

Once you've done that, select the old part of the crate and goto EDIT/HIDE so all you're left with is the detached face...
Now select VIEW/FRONT then goto
point edit mode ![]() and hilight the face...
and hilight the face...
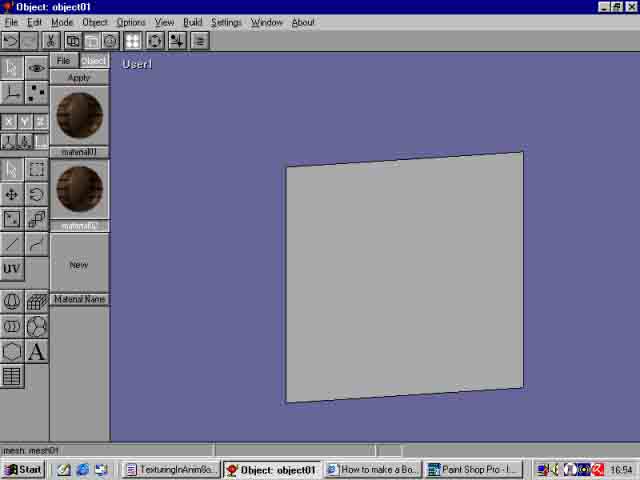
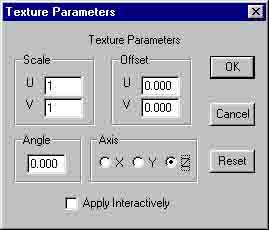
Next, apply one of the textures to the selected face. You will notice that the crate texture is perfectly aligned. This isn't usually the case and you will need to goto SETTINGS/COMPONENT/TEXTURE UV and change the axis to "Z" and then click "OK"
[If we were working from the top view, then we would select the "Y" axis]
Go back to normal editing mode ![]() then select EDIT/SHOW
ALL
then select EDIT/SHOW
ALL
It's time to delete the unwanted faces, ready for copying/pasting
our textured one. Go back to point edit mode
Next delete the lines, leaving only the textured face visible (If you want to, you can leave them since this is only a simple object and shouldn't need adjusting later)
Go back to normal editing mode ![]() and select the textured face. Now select EDIT/COPY then goto EDIT/SELECT
ALL then BUILD/JOIN SOLIDS
You are now back to a single mesh.
and select the textured face. Now select EDIT/COPY then goto EDIT/SELECT
ALL then BUILD/JOIN SOLIDS
You are now back to a single mesh.
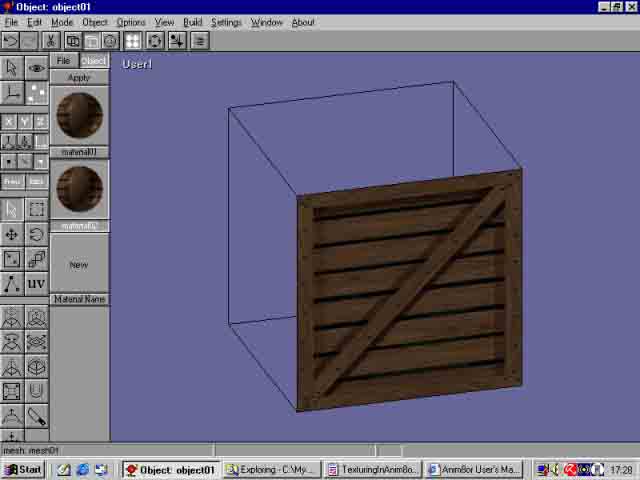
With the mesh selected, goto EDIT/ROTATE/ROTATE Y 90
Now goto EDIT/PASTE and our face will appear from nowhere! Copy it again then goto EDIT/SELECT ALL then BUILD/JOIN SOLIDS Repeat this process until all the sides are textured.
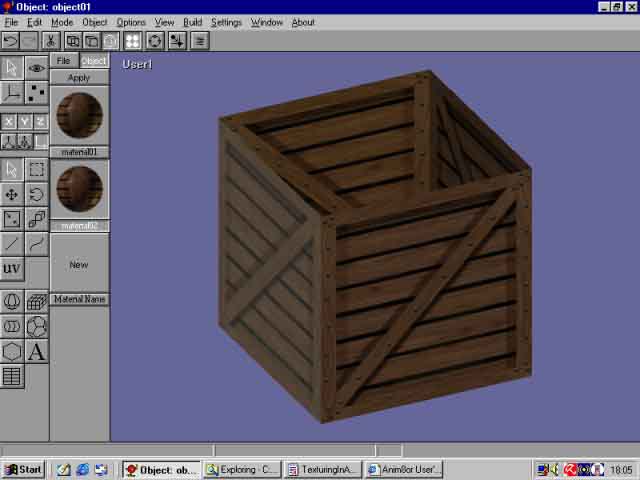
NOTE: Make sure you have a copy of the textured face after doing this as we haven't finished with it just yet. We need it for the top and bottom of the crate.
Now we need to do the top and bottom faces. You should still have a copy of the textured face. Select the crate, then goto EDIT/ROTATE/ROTATE X 90 and paste in the textured face.
As before, copy the face again, then select EDIT/SELECT ALL then BUILD/JOIN SOLIDS
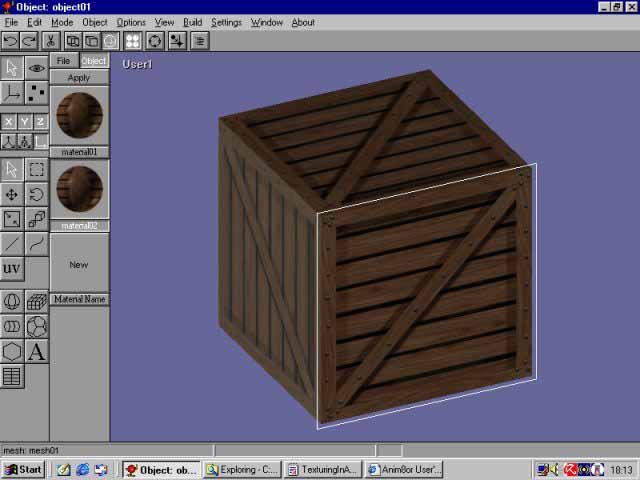
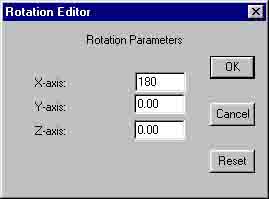
All we need to do now is the final side of the crate. Goto EDIT/ROTATE/ROTATE CUSTOM and enter "180" in the "X" axis field and click "OK"
Now paste in the textured face then goto EDIT/SELECT ALL then BUILD/JOIN SOLIDS
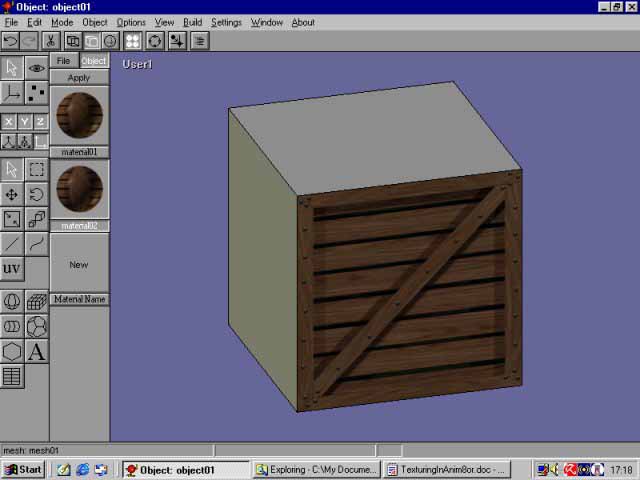
Once you've done that, correctly rotate the crate then change the top texture for the other one.

CONGRATULATIONS! You've just made a crate! If you want to make a smaller 4x4x4 crate, then select it and select EDIT/SCALE/SCALE BY 0.5